
 OFFER
OFFER


Why are my emails going to spam? Reasons and fixes (2026)
With over 130+ pre-built integrations and flexible APIs, you can easily centralize data from across your tech stack
Make the most out of your data and unlock powerful growth marketing possibilities with these other top marketing tools.
Build any custom integration with our open, flexible APIs that are simple to use and implement.
Check out apps that have been stealing all the spotlight.
Email and SMS marketing insights, ecommerce resources, and the latest Omnisend news
Expert-led sessions covering email, SMS, and ecommerce marketing strategies.
Educational video and live training to help you make the most out of Omnisend.
Drive sales on autopilot with ecommerce-focused features
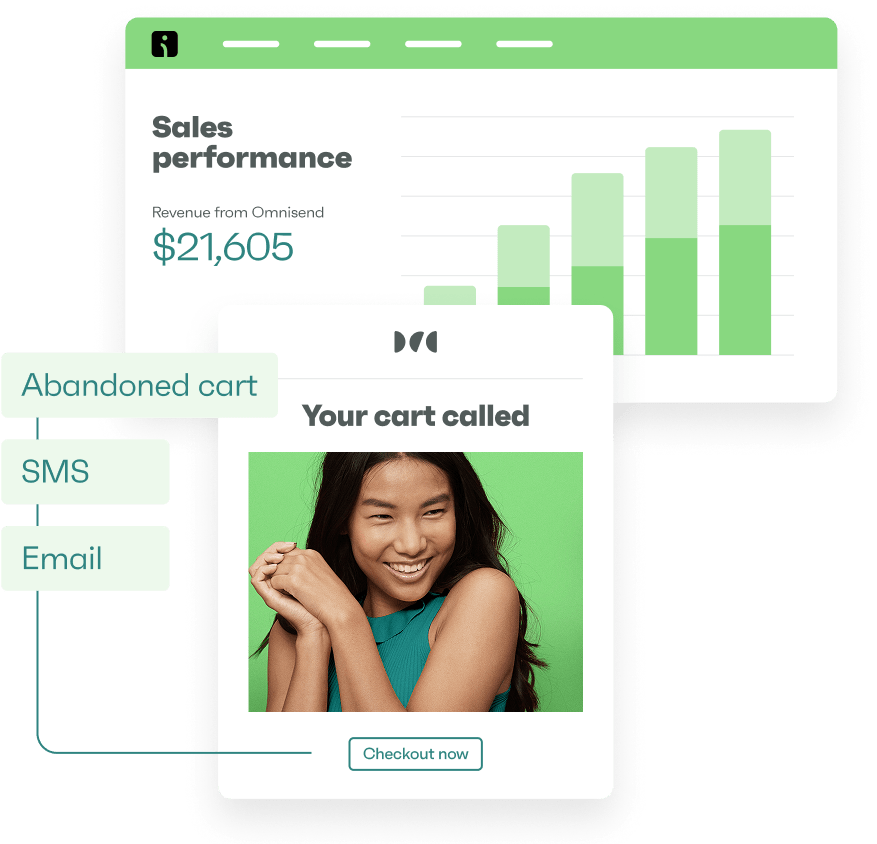
See FeaturesLanding on an email blacklist can drastically reduce your email deliverability, impacting abandoned cart recovery and overall revenue.
Regularly checking your blacklist status using tools like MXToolbox can help you identify and address issues before they escalate.
Maintaining good email list hygiene and implementing proper authentication measures (SPF, DKIM, DMARC) are essential to prevent getting blacklisted.
If you find yourself blacklisted, promptly address the root cause and follow the delisting process to restore your sender reputation.
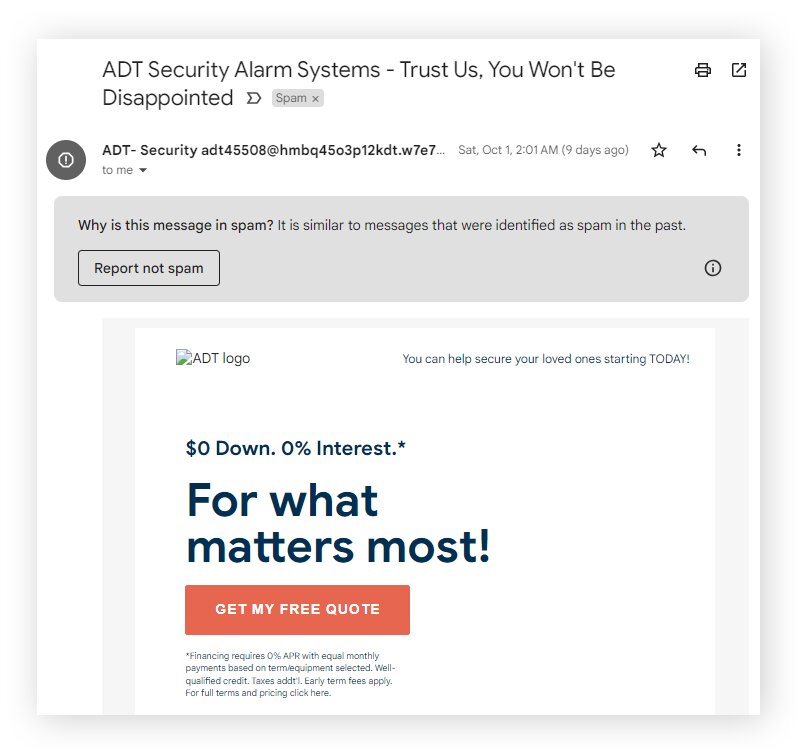
Landing on an email blacklist feels like your ecommerce business just went invisible overnight. For example, your email open rate hovers around the 30% industry standard, then suddenly plummets to a measly 4%.
If this sounds familiar, you might be dealing with an email blacklist. It quietly blocks your messages before they ever reach your customers’ inboxes. Abandoned cart recovery emails stop converting, customer retention drops, and revenue takes a hit.
To avoid this, you should run an email blacklist check. This allows you to make adjustments to protect future campaigns.
In this guide, you’ll learn what an email blacklist is and how to check your status using free tools. You’ll also discover how to clear your domain or IP address and prevent it from happening again.
Quick sign up | No credit card required
Let’s start with a simple answer. An email blacklist is simply a record that contains IP addresses or domains flagged by spam filters. Servers then use these lists to identify addresses to block.
The entire point of an email blacklist is to protect users from unwanted messages sent from untrustworthy sources. A Kaspersky report shows that 44.99% of all emails sent worldwide in 2025 were classified as spam. What’s more, 24% of users never check their spam folders.
Sometimes messages sent from the address in question are directed to a spam folder. Other times, they’re blocked completely.
When your domain or IP ends up on an email blacklist, it becomes difficult to reach your subscribers.
For ecommerce businesses, the impact is more significant. Your abandoned cart emails, product updates, and promotional offers never land in your customers’ inboxes.
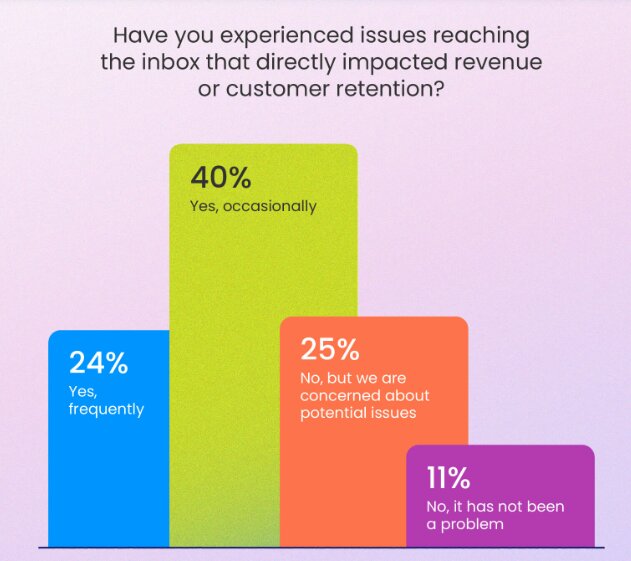
This directly affects your revenue, weakens customer relationships, and reduces retention. In fact, a Kickbox report shows only 11% of companies state that they don’t experience these issues.
Additionally, modern blacklisting isn’t just about sending too many emails. Email providers now check things like:
The good news is that email platforms like Omnisend now include deliverability monitoring features. These deliverability tools help you spot and fix problems before your messages land on an email blacklist.
If you’re asking, “Is my email blacklisted?”, you’re not alone. Many senders only notice a problem when deliverability, open, and engagement rates drop.
To know your status, run a quick email blacklist check. Take note of these three main types of email blacklists:
1. Enterprise spam firewalls are normally used by corporate IT departments. Examples include McAfee and Barracuda.
2. Private blacklists are maintained and circulated by ISPs. Gmail, for example, has its own internal blacklists it uses to monitor and filter emails.
3. Public blacklists are open for anyone to check, at no cost. They’re your best starting point for a blacklist email check.
This is one of the easiest ways to run an email blacklist check. MXToolbox checks your IP address against more than 100 publicly available blacklists.
Here’s how to check email blacklists using this tool:
1. Open the MXToolbox email blacklist checker
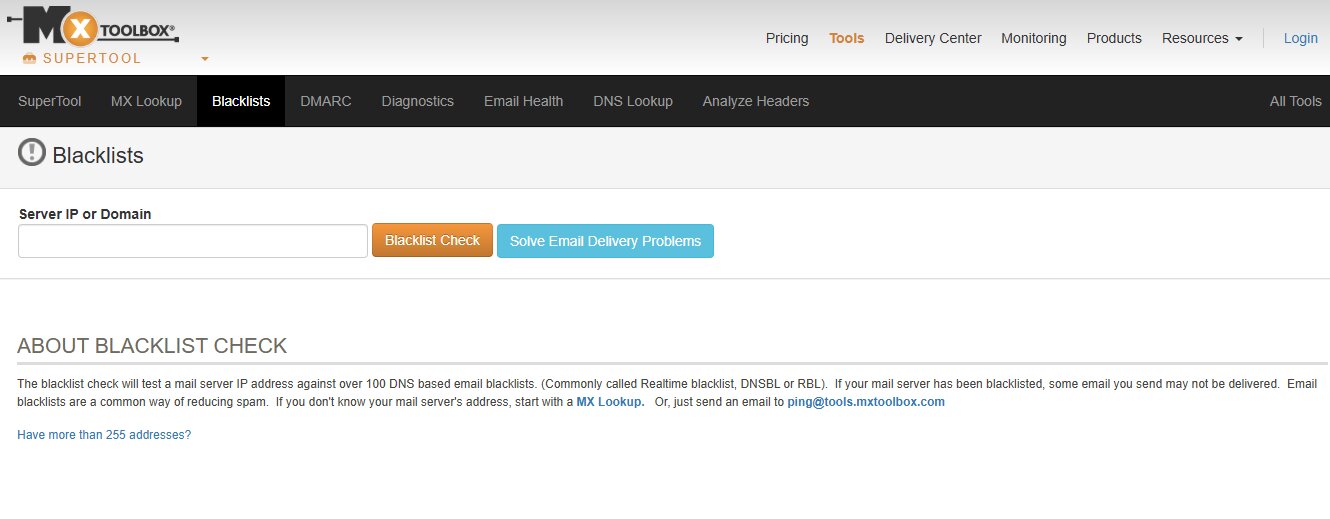
2. Enter your domain name (like yourstore.com) or sending IP address
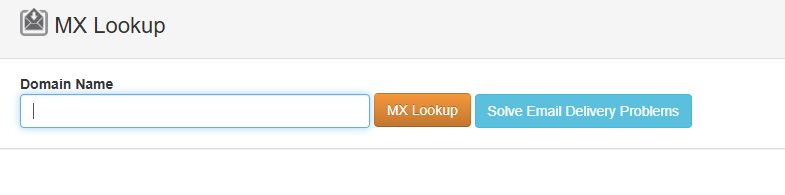
3. Click the Blacklist Check button
4. Read your results
If you see OK next to a green checkmark, it means you’re not blacklisted.
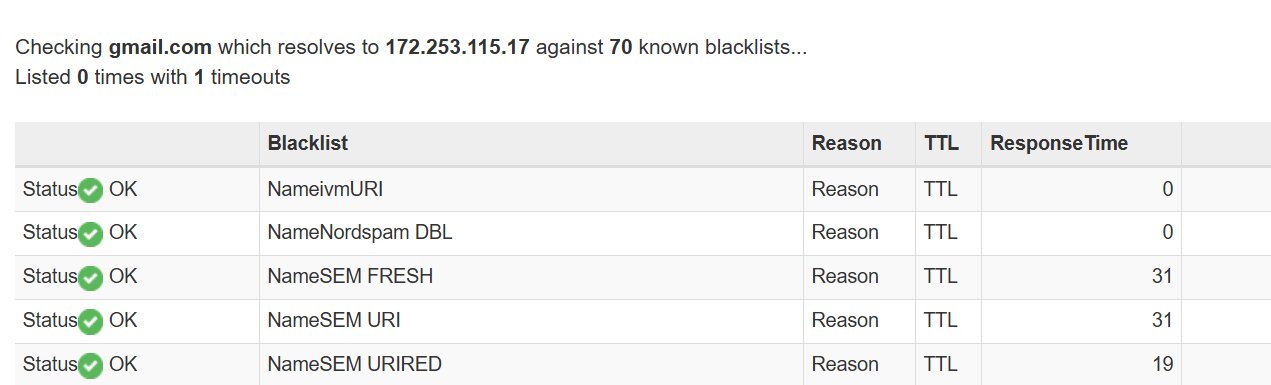
However, if you see LISTED alongside a red mark, your IP or domain appears on a blacklist. Click the Details button to see the exact reason.

Other top email blacklist tools you can use include:
These free tools help you check your email blacklist status quickly. However, they can’t prevent you from landing in one. To receive alerts before you’re added to a blacklist, use Omnisend’s built-in email deliverability monitoring.
When running an email blacklist check, you should know exactly what’s being blocked.
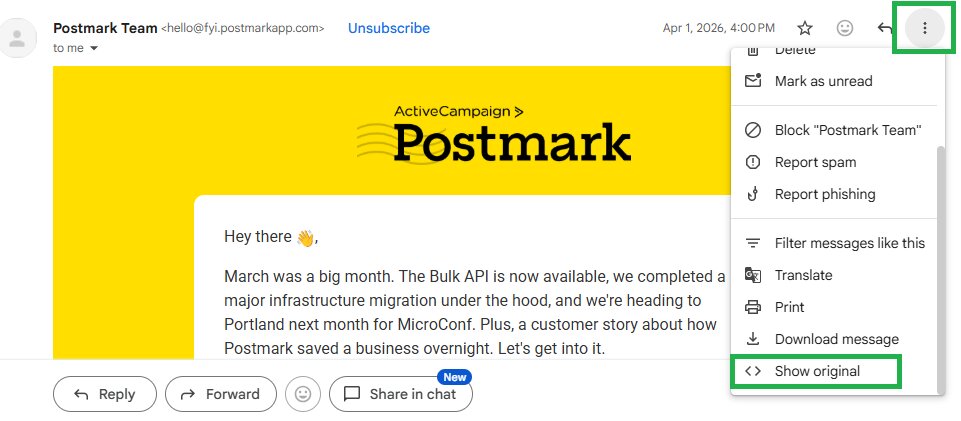
1. IP address check
This checks the server that sends your emails.
To find your IP:
2. Domain check
This checks your website domain, such as yourbrand.com. Here’s how to check if your domain is on an email blacklist:
3. Email address check
While less common, some tools let you check specific sender addresses.
| Type of check | What it monitors | Best tool to use |
|---|---|---|
| IP address | Sending server's reputation | DNSBL |
| Domain | Your brand's reputation | Spamhaus |
| Email address | Sender email address | MX Toolbox |
Don’t wait until your marketing campaigns fail before you start wondering: Is my email on a blacklist? Run regular checks to spot and fix issues before they get more serious.
Here’s a cadence you can follow:
The answer is simple: ISPs reserve the right to blacklist any IP address they want, for whatever reason. They are not obliged to hear your deliverability concerns or clean up your non-compliance issues.
There are, however, common things that can harm you as a sender and tag you as a blacklisted email sender:
Omnisend automatically verifies your list and removes risky addresses before you send any emails. This helps you stay off any email blacklist and keep your ecommerce marketing campaigns flowing smoothly.
Being on an email blacklist can result in a chain of problems. Sender reputation drops, emails stop reaching inboxes, campaigns lose impact, and revenue takes a hit.
Imagine that you have no clue that your IP address was flagged as a blacklist email. So, you go about your regular email marketing activities and launch a campaign. We’ll say it’s a sales promotion and John is on the contact list. The email goes to his internet service provider (ISP), which checks your IP address against whatever email blacklists his ISP uses.
Bingo, there’s a match. Your email is discarded. John either never gets news of your sales promotion or, if he does, it’s delivered to the spam folder that he rarely checks.
This blockage clearly has a harmful effect on email deliverability. Being identified as a blacklisted email sender can wreak havoc on your email marketing efforts.
Here’s what to expect:
But really, how worried should you be? According to Omnisend Deliverability Manager Serhii Chernenko, it depends on what blacklist you’re on.
“Some are more influential, respected, and impactful, like Spamhaus, Cloudmark, and Barracuda. You should be pretty worried if those have you listed, as impact would be significant,” Chernenko says. “Some RBLs will have way less impact on your deliverability or even zero impact, so it is important to monitor the biggest RBLs.”
— Serhii Chernenko Deliverability Manager at Omnisend
And it’s absolutely essential that you regularly keep an eye on your email campaign stats, such as click rates. Persistently check the domain opens for any sharp drop-offs as well.
If you get blacklisted, don’t expect a quick solution. While some IP blocks can be cleared in 24 to 48 hours after fixing the root cause, it takes longer to restore your reputation. A damaged domain reputation can take up to six to 12 weeks to fully recover.
Omnisend tracks your deliverability metrics and alerts you before you end up on an email blacklist.
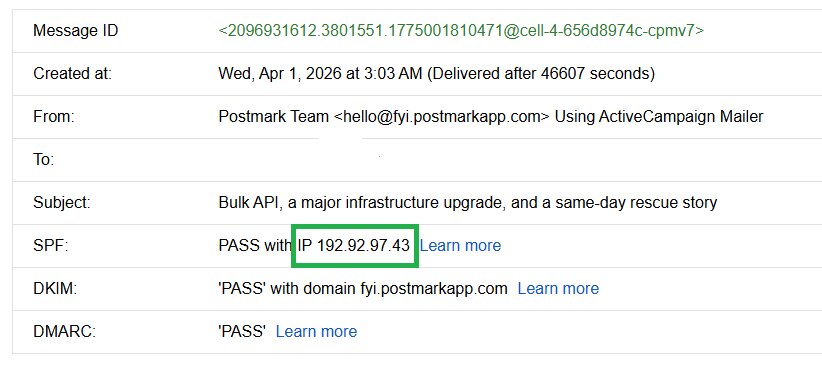
Every email you send carries a unique string of numbers called an IP address. Think of it like a return address on a physically mailed letter. It tells receiving servers where your email came from.
You can trace the location of the email sender by referencing the IP address.

When your email reaches an inbox provider, it checks the IP address against an email blacklist. Officially, blacklists are known as Real-time Blackhole Lists (RBL) or Domain Name System Blacklists (DNSBLs or DNS blacklists). They store lists of IP addresses and domains that have shown risky sending behavior.
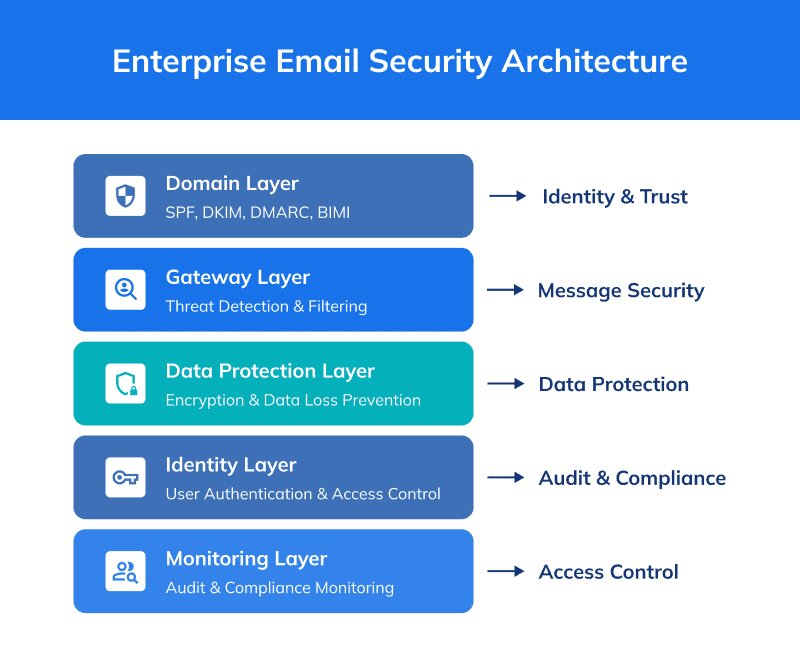
Email providers also verify your identity using SPF (Sender Policy Framework), DKIM (DomainKeys Identified Mail), and DMARC (Domain-based Message Authentication). These security checks prove that you’re a trusted sender. However, if they’re missing or set up incorrectly, email blacklists are much more likely to flag you.
Omnisend automatically handles technical setup like SPF, DKIM, and DMARC, so you don’t have to.
If you find your IP address or domain on an email blacklist, don’t panic. Every major blacklisting company provides a way to appeal your status and have your email delisted. The exact removal procedures vary by provider, but most follow a similar approach.
Here’s how to get off email blacklists and get your ecommerce campaigns back on track:
![Email blacklist: A web form page titled Removing [redacted] from CSS with sections for name, email, confirmation email, and a message. Steps include explanation, verification, and conclusion. A note instructs users to verify their email address.](https://www.omnisend.com/blog/wp-content/uploads/2026/04/13.-Spamhaus-Delisting-Form.jpg)
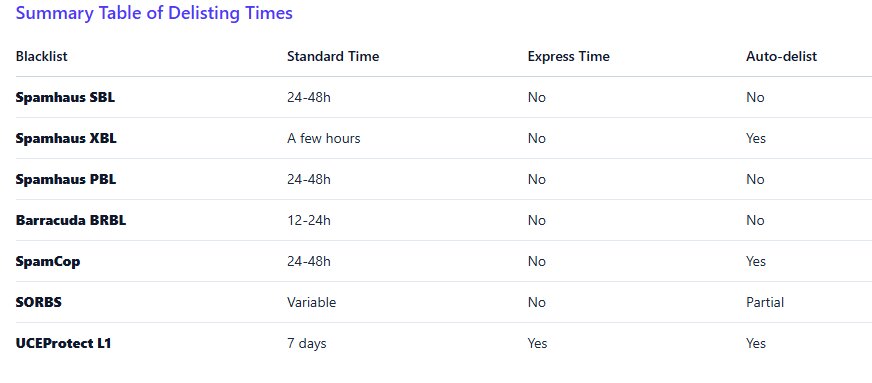
Delisting doesn’t always happen instantly. It depends on the type of email blacklist that flags your IP or domain.
Here are the average timelines:
In many cases, first-time email unblacklist requests succeed if you show clear fixes. However, if the issue persists, removal may take longer.
As you wait for delisting, use that time to strengthen your email setup and reputation to avoid email blacklists.
Here’s what to do:
If your current provider isn’t helping, you can switch to a more reputable platform. Omnisend has strong relationships with blacklist providers and can help you expedite the removal process. It also provides sender reputation warming strategies to help you re-enter the inbox safely.
Who wants to deal with petitioning for removal from an email blacklist? Our best advice is to be proactive, so you never have to deal with an email spam list. Adhere to the following best practices to stay on the right track.
Email lists that contain bad addresses are the predominant culprit for getting sent to an email blacklist.
“The very first and most important rule for any email marketer is don’t ever buy an email list.” “When buying a list, you don’t know whether or not the email addresses were collected properly.”
— Serhii Chernenko Deliverability Manager at Omnisend

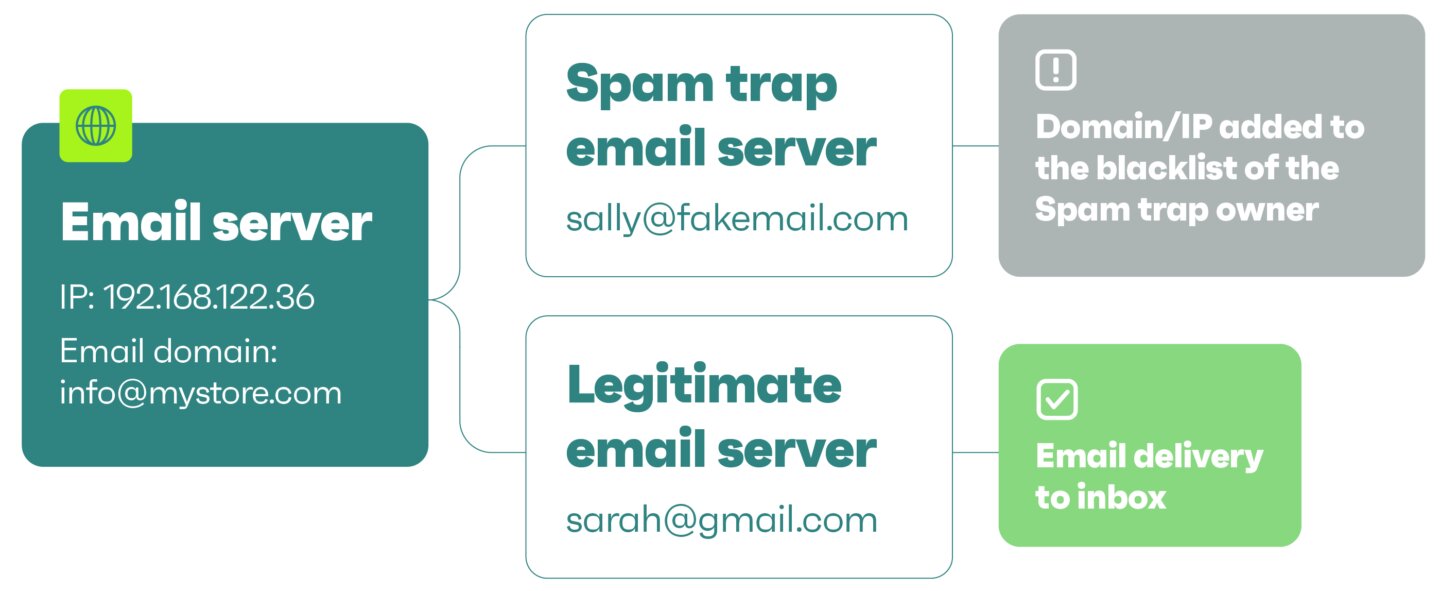
Worst case, some addresses are spam traps. As mentioned before, they appear real but don’t belong to a real person. Their only purpose is to identify spammers and senders not utilizing proper list hygiene and to add them to email blacklists.
Instead, grow your list organically. Collect emails with popups and landing pages on your ecommerce website. Omnisend’s intuitive form builder provides email validation features that help you collect verified addresses from the start.
A double opt-in is a two-step email verification process. Step one—the user signs up for the mailing list on the website. In the next step, an email is sent to the user with a link to confirm their email subscription.
Double opt-in practices are good for avoiding email fraud, as they ensure that email subscribers are real people genuinely interested in receiving your marketing emails.
By enabling them, you also avoid spam complaints (and the email spam list), since customers won’t discover they are on a mailing list they did not request to join. Double opt-ins are an email marketing best practice and one of the surest ways to avoid the junk folder.
Omnisend offers a built-in double opt-in capability that automatically handles the email confirmation process for you.
Collecting emails the right way is one thing. But it doesn’t take care of accumulated bad addresses. So, make list hygiene part of your routine, at least once quarterly.
Omnisend automatically segments your audience, flags invalid addresses, and tracks key metrics, so your list stays healthy without manual work.
It’s crucial to check that your server is clean of any malware or bots. These harmful programs hijack your email domain or IP address to send bogus emails, so you can end up on an email blacklist even if you’ve done nothing wrong.
To enhance security, follow these steps:
Platforms like Omnisend help reduce server security risks without technical complexities. It handles security monitoring, authentication, and protection on your behalf.
Unfortunately, nearly every ecommerce brand will end up on an email blacklist at some point. However, the situation isn’t permanent and doesn’t have to stop your progress.
You’ve seen what blacklists are, how to check your status, fix issues, and even get delisted. More importantly, you know how to avoid being blacklisted in the first place.
Your email deliverability depends on trust. When you protect your sender reputation, emails reach the inbox more often. The key is proactively monitoring your metrics, cleaning your email list, and fixing problems early. Also, don’t forget to warm up your email domain when you restart campaigns.
If you’ve run into problems with your ESP and you’re ready for a clean slate, start Omnisend for free. It provides deliverability and list management tools to help you avoid ending up on email blacklists. Plus, you can enjoy its award-winning 24/7 support.
Quick sign up | No credit card required
An email blacklist is a database of IP addresses or domains flagged for sending suspicious emails and other reasons. If you’re on it, your emails may go to spam or get blocked entirely.
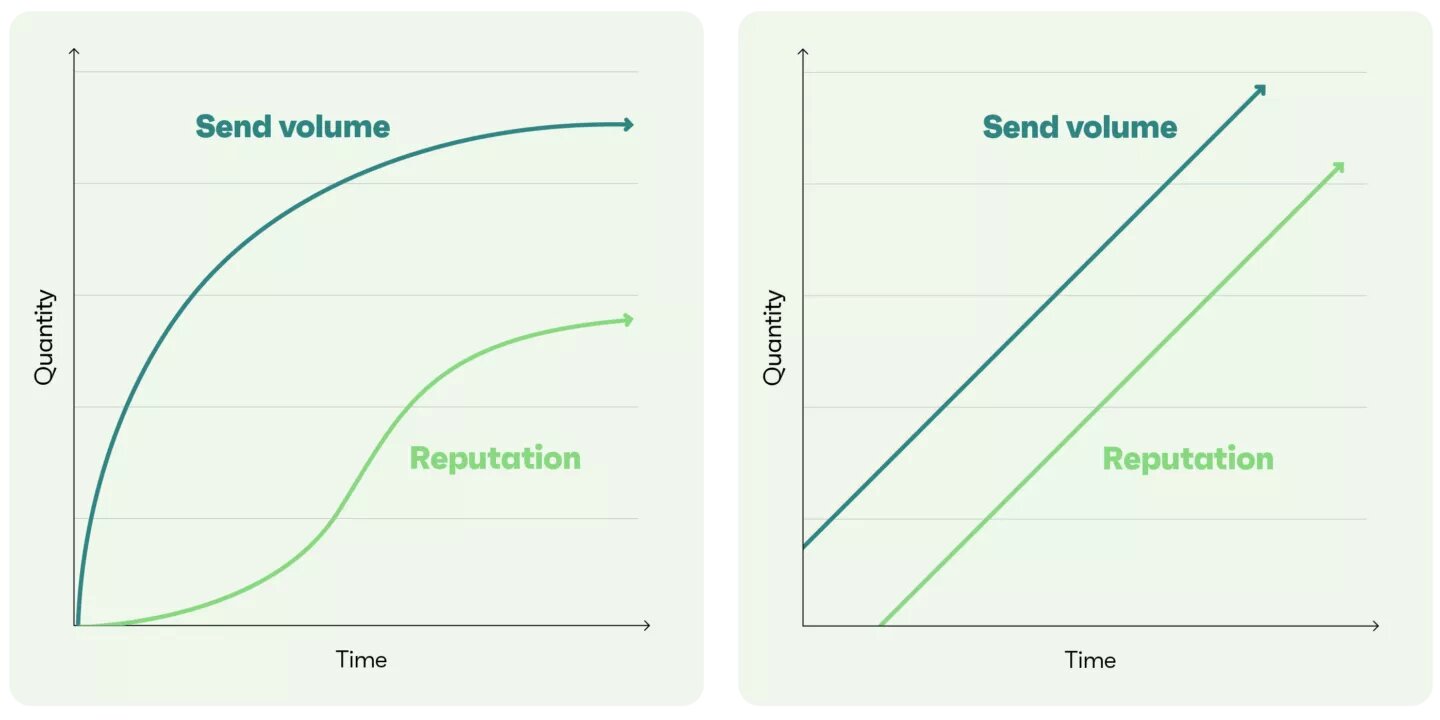
Your email can be blacklisted if you send emails to spam traps or inactive addresses, trigger spam complaints, or increase your email volume suddenly. Spammy content and a hacked account also increase your risk.
To delist your email, first find which blacklist you’re on using a checker tool and fix the root issue. Then, submit a removal request and monitor your status until you’re cleared.
Blacklisted emails aren’t always blocked completely. Sometimes, your emails land in the spam folder instead of the inbox. Either way, fewer subscribers see your messages, and your email deliverability drops significantly.
TABLE OF CONTENTS
TABLE OF CONTENTS
What’s next


No fluff, no spam, no corporate filler. Just a friendly letter, twice a month.