
 OFFER
OFFER


Drive sales on autopilot with ecommerce-focused features
See FeaturesIf you’re thinking of switching from WooCommerce to Shopify, you should expect a whole set of new features and opportunities to come with it. Shopify can help you streamline your operations and elevate your online store’s performance and user experience — and Shopify makes this migration straightforward.
We’ll walk you through how to migrate from WooCommerce to Shopify in nine easy steps. This guide will provide every detail — from exporting your data to setting up your Shopify store. In the end, you’ll have all the insights you need to migrate with confidence and set your business up for success.
We’ll cover these steps:
- Prepare for the migration
- Export data from WooCommerce
- Import data into Shopify
- Recreate your store design on Shopify
- Configure store settings
- Handle SEO and redirects
- Test your Shopify store
- Launch your Shopify store
- Post-migration tasks
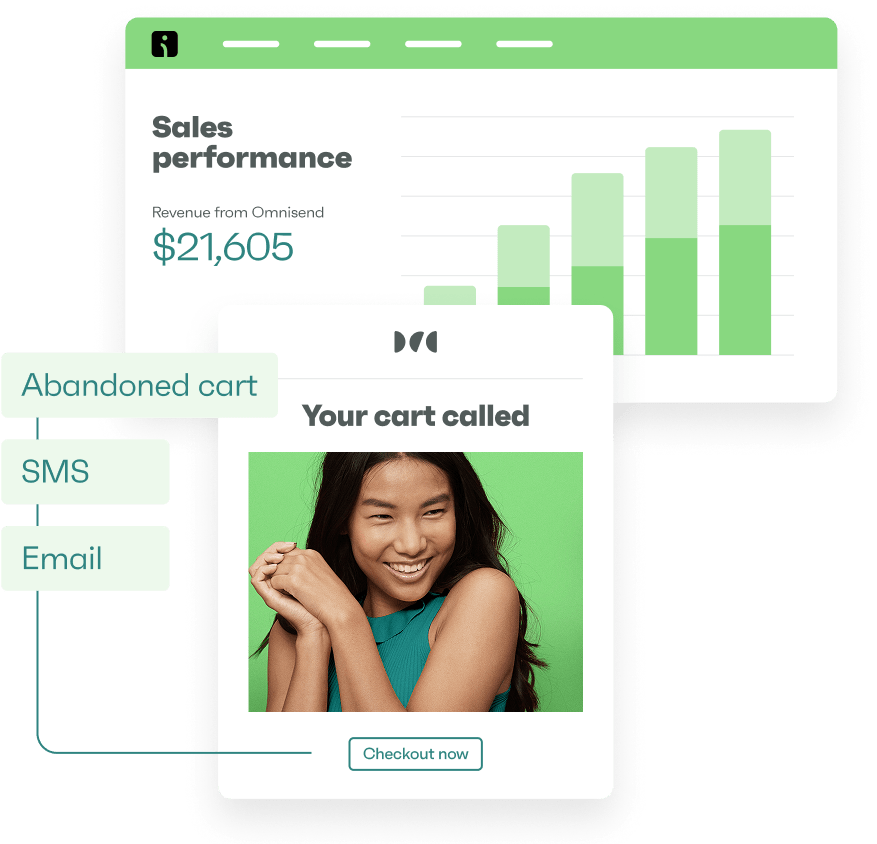
Get started with Omnisend for email and SMS automation to boost Shopify sales
Quick sign up | No credit card required
Why migrate from WooCommerce to Shopify?
Before migrating WooCommerce to Shopify, you should understand that both of these platforms have unique features. You must also know how these platforms differ so you can see what you’re trading for when you migrate from WooCommerce to Shopify.
Here’s a detailed comparison of both platforms and how they differ in terms of ease of use, hosting, and scalability:
- Ease of use: Shopify is known for its user-friendly interface and guided Shopify setup process. This makes it easy for anyone, even beginners, to set up. WooCommerce, on the other hand, is flexible but requires more technical expertise to set up and manage.
- Hosting requirements: Shopify operates as a software-as-a-service, handling hosting and site performance so you can focus on running your store. Meanwhile, WooCommerce offers self-hosting. This means you must sort out web hosting, server security, and backups on your own. Otherwise, you can employ a web hosting provider.
- Scalability and extensions: Shopify has an app store with extensions for marketing, inventory, and customer service. With this, you can have a streamlined space for business growth. On the other hand, while WooCommerce provides comprehensive features, it relies on third-party plugins that may require manual updates and compatibility checks.
- Performance and reliability: Shopify’s infrastructure is designed for optimal performance. It offers faster loading times and minimal downtimes — even when your store’s traffic increases. WooCommerce can also face performance challenges, especially during traffic surges, as hosting and speed depend on your server setup.
Step-by-step guide: How to migrate WooCommerce to Shopify
Migrating from WooCommerce to Shopify doesn’t have to be overwhelming. With the right approach, you can transition smoothly and optimize your store.
This step-by-step guide will help you understand each phase of the migration process, from preparing your store data to launching your new Shopify store.
Now, let’s walk through how to switch from WooCommerce to Shopify in detail:
Step 1: Prepare for the migration
Preparing your WooCommerce store for migration is a crucial step to ensure a smooth transition to Shopify. Follow these steps to set the stage for WooCommerce migration to Shopify:
1. Evaluate your data
- Pick out the store elements that you want to transfer. These include products, customer data, orders, and any content critical to your business.
- Identify specific WooCommerce plugins, features, or customizations that aren’t compatible with Shopify. Find their alternatives on the Shopify app store for a smooth transition.
2. Backup your WooCommerce store
Use reliable plugins like UpdraftPlus or Duplicator to save your WooCommerce Store data. This way, you can restore the data if anything goes wrong during the migration process.
3. Create a Shopify account
- Visit Shopify.com to create your account
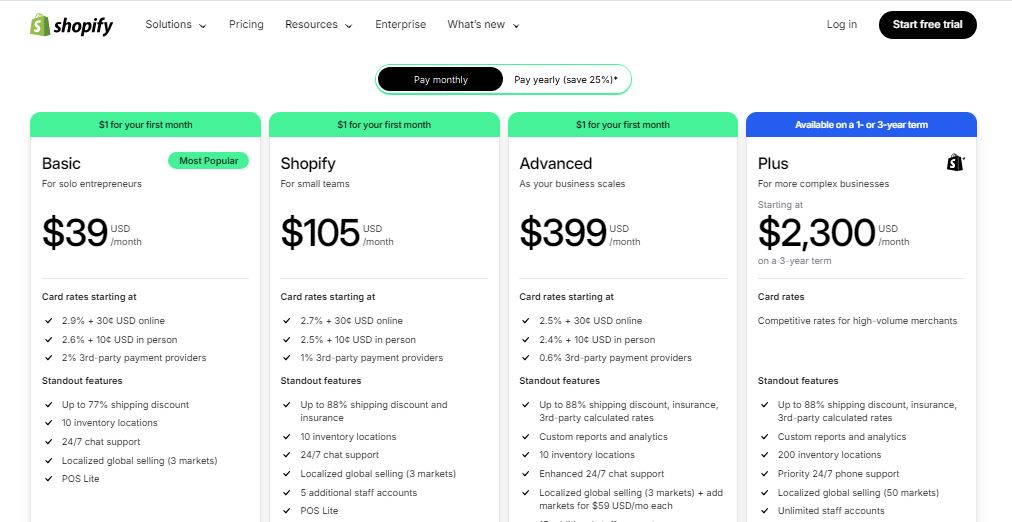
- Select a plan that fits your business needs or use Shopify’s three-day trial to explore its features before committing
- Choose from one of Shopify’s free and paid themes that align with your brand and enhance the shopping experience
4. Choose a migration method
- Manual migration: Suitable for smaller stores with limited data, this involves exporting and importing files manually
- Automated migration platforms: Use platforms like LitExtension, Matrixify, or Cart2Cart for a more efficient data transfer process
- Professional services: For large stores, you can consider hiring a Shopify expert to handle the migration for you, ensuring all elements are transferred successfully
Step 2: Export data from WooCommerce
Now that your WooCommerce data is prepared, the next step is to extract it to ensure a smooth transfer to Shopify. Follow these steps to export the necessary information:
1. Export products
- In your WordPress dashboard, navigate to WooCommerce > Products > Export
- Choose the product details you want to transfer, such as product name, description, SKU, prices, stock levels, and images
- Click the Generate CSV button to download a file containing all your product data
2. Export customers and orders
- Go to Tools > Export on your WordPress dashboard
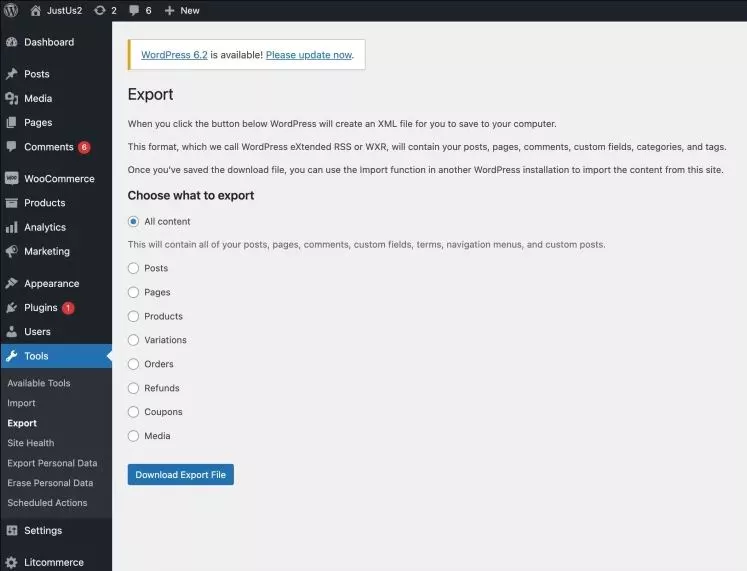
- Choose whether to export customers or orders and download the respective CSV files for each
- For further customization, consider using plugins like WooCommerce Customer/Order CSV Export to save your blog posts, pages, or other content that needs to be transferred to Shopify
3. Export additional content
- Use the WordPress built-in Export Tool under Tools > Export to save your blog posts, pages, and other content you want to move to Shopify
Step 3: Import data into Shopify
The next step is to import WooCommerce data to Shopify, ensuring that your store’s vital information is transferred efficiently. Here’s how to do it:
1. Import products
- Navigate to your Shopify admin and go to Products > Import
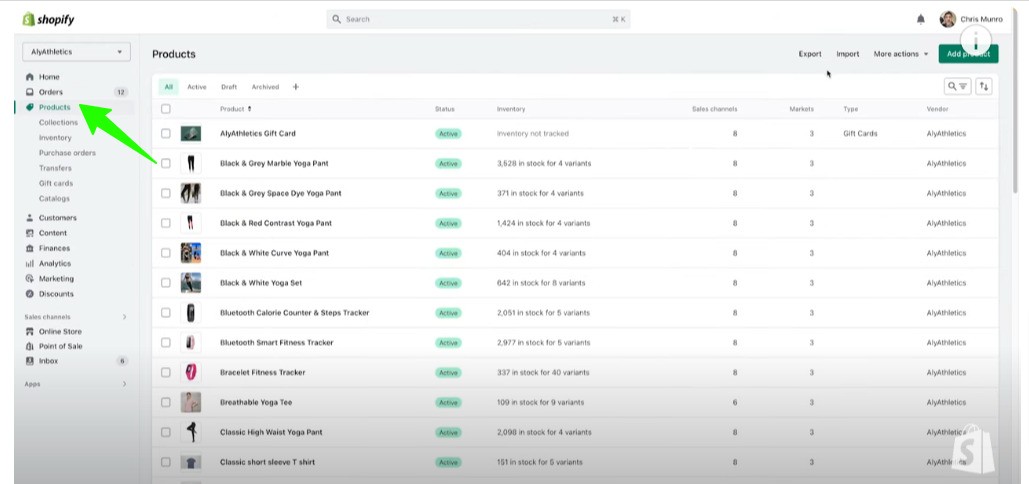
- Upload the product CSV file you exported from WooCommerce
- Review the data to ensure everything is correct. Then, click Upload and continue
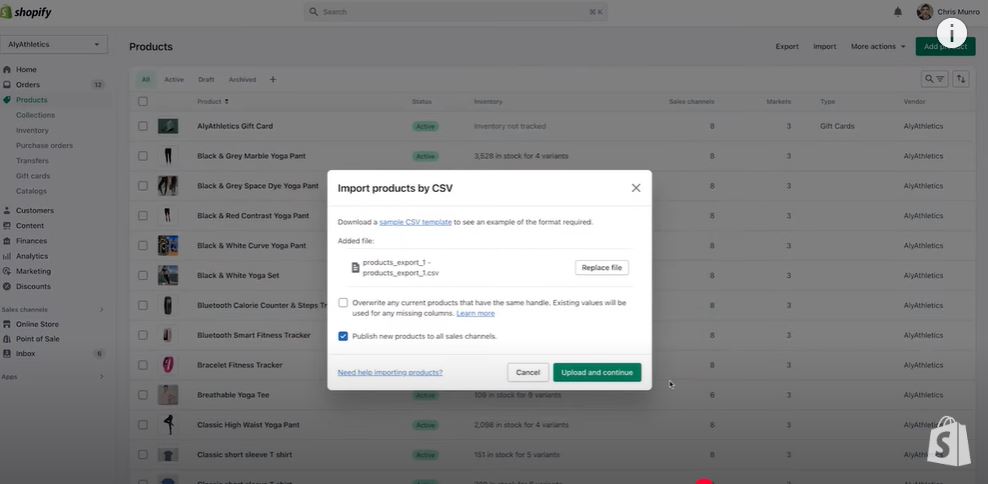
- Cross-check the product listings to ensure all images, descriptions, and SKUs appear accurately
2. Import customers and orders
- In Shopify, go to Customers > Import Customers
- Upload the CSV file from WooCommerce, and Shopify will automatically add the data to your store
3. Import additional content
- Shopify allows you to recreate your blogs and pages manually, but you can import them using a migration app
4. Test your imported data
- Review your Shopify store to ensure everything is displaying correctly
- Ensure your navigation menus, categories, and search functionality are well-organized and fully operational
Step 4: Recreate your store design on Shopify
WooCommerce themes aren’t compatible with Shopify, so setting up your Shopify store design is a necessary step. Here’s how to do it:
1. Choose a Shopify theme
- Explore the Shopify Theme Store to select from 100+ free and paid themes that are tailored to different industries, ensuring you find one that suits your business requirements
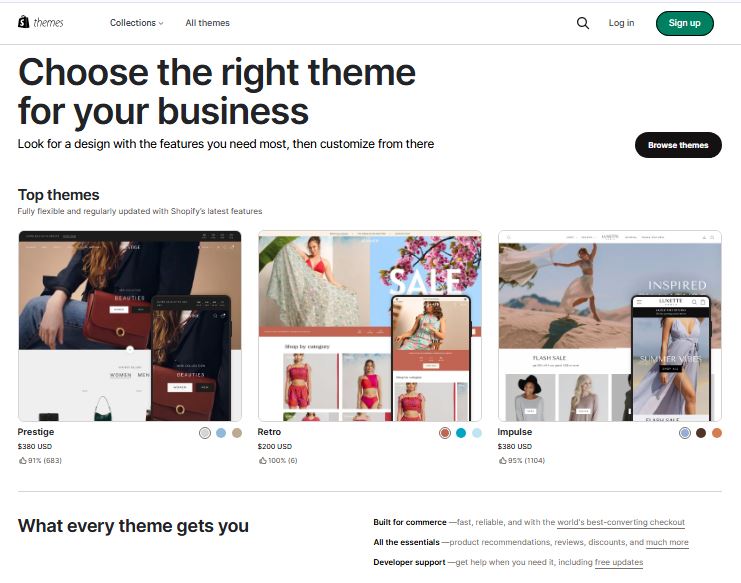
- Take advantage of Shopify’s preview feature to see how the theme looks with your content
- After choosing a theme, customize it to align with your brand’s style and appearance
2. Add branding elements
- Add your logo to the store’s header or homepage for instant brand recognition
- Fine-tune the color scheme and fonts to replicate the visuals of your previous store while taking advantage of Shopify’s modern design options
3. Customize page layouts
- With Shopify’s intuitive drag-and-drop editor, you can customize your key pages, including your homepage and product pages with banners, featured products, testimonials, and more
Step 5: Configure store settings
A migration from WooCommerce to Shopify isn’t just about transferring products. It’s also about recreating the entire shopping experience.
Customizing your store settings helps create a professional, reliable, and customer-friendly shopping experience. Here are the steps:
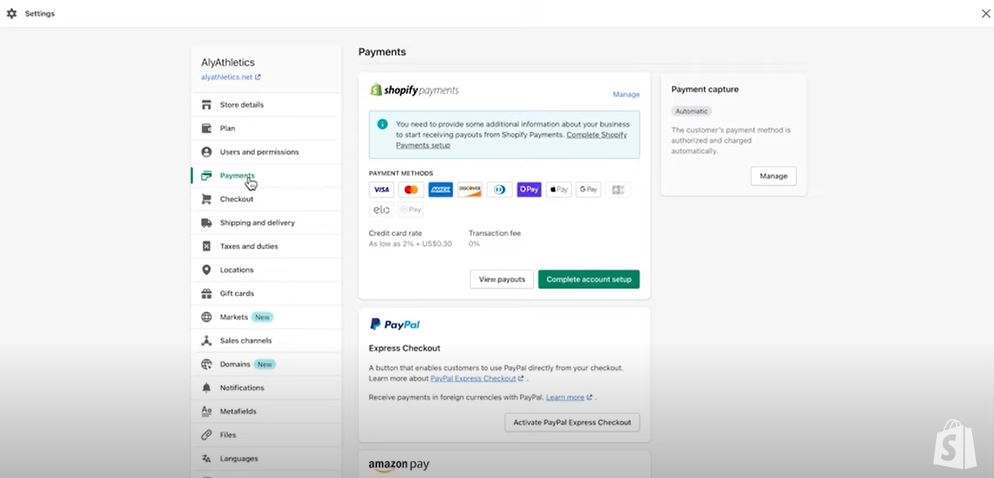
1. Set up payment gateways
- In your Shopify admin, go to Settings > Payments
- Select your preferred payment gateways, whether it’s Stripe, PayPal, or Shopify Payments
2. Configure shipping settings
- Navigate to Settings > Shipping and Delivery to set up shipping options that match your previous WooCommerce setup
3. Set up taxes
- Go to Settings > Taxes and Duties to set up automatic tax calculation
4. Test your checkout process
- Test your settings to ensure that everything is performing correctly and smoothly, from payments to taxes
Step 6: Handle SEO and redirects
Switching from WooCommerce to Shopify also involves preserving your search engine optimization rankings. Follow these steps to handle redirects and SEO to ensure minimal traffic losses:
1. Set up 301 redirects
- Redirect your old WooCommerce URLs to new Shopify URLs using Shopify’s URL redirects or via a third-party app if you’re managing large redirects
- Focus on product URLs, blog posts, and other high-traffic pages to maintain link equity and prevent broken links
2. Update your sitemap
- Go to Google Search Console and submit your new Shopify sitemap so search engines can index your online store
3. Verify metadata
- Confirm that your meta descriptions, product titles, and alt texts are optimized for the right keywords to preserve search engine rankings and click-through rates
Step 7: Test your Shopify store
Before going live, test your Shopify store thoroughly to identify and resolve any potential issues that can impact your store’s performance and user experience. Here’s what to do:
1. Check imported data
- Carefully review all imported products, customers, and orders to be sure they’re transferred correctly
- Look out for duplicate entries, missing images, and incorrect prices that may confuse customers or cause operational bottlenecks
2. Test functionalities
- Thoroughly verify critical store functionalities, such as the search bar, navigation menu structure and links, complete checkout process, and payment gateways and transaction processing
3. Check responsiveness
- Preview your store on various screen sizes, including desktops and mobile devices, to ensure the design fits perfectly
Step 8: Launch your Shopify store
If everything looks good after testing, you’re ready to go live and introduce your updated online store to the public. Here are the steps you must take:
1. Update your domain
- If you’re using a custom domain, carefully update the DNS settings to transfer it to Shopify
- Follow Shopify’s detailed instructions for domain transfers to ensure a seamless process
2. Announce your migration
- Use your communication channels, such as social media, email, and SMS, to inform your customers about your new store
- Talk about the improvements in the shopping experience and provide customer support information for customers with inquiries
Step 9: Post-migration tasks
Launching your Shopify store isn’t the end. You should improve and maintain your online presence. Continuous monitoring and store optimization are essential for long-term success.
1. Monitor store performance
- Use Shopify Analytics to track sales performance, website traffic, customer behavior, and engagement
- Regularly check for potential technical issues or performance delays so you can quickly resolve them as they arise
2. Install essential apps
- Visit the Shopify app store to find essential tools to enhance your store, such as email marketing, abandoned cart recovery, upselling, and live chat
3. Update marketing campaigns
- Modify your Google, Facebook, and Instagram ads and email marketing templates and links to match the new store’s URLs
Benefits of switching from WooCommerce to Shopify
Switching from WooCommerce to Shopify offers numerous advantages to streamline store management and support long-term growth. Fortunately, Shopify is an all-in-one platform with the necessary tools for a simplified ecommerce experience:
- Integrated tools: Shopify offers built-in payment gateways, reducing the need for third-party integrations. With 8,000+ apps, its extensive app store offers comprehensive solutions for marketing, ecommerce analytics, inventory management, and more.
- Reliable customer support: Shopify offers 24/7 customer support via email, phone, and live chat. The platform ensures you get direct access to customer support for quick issue resolution.
- Simplified store management: The Shopify central dashboard lets you manage inventory, track sales, and analyze performance in one place. This streamlined approach enhances efficiency, allowing you to dedicate more time to creating growth strategies and ensuring customer engagement.
- Better scalability: Shopify’s infrastructure is designed to support businesses of all sizes, from startups to large enterprises. As your business grows, you don’t need to worry about managing server upgrades or performance issues.
- Reduced maintenance: Shopify takes care of maintenance, from fixing security issues to updating plugins and themes. It features a SaaS model, ensuring that your store always runs on the latest version. This reduces the time and cost of hiring developers to troubleshoot compatibility issues.
- Business growth: Since Shopify handles the technical details of your online store, you’ll have more time to focus on growing your business. From expanding product lines to implementing new marketing strategies, you can dedicate your resources to scaling your operations.
Integrate Ominsend to Shopify
Integrating Omnisend with your Shopify store is a strategic way to elevate your marketing efforts. This is because Omnisend provides powerful tools for email and SMS marketing automation.
Here’s a step-by-step guide to making Omnisend an essential part of your migration from WooCommerce to Shopify:
1. Install Omnisend on your Shopify store
- Visit the Shopify App Store and search for Omnisend Email Marketing and SMS
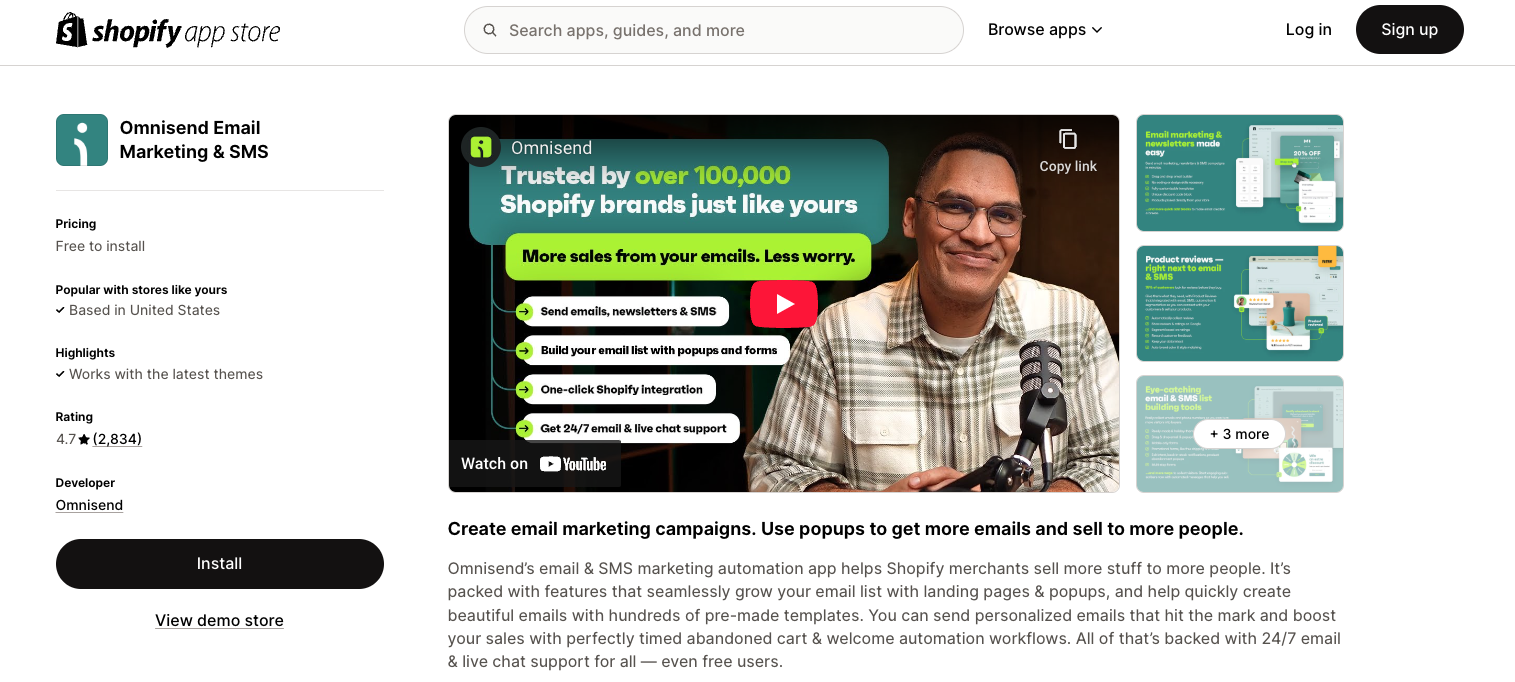
- Click Add App and follow the steps to install Omnisend on your Shopify store
- After installation, Omnisend automatically syncs your Shopify data, including products, orders, and customers
2. Sync your existing contacts
- Omnisend imports your existing data from Shopify, ensuring your contact list is updated
- Ensure compliance with marketing regulations by verifying that all contacts have given informed consent to receive marketing messages
3. Set up automation workflows
- Use Omnisend’s pre-built automated workflows, such as welcome emails and abandoned cart reminders, along with Shopify Plus advanced workflows
- Customize workflows to reflect your brand’s voice and strategy
4. Design and send campaigns
- Design stunning emails using Omnisend’s drag-and-drop email builder and professionally designed templates
- Divide your audience based on demographic data, purchase history, and browsing behavior to send highly targeted and relevant messages
5. Monitor performance
- Get detailed analytics from the Omnisend dashboard to track the success of your campaigns and automation workflows
- Use the insights to adjust your marketing strategies, improve engagement, and drive conversions
Conclusion
Migrating from WooCommerce to Shopify may seem like a daunting task. However, in reality, it’s a straightforward process that can be broken down into manageable steps. Just remember to prepare thoroughly, export your data from WooCommerce, and then import them to Shopify.
After that, you’ll design your Shopify store based on your brand’s style guide and configure the store settings. Lastly, you’ll have to optimize your store pages and categories and test to ensure that everything works well.
Use the right migration tools or hire a professional for a simpler migration. We also recommend integrating Omnisend with your Shopify store to automate your email and SMS marketing campaigns.
If you’re ready to convert from WooCommerce to Shopify, go ahead and explore Shopify’s features or start with a free trial to get a feel of the platform.
Get started with Omnisend to automate email marketing in your Shopify store
Quick sign up | No credit card required
FAQ
1. How long does migration take?
The amount of time it takes to migrate WooCommerce to Shopify depends on your online store’s size and complexity. Smaller stores may take a few hours to a day, while larger stores with extensive data could take several days. To speed up the process, leverage automated migration tools like LitExtension.
2. Will I lose SEO rankings during migration?
No, you won’t lose SEO rankings when switching from WooCommerce to Shopify. The platform allows you to set up 301 redirects and transfer meta tags, titles, and alt tags. Google may also take time to re-crawl your site, causing minor fluctuations. Consulting an expert can help you transfer WooCommerce to Shopify and still retain your store’s visibility.
3. Can I migrate my store without downtime?
Yes, you can migrate from WooCommerce to Shopify without downtime. To avoid interruptions, ensure your WooCommerce stays live until the migration is successful and your new Shopify store is fully set up. Perform the migration in stages and test all features.
4. What happens to WooCommerce after migration?
Your WooCommerce store remains intact after the migration process. So, you can keep it live as a backup during the transition or deactivate it once you’ve confirmed that your Shopify store is running smoothly. This serves as a safety net in case you need to reference your old store.
TABLE OF CONTENTS
TABLE OF CONTENTS

Subscribe and don’t miss any updates!
No fluff, no spam, no corporate filler. Just a friendly letter, twice a month.