
 OFFER
OFFER


WooCommerce SMS marketing guide for 2026
With over 130+ pre-built integrations and flexible APIs, you can easily centralize data from across your tech stack
Make the most out of your data and unlock powerful growth marketing possibilities with these other top marketing tools.
Build any custom integration with our open, flexible APIs that are simple to use and implement.
Check out apps that have been stealing all the spotlight.
Email and SMS marketing insights, ecommerce resources, and the latest Omnisend news
Expert-led sessions covering email, SMS, and ecommerce marketing strategies.
Educational video and live training to help you make the most out of Omnisend.
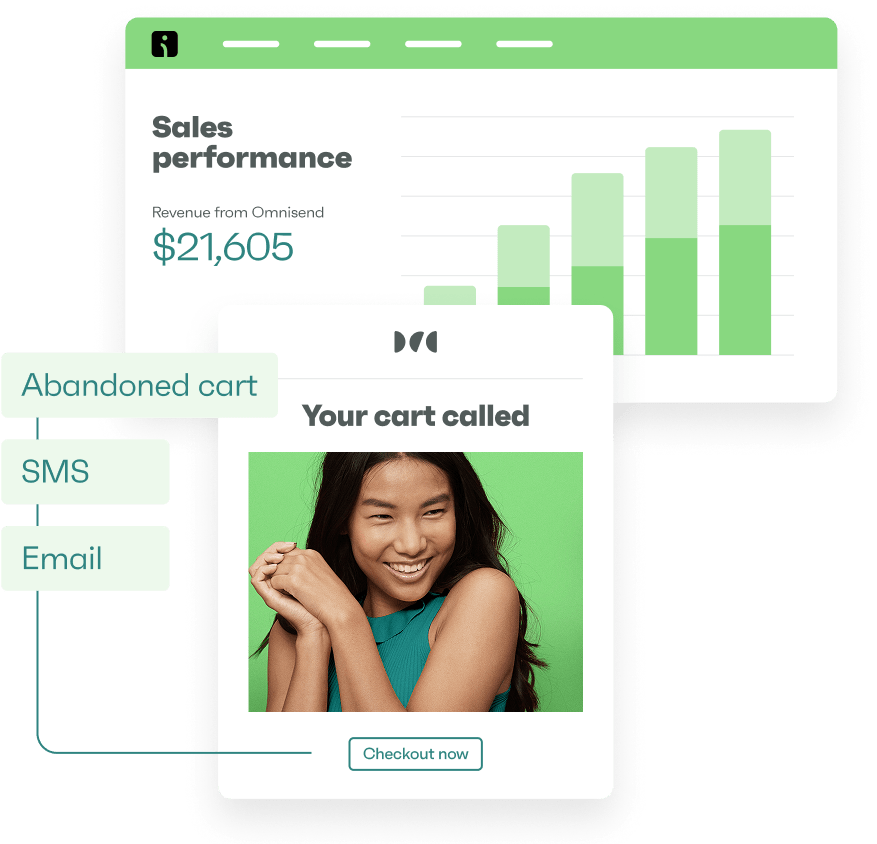
Drive sales on autopilot with ecommerce-focused features
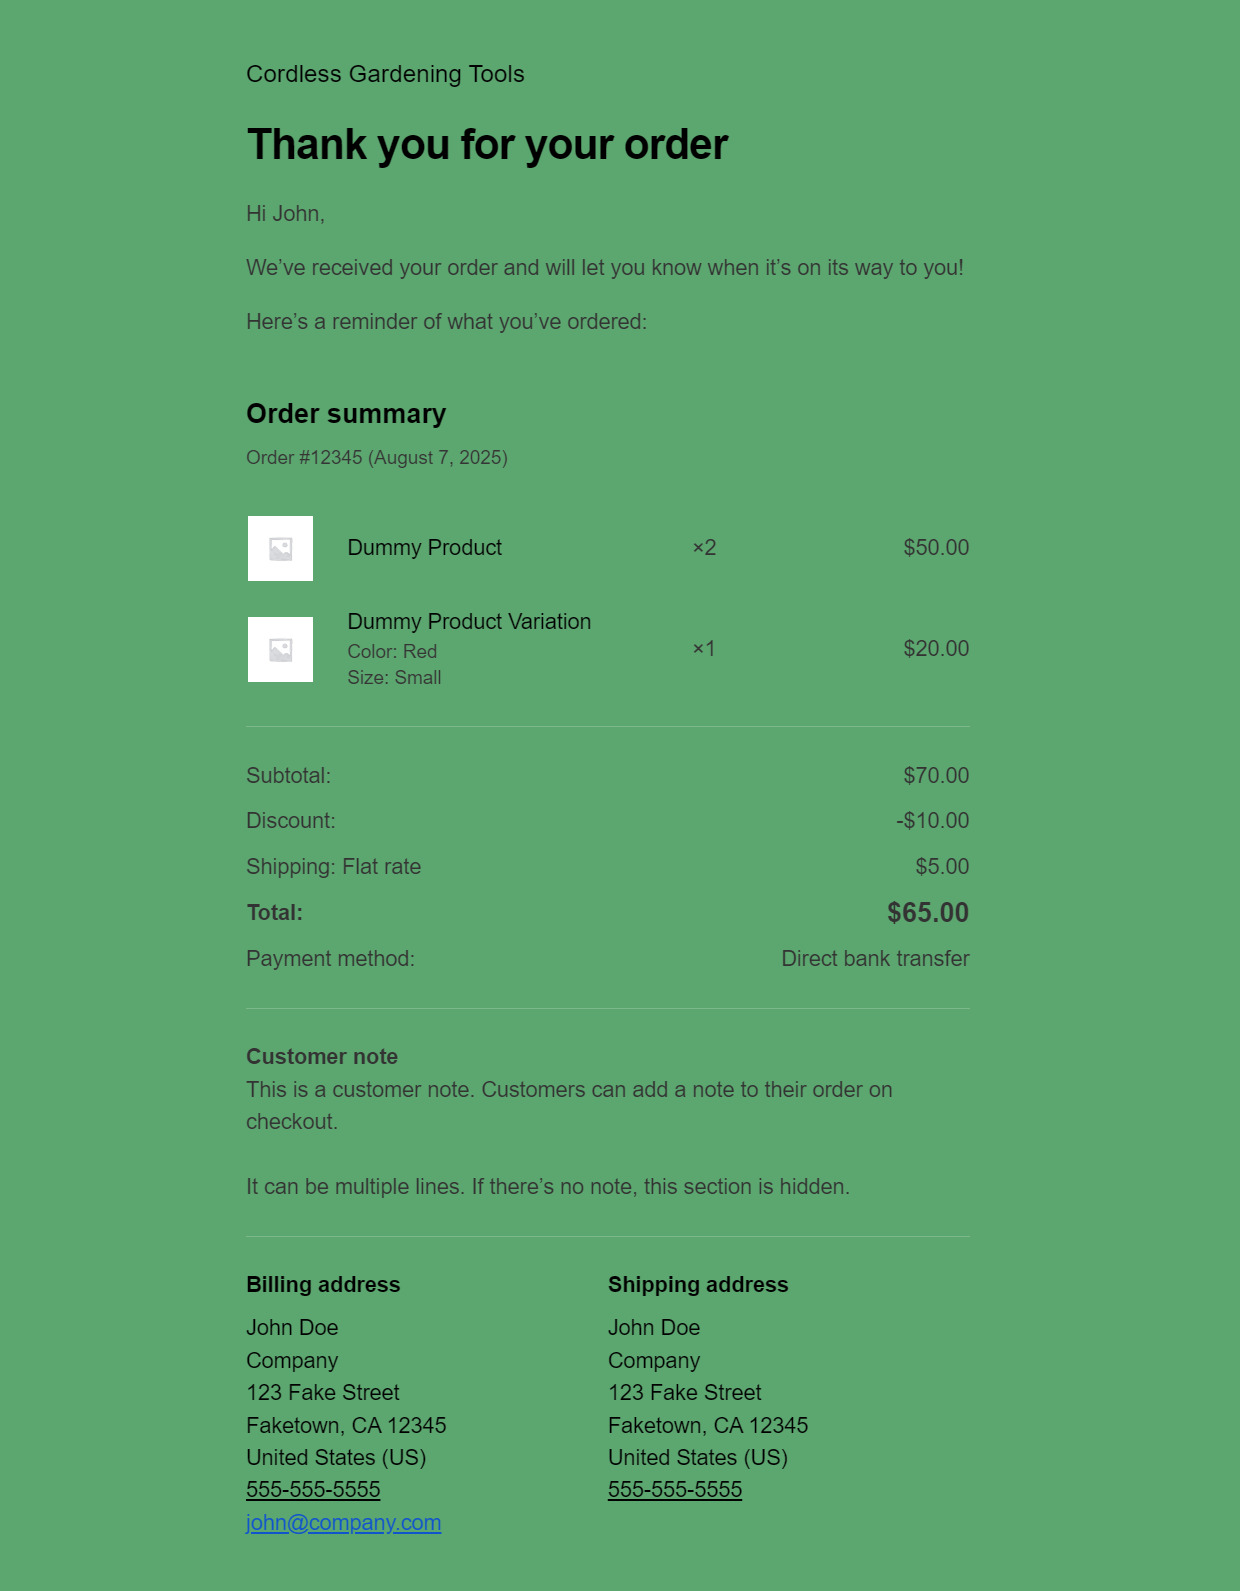
See FeaturesYour WooCommerce order confirmation email is automatically sent after every order. It confirms payment, shares order details, and builds trust from the first interaction.
Automated emails averaged a 38% open rate in 2025. This is crucial as confirmation emails are a type of transactional automated messages. Since they’re timely and expected, they’re almost always opened.
Every order confirmation email WooCommerce sends is a chance to ease post-purchase anxiety and nudge customers toward buying again.
WooCommerce includes basic email tools by default, but customization stays limited. Omnisend makes it easier to personalize emails, automate campaigns, and drive more repeat sales. We’ll learn how.
(Looking for the WooCommerce order confirmation page in the block editor? This guide focuses on the confirmation email, not the on-screen thank-you page.)
Quick sign up | No credit card required
Pro tip
Automated emails (like order confirmations) generated 30% of email-driven revenue from just 2% of total email volume in 2025. And they convert way more efficiently too: nearly one in three clicks on an automated email resulted in a purchase, compared to scheduled campaigns, where clicks were far less likely to turn into orders.
Find out more: Omnisend’s 2026 Ecommerce Marketing Report
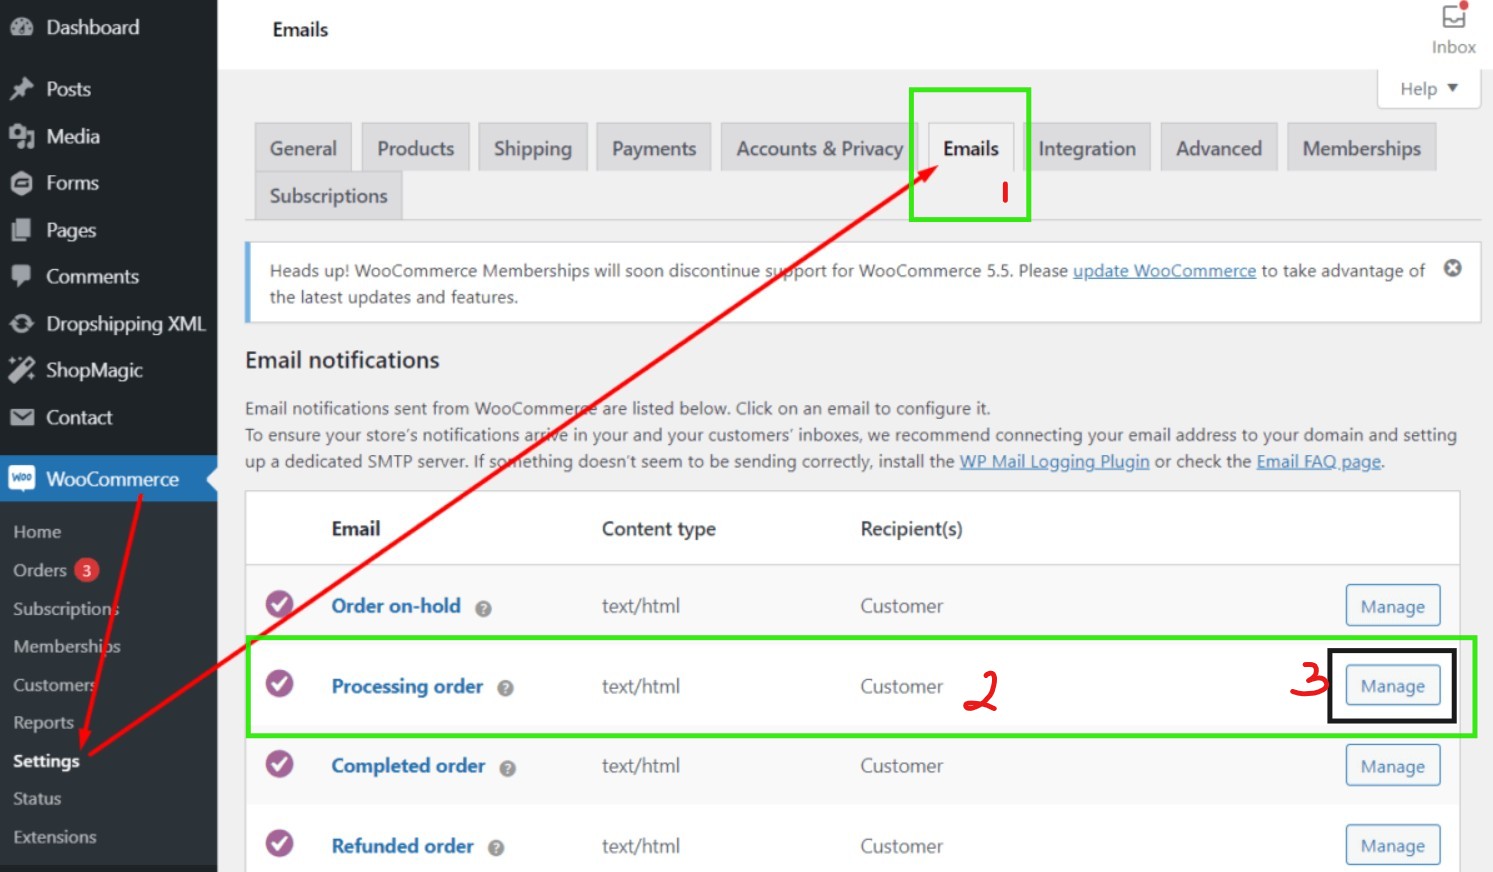
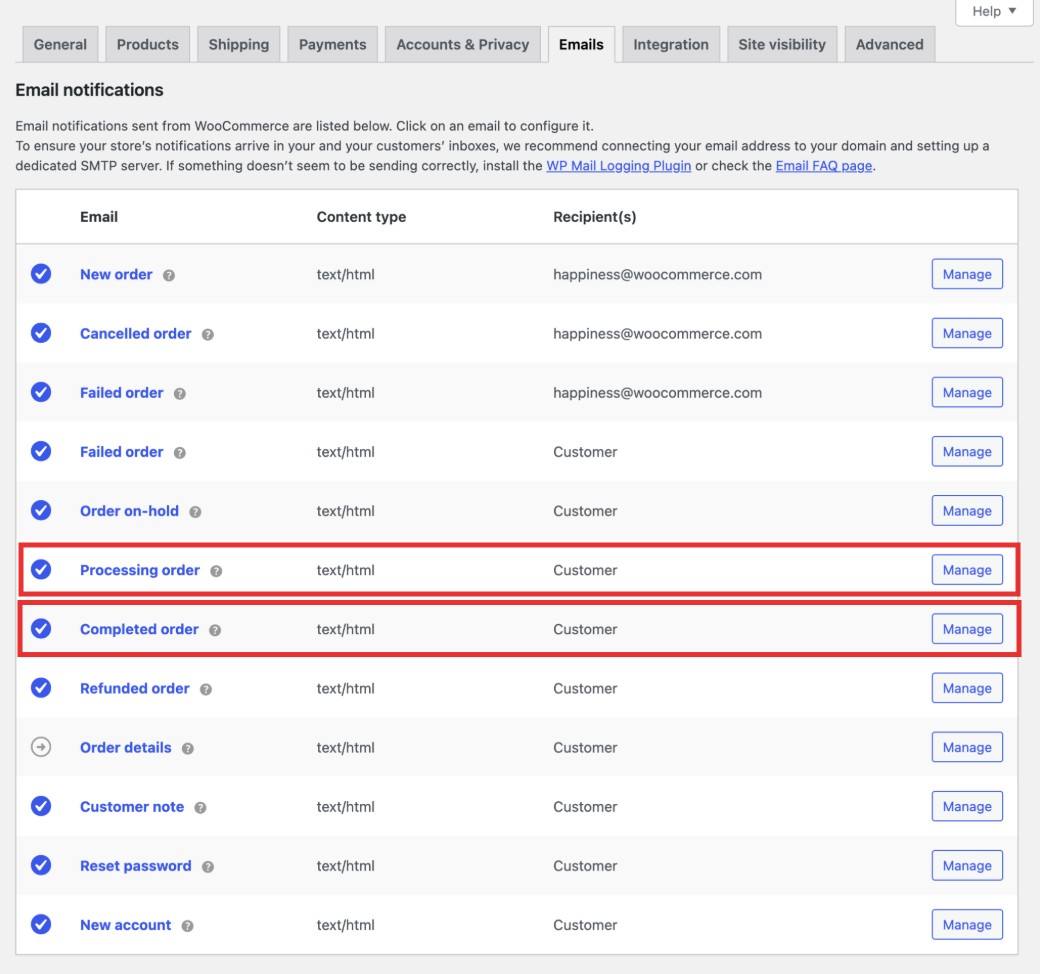
To send an order confirmation email in WooCommerce, you use the built‑in “Processing order” email. Once payment clears, WooCommerce will automatically send an email after order placement, no plugins or extra setup required. (If you’re wondering about the “Completed order” email – that’s a separate WooCommerce notification for when an order is marked complete/shipped, which we’ll cover later.)
Below, we’ll walk through the step-by-step process to make sure these confirmation emails send without a hitch.
Important: WooCommerce doesn’t send confirmations for orders stuck in “Pending payment.” Customers only get an email once the order status switches to Processing (i.e. payment received).
Steps to send WooCommerce order confirmation emails:
Enabling email notifications ensures WooCommerce will actually send the confirmation email when an order is paid. If you’re learning how to set up confirmation emails in WooCommerce, make sure this option is checked. An unchecked box is often why confirmations don’t send.
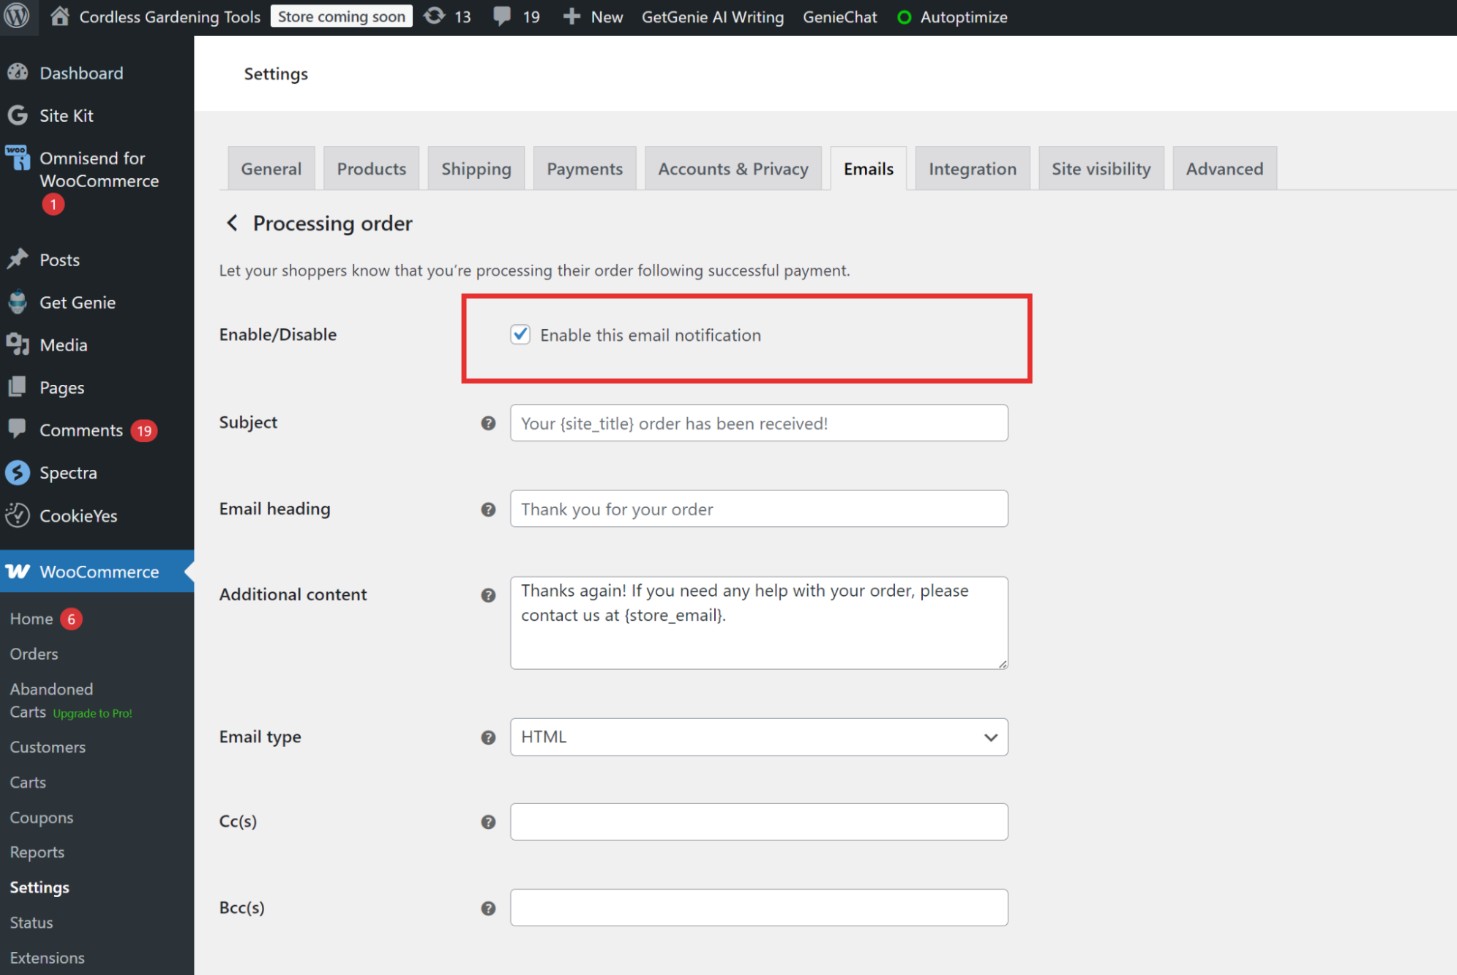
While viewing the Processing order email settings, you can tailor the content to fit your brand. WooCommerce lets you modify a few fields here: the Subject line, the Email heading, and an Additional content text box.
By default, the subject is “Your {site_title} order has been received!” – which is generic and could be improved. Feel free to change it to something more personalized or on-brand (e.g. “Thanks for your order, {customer_first_name}! Your purchase is confirmed.”). The email heading (which appears at the top of the email body) can also be adjusted from the default “Order Received” to better match your tone.
Use the Additional content box to add a custom message. This is a great place for a friendly note, store policies, or even a small promo for a future purchase. For instance, you might thank the customer for their business, remind them of your support contact, or suggest they follow your social media.
Tip: WooCommerce supports placeholders in these fields to personalize the message. For example, {customer_first_name} will insert the buyer’s first name (“Hi Sarah”), and {order_total} will insert the order amount (“$127.50”). WooCommerce provides a list of available placeholders right on that settings page, so use them to make your email feel individual.
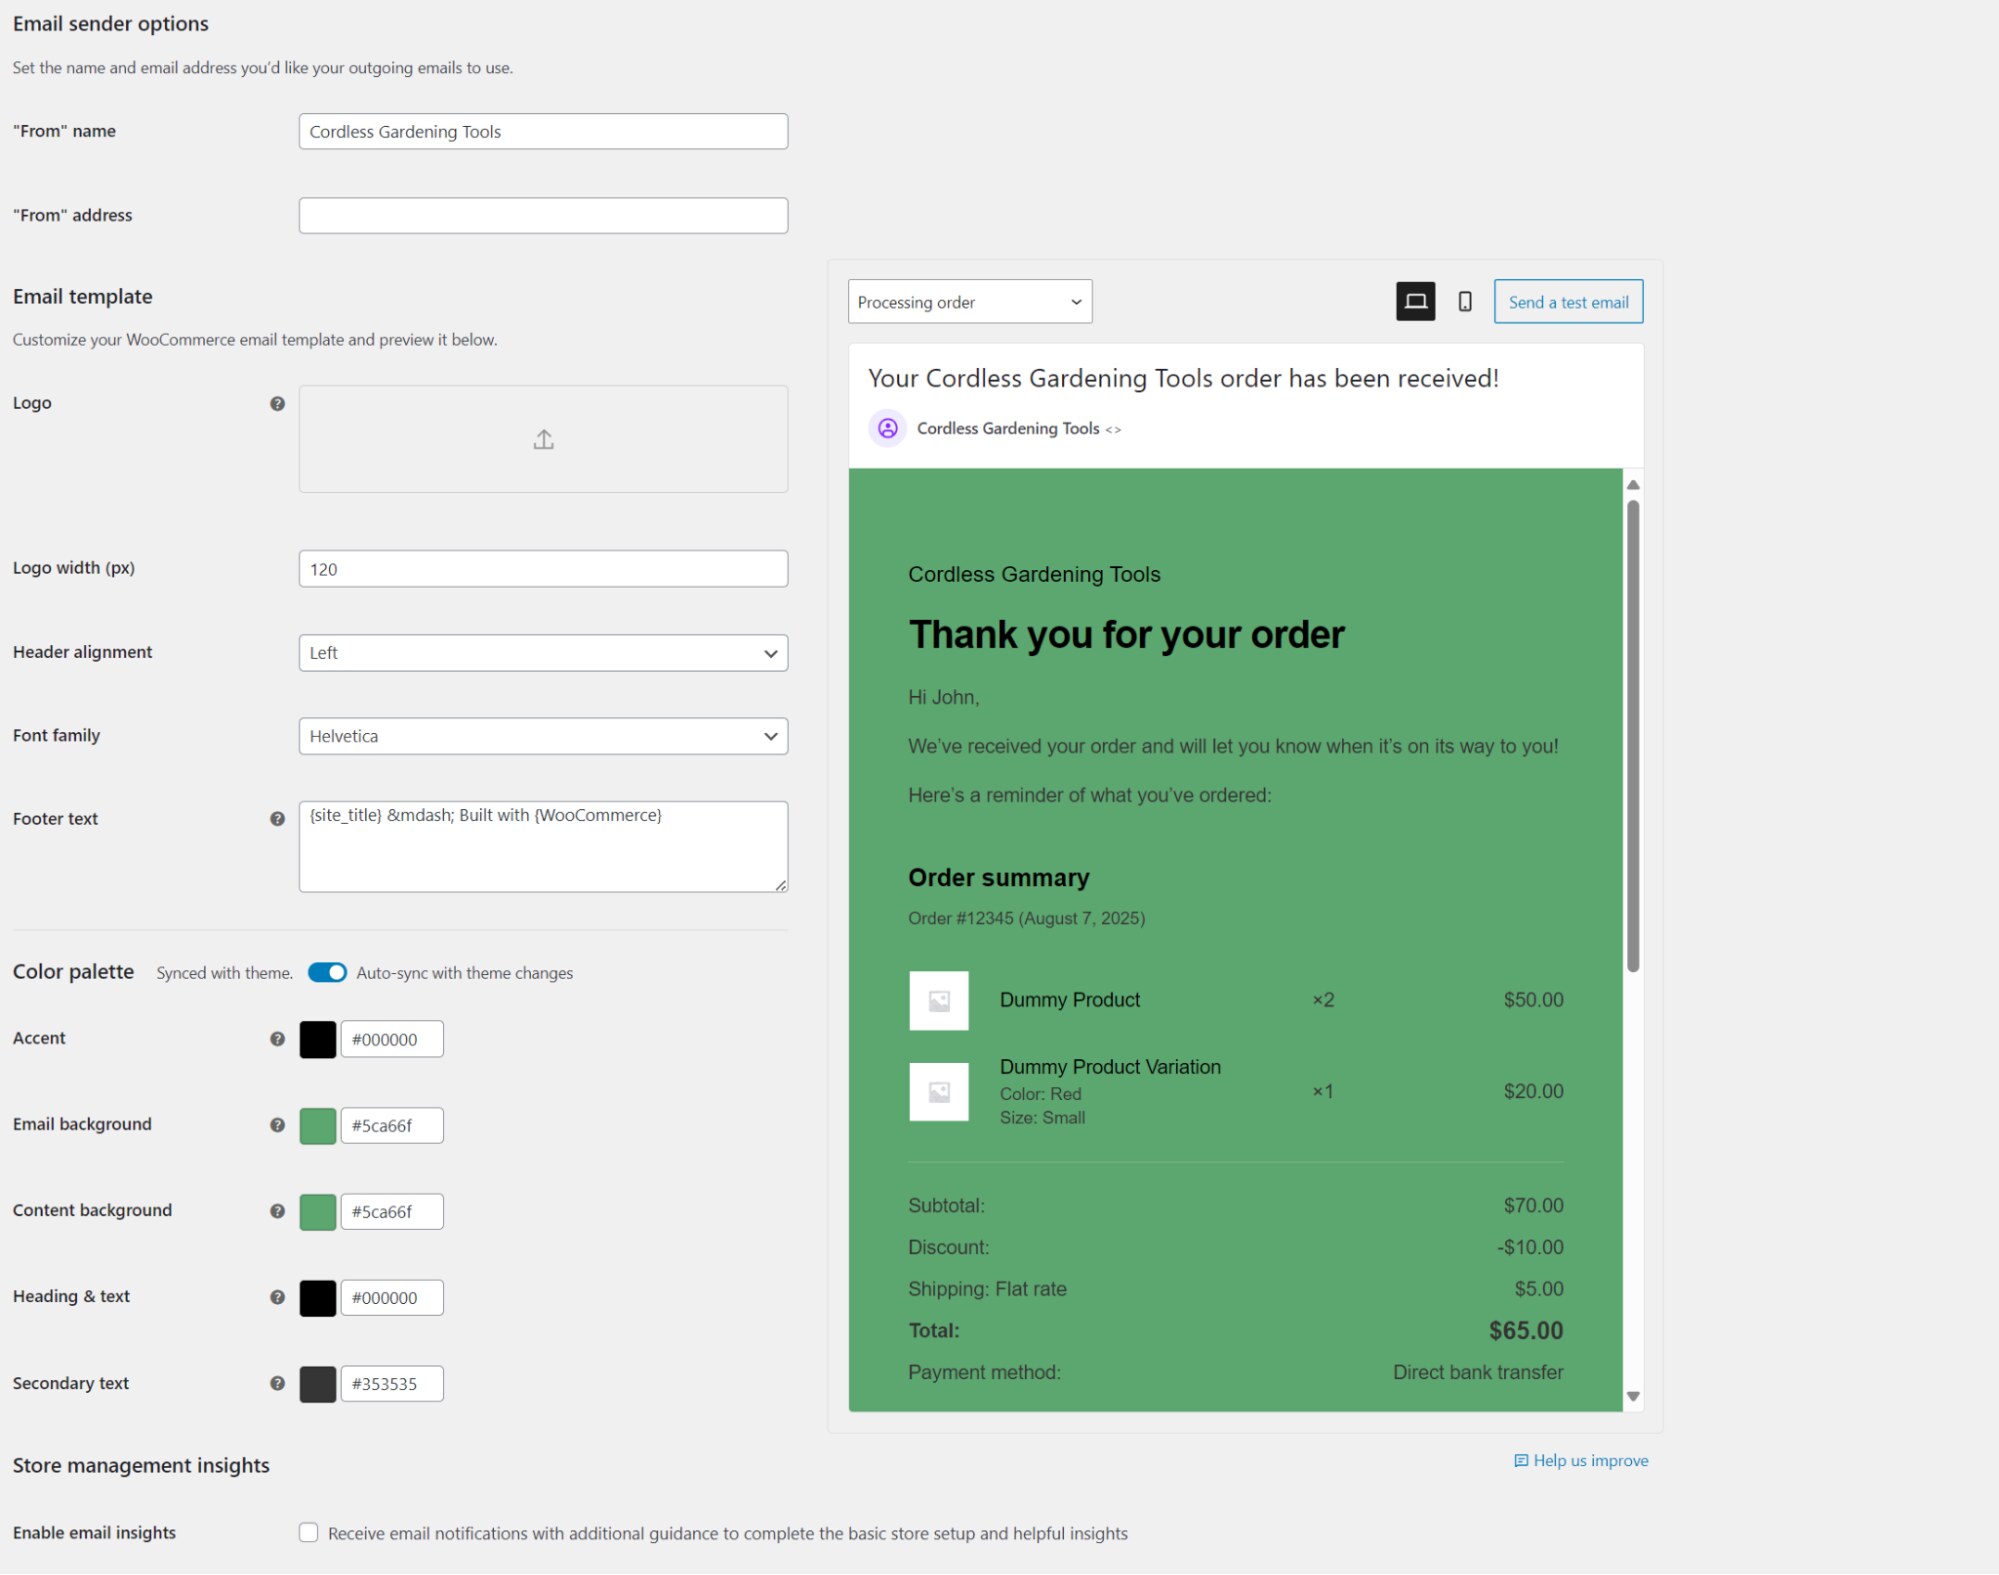
As you make changes, you can preview what the email will look like. WooCommerce’s email settings page offers a built-in preview for the template, which updates with your new subject, heading, and content. Always preview to ensure everything looks good.

It’s not just customers who should get emails – you (and your team) likely want a notification when a new order comes in. To enable this, go back to the main Emails tab in WooCommerce settings. Find the “New order” email (this one is for the store admin) and click Manage.
Ensure this New order notification is enabled so that the store owner/admin receives an email every time an order is placed. You can enter the recipient addresses for these alerts (it can send to multiple admins – just separate emails with commas).
While you’re here, you can customize the New order email’s subject line and heading if needed. For example, you might add “[Store Name] New Order: {order_number}” as the subject so it’s clear and easy to spot in your inbox.
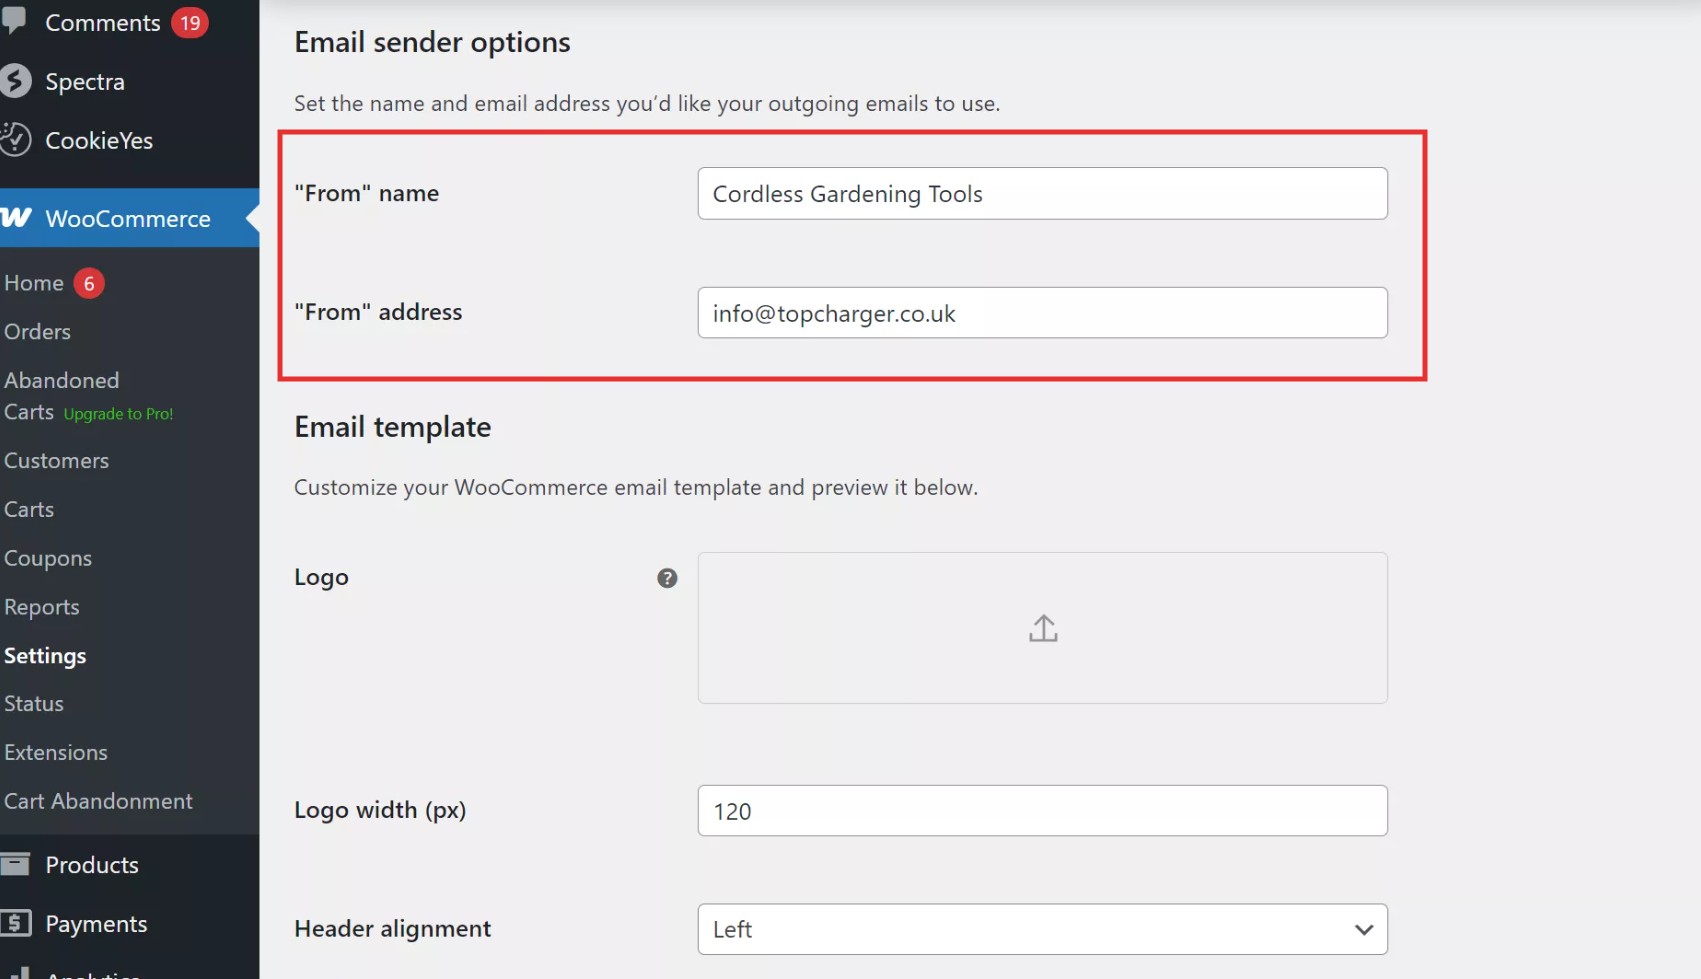
Scroll further down below the list of individual emails to find the Email sender options section. Settings here apply to all WooCommerce emails globally: “From” name: Set this to your store name or the sender name you want customers to see. For example, Awesome Store Team.
“From” address: Use an email address on your own domain (e.g. [email protected]) rather than a personal Gmail/Yahoo address. Using a domain-based email is critical for deliverability – many hosts will block or flag messages sent from free email providers.
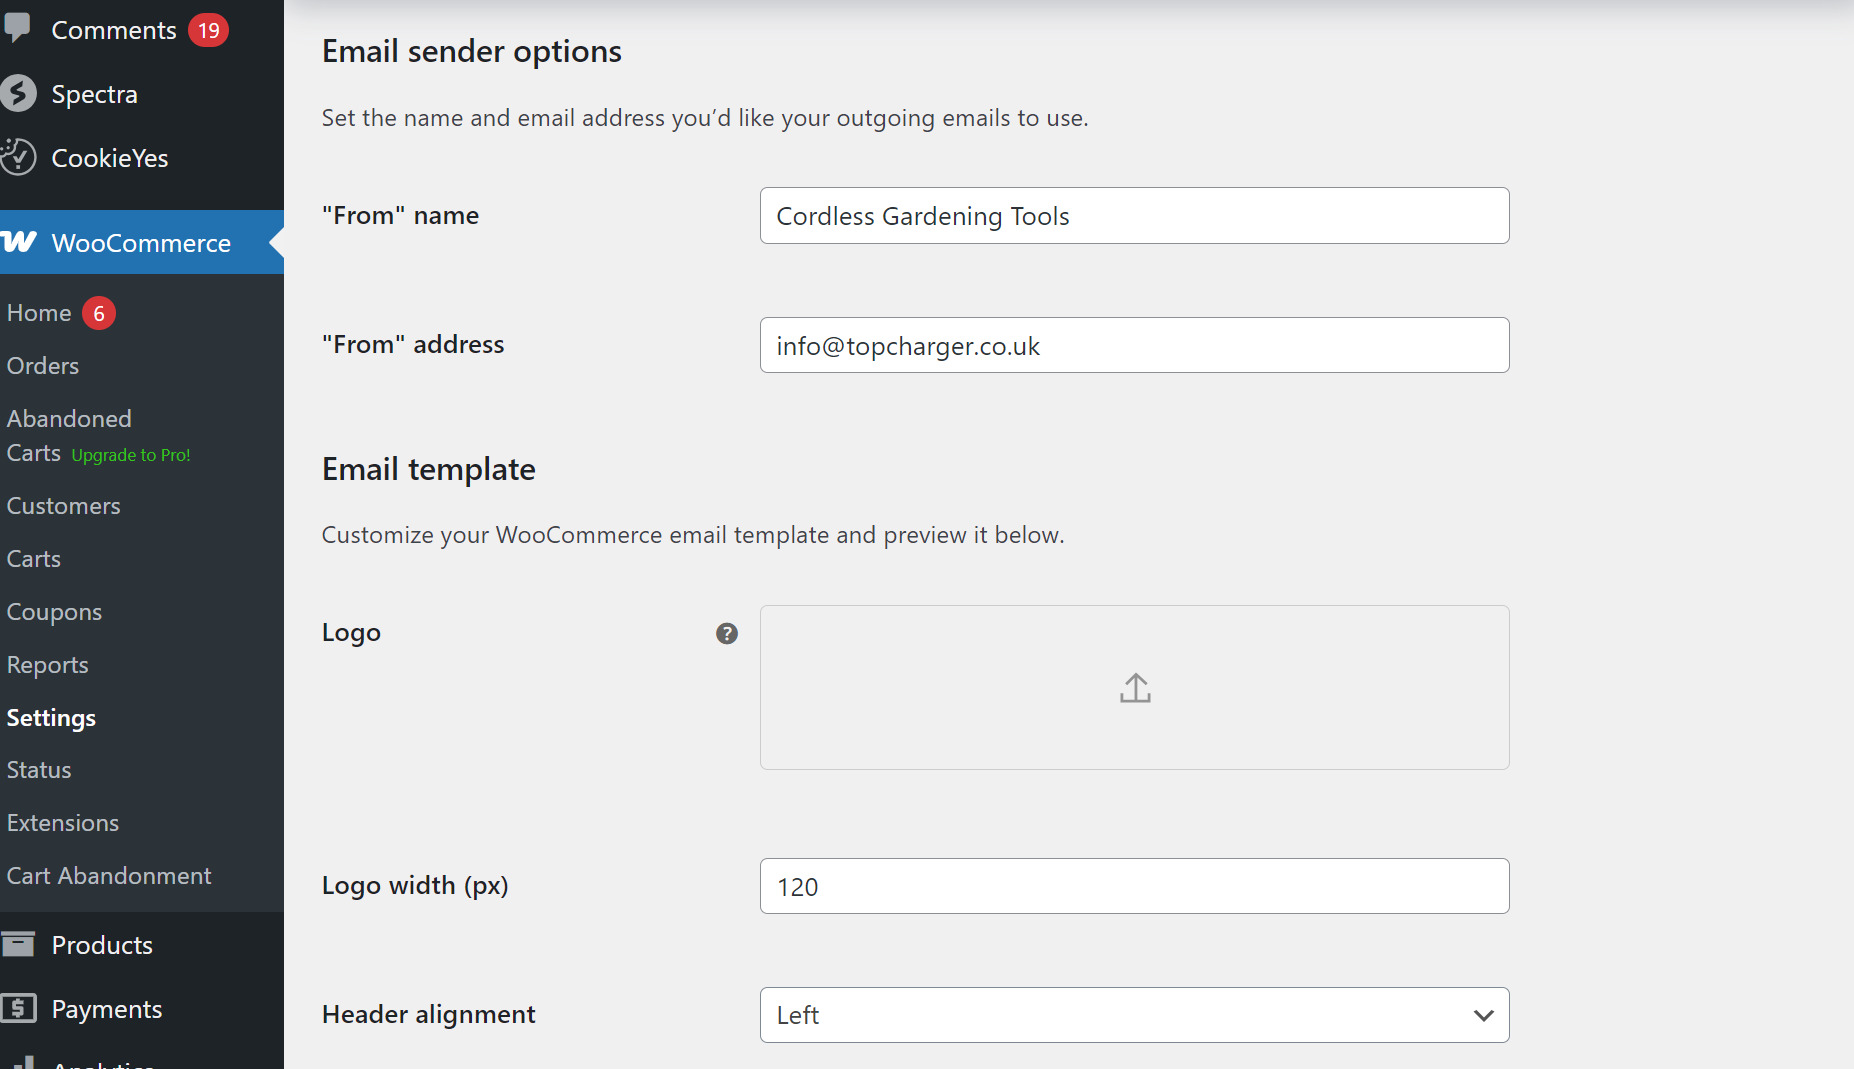
Email template: Here you can add your store’s logo to the top of the emails. You can also adjust the color scheme (background color, email body color, text color, link color) to better match your branding. WooCommerce 9.8 (April 2025 version) introduces an expanded color palette for finer branding control. It also features a broader font selection library, and live Email Preview enhancements.
Footer text: Customize the small print at the bottom of emails. You might include a thank-you note, your support email/phone, or social media links here.
After updating these settings, click Save changes. These global settings will ensure all your WooCommerce emails (including the order confirmation) have the right sender info and basic styling.
With everything configured, it’s important to test that your WooCommerce order confirmation emails are working properly before customers start relying on them. Save all your changes and then simulate a purchase on your store (you can create a test product priced at $1 or use a coupon to minimize cost).
Place a test order as a customer would, going through checkout and payment. Once completed, verify that the customer order confirmation email is received at the customer’s address. Also check that the admin New order notification arrives in the admin inbox.
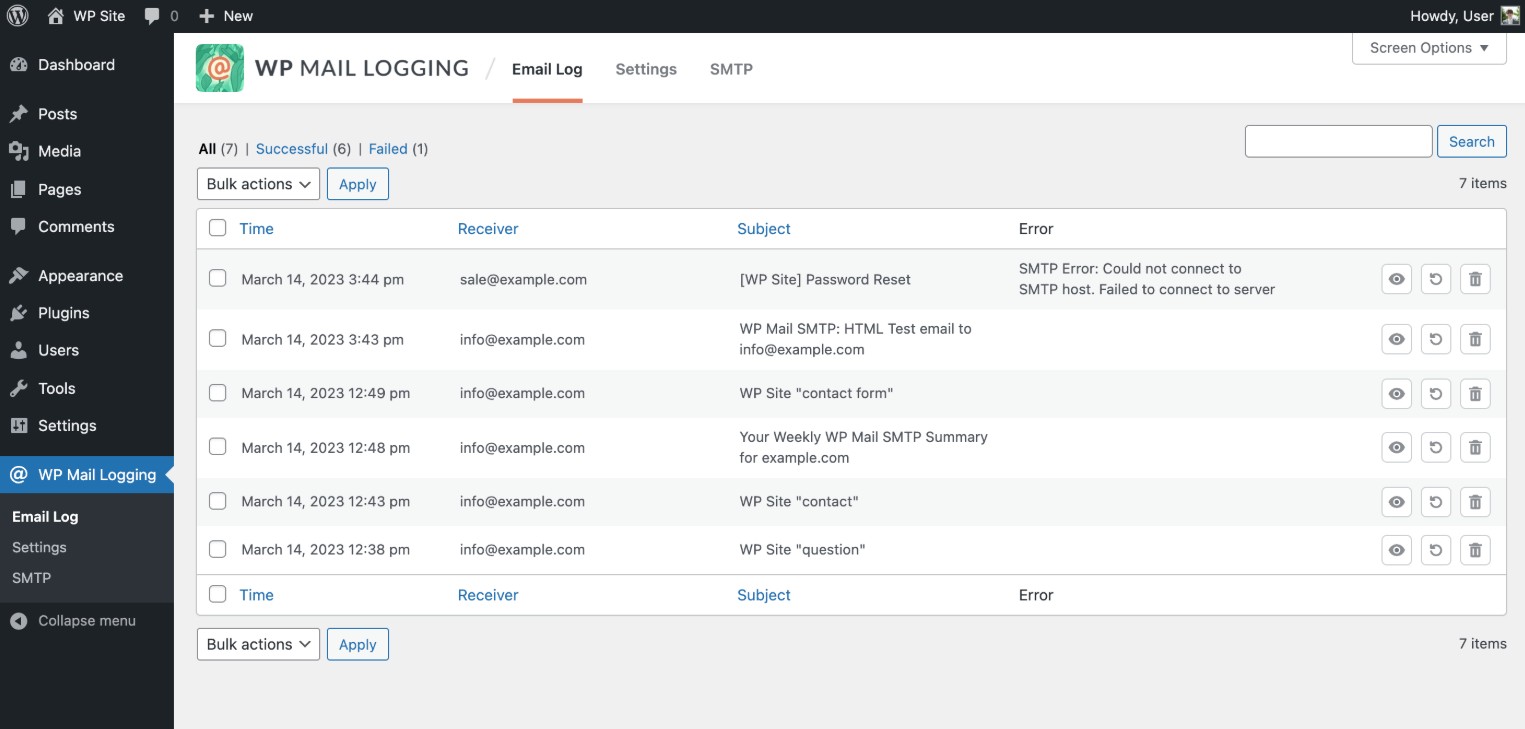
If you have trouble getting emails, install a mail logging plugin like WP Mail Logging. This tool records every email WordPress/WooCommerce attempts to send. After your test order, look at the mail log (under Tools → WP Mail Log) to see if the emails were generated. If they appear in the log but never reach your inbox, it indicates a deliverability issue.
Remember: If emails aren’t arriving, the culprit is usually your hosting provider blocking or not properly sending PHP mail. This is common on shared hosts. The quick fix is to install an SMTP plugin (such as WP Mail SMTP) to send emails via a proper SMTP server instead of PHP mail. We’ll discuss deliverability fixes more in the Troubleshooting section, but keep this in mind during testing.
Adjust formatting or content as needed based on your test. For instance, you might find you need to tweak the logo size, or maybe the additional content message could be clearer. It’s easier to refine now than after real customers start seeing the emails.
Want to go beyond WooCommerce’s built-in options? Further below, we explore how Omnisend’s native WooCommerce integration delivers branded, automated confirmation emails with analytics and A/B testing built in.
Related reading:
How to preview and test WooCommerce emails: Complete guide
There are several ways to edit your WooCommerce order confirmation email, including using built-in settings, plugins, code, and email marketing platforms. The right approach depends on how much control you need.
WooCommerce includes basic tools for editing confirmation emails without installing extra plugins.
Go to WooCommerce > Settings > Emails. Click the Manage button for the email you want to edit, and update the subject line, heading, additional content, and recipient details.
There are other customizable settings beneath the table of email notifications here: WooCommerce > Settings > Emails.
These let you customize your email sender options (“From” name and address) across your email templates. Other elements you can tweak include the color palette, logo, header alignment, fonts, and footer text.
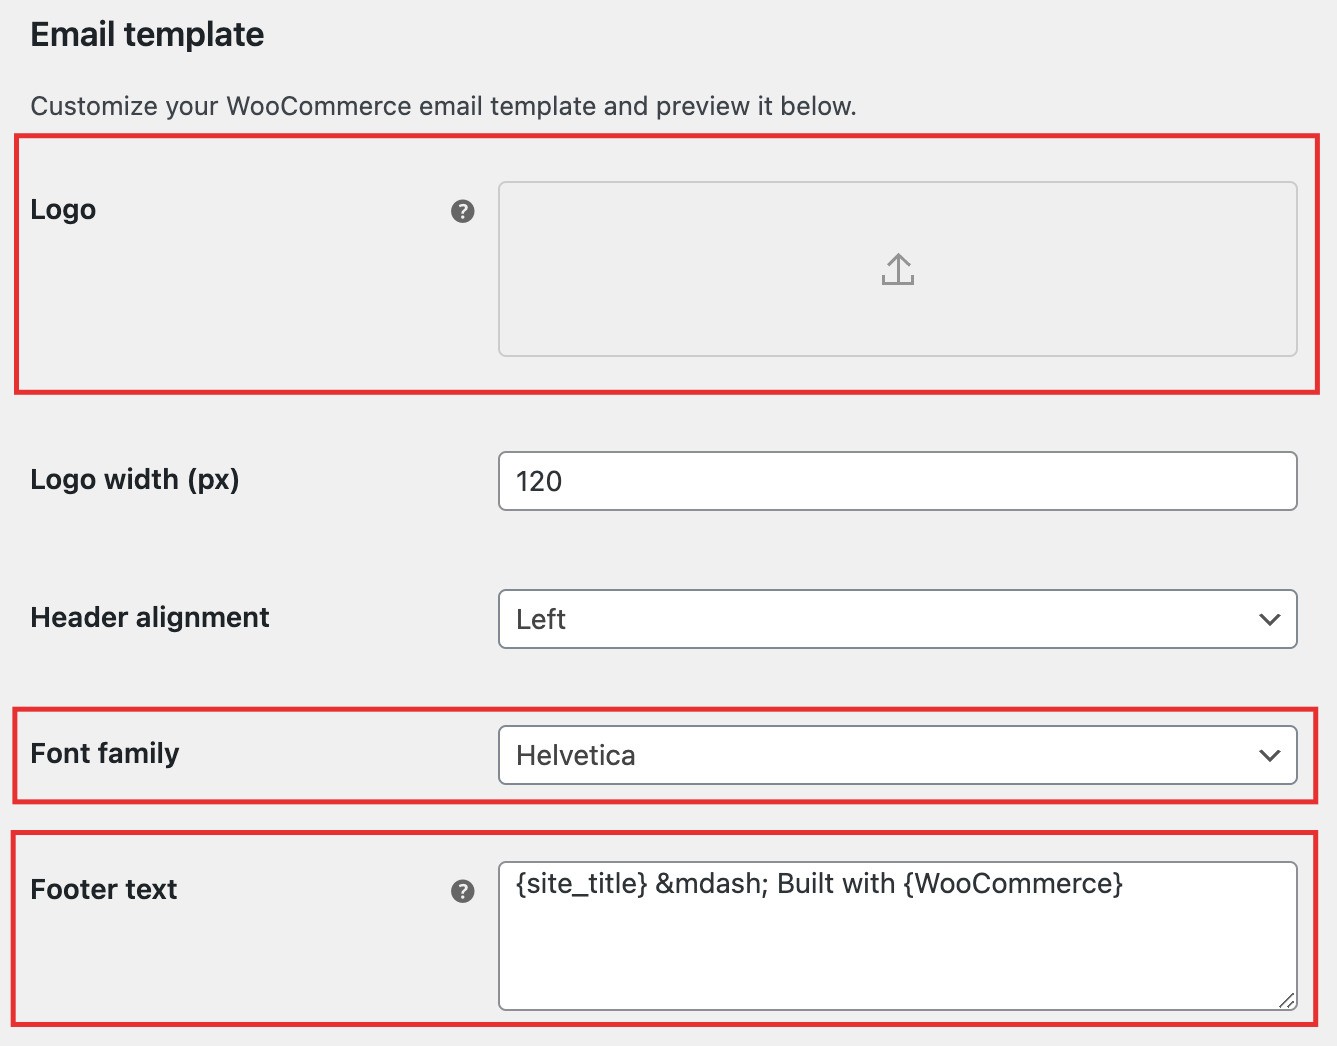
WooCommerce 9.8+ only: Includes expanded color palette controls, font selection options, and email preview tools that make branding easier.
Action: Adjust your logo and color scheme to match your store branding, then save changes to apply instantly.
If you want more design flexibility, consider a dedicated email customizer plugin. Popular options include YayMail – WooCommerce Email Customizer and Kadence WooCommerce Email Designer.
These tools give you drag-and drop design freedom, letting you:
For example, you could add a “Track your order” or “Shop Again” button below the order summary. This approach works well for stores that want to improve design without touching code.
Action: Install a customizer plugin and create a test email to compare against the default template.
For complete control, you can customize WooCommerce email templates with code. This method lets you add custom content, modify layouts, or display additional order information.
Copy the email file (for example, customer-processing-order.php) from woocommerce/templates/emails/ into your theme’s /woocommerce/emails/ folder. Then modify it safely in a child theme.
Many developers use a child theme and WooCommerce hooks instead of editing core files directly. Here’s an example of a code snippet adding a custom message to the Processing Order email:
add_action( ‘woocommerce_email_before_order_table’, ‘add_custom_message_to_processing_email’, 20, 4 );
function add_custom_message_to_processing_email( $order, $sent_to_admin, $plain_text, $email ) {
// Only target the “Processing Order” email, ignoring admin notifications
if ( ‘customer_processing_order’ === $email->id && !$sent_to_admin ) {
echo ‘<h2>Thank you for your order!</h2>’;
echo ‘<p style=”color: #333; font-size: 14px; background-color: #f9f9f9; padding: 10px; border-left: 4px solid #7f54b3;”>’;
echo ‘<strong>Important Note:</strong> Your order is currently being processed by our warehouse. ‘;
echo ‘Standard delivery takes 3-5 business days. We will email your tracking number as soon as it ships!’;
echo ‘</p>’;
}
}
Always test code changes on a staging site before publishing them to your live store.
Action: Copy and modify your template files or use the hook above to add custom content safely.
Email marketing platforms don’t just redesign your WooCommerce confirmation email. They replace the entire sending infrastructure, unlocking capabilities customizer plugins can’t match.
You get behavioral automation beyond the order confirmation. Think abandoned cart sequences, win-back campaigns, and post-purchase flows. You also get deliverability tools, list management, and segmentation based on purchase history.
A WooCommerce Mailchimp order confirmation email setup, for example, adds branding and follow-up campaigns. Klaviyo offers deeper segmentation and customer data tools.
For WooCommerce stores seeking the most seamless integration, Omnisend connects natively without manual webhook setup. It also generates an average of $79 in revenue for every $1 spent, and includes 24/7 support on every plan.
You can design branded confirmation emails using its drag‑and‑drop builder, automate follow-ups, and recommend related products.
Action: Connect your WooCommerce store to Omnisend and build automated on‑brand confirmation emails.
Keep in mind: WooCommerce offers solid basic customization, but advanced personalization usually requires plugins, code, or a dedicated marketing platform. If your goal is to create branded, revenue-generating confirmation emails without technical work, Omnisend provides the easiest upgrade path.
The first thing you’ll notice about default WooCommerce order confirmation emails is their lack of flexibility. You can’t easily add dynamic elements, extra sections, or product recommendations without editing PHP templates.
For instance, here’s an example of the stock order confirmation email in WooCommerce, without any setting changes other than to the background color:
Notice how plain it is? The email editor isn’t much better, with options to sync the color palette to your theme, change the logo size, select a font, and add custom footer text:
The bottom line is that WooCommerce emails get the job done — barely. They trigger reliably and include order details, but that’s where the good news ends.
Amundsen Sports used Omnisend’s automation to turn a simple order confirmation email into a powerful sales driver. Nearly one in three customers who click through make another purchase, and 16.7% of Omnisend-attributed annual revenue comes from this automation.
Read Amundsen Sports success story here
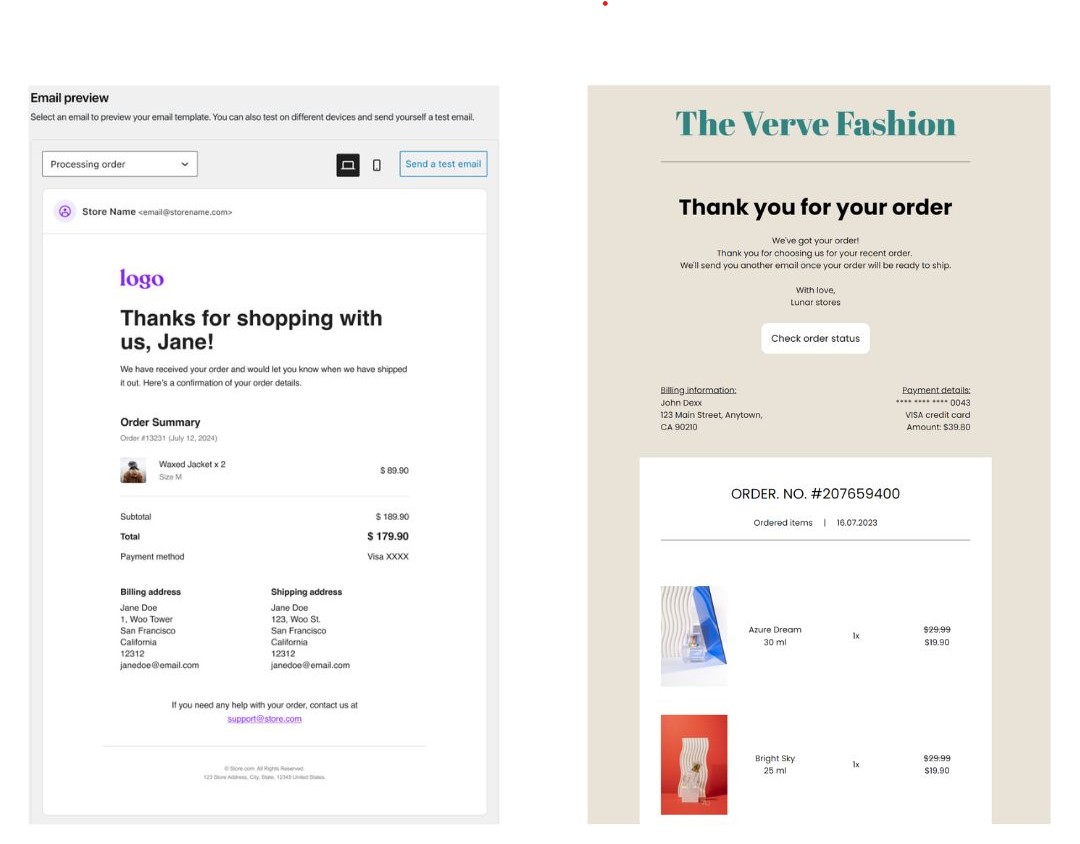
Here’s how the default WooCommerce confirmation email (left) compares with Omnisend’s customized design (right).
Here’s the kicker — WooCommerce sends through your web server’s PHP mail function, the same overworked server running your entire store.
Shared hosting providers hate this setup, often blocking or throttling emails. Even when emails are sent, they lack proper authentication, making inbox placement a gamble.
It’s best practice to bypass this mess entirely with SMTP services or dedicated platforms like Omnisend to route emails via optimized infrastructure designed for getting messages delivered.
WooCommerce gives you two ways to control where your confirmation emails come from. The first is a simple settings change. The second goes deeper and involves fixing the actual server that sends your mail.
Both can make your WooCommerce confirmation email appear like it’s coming from a branded domain or specific department. For example, [email protected] instead of the default WordPress address.
You can change the sender details shown in your emails directly in the dashboard. Go to WooCommerce > Settings > Emails and scroll to Email sender options.
Here, you can update:
Update both to reflect your store’s domain, and save changes when done.
Note: Changing these fields only updates the display address, which is what customers see. It doesn’t change the actual server that sends the email. WooCommerce may still use your hosting provider’s default mail system unless SMTP is configured separately.
By default, WordPress uses the wp_mail() function, which often causes deliverability issues because messages aren’t authenticated.
To send your WooCommerce order confirmation email from a verified domain, install and configure WP Mail SMTP. It’s currently the most recommended plugin on WordPress, with over 4 million active installations and a 4.8‑star rating. To set it up:
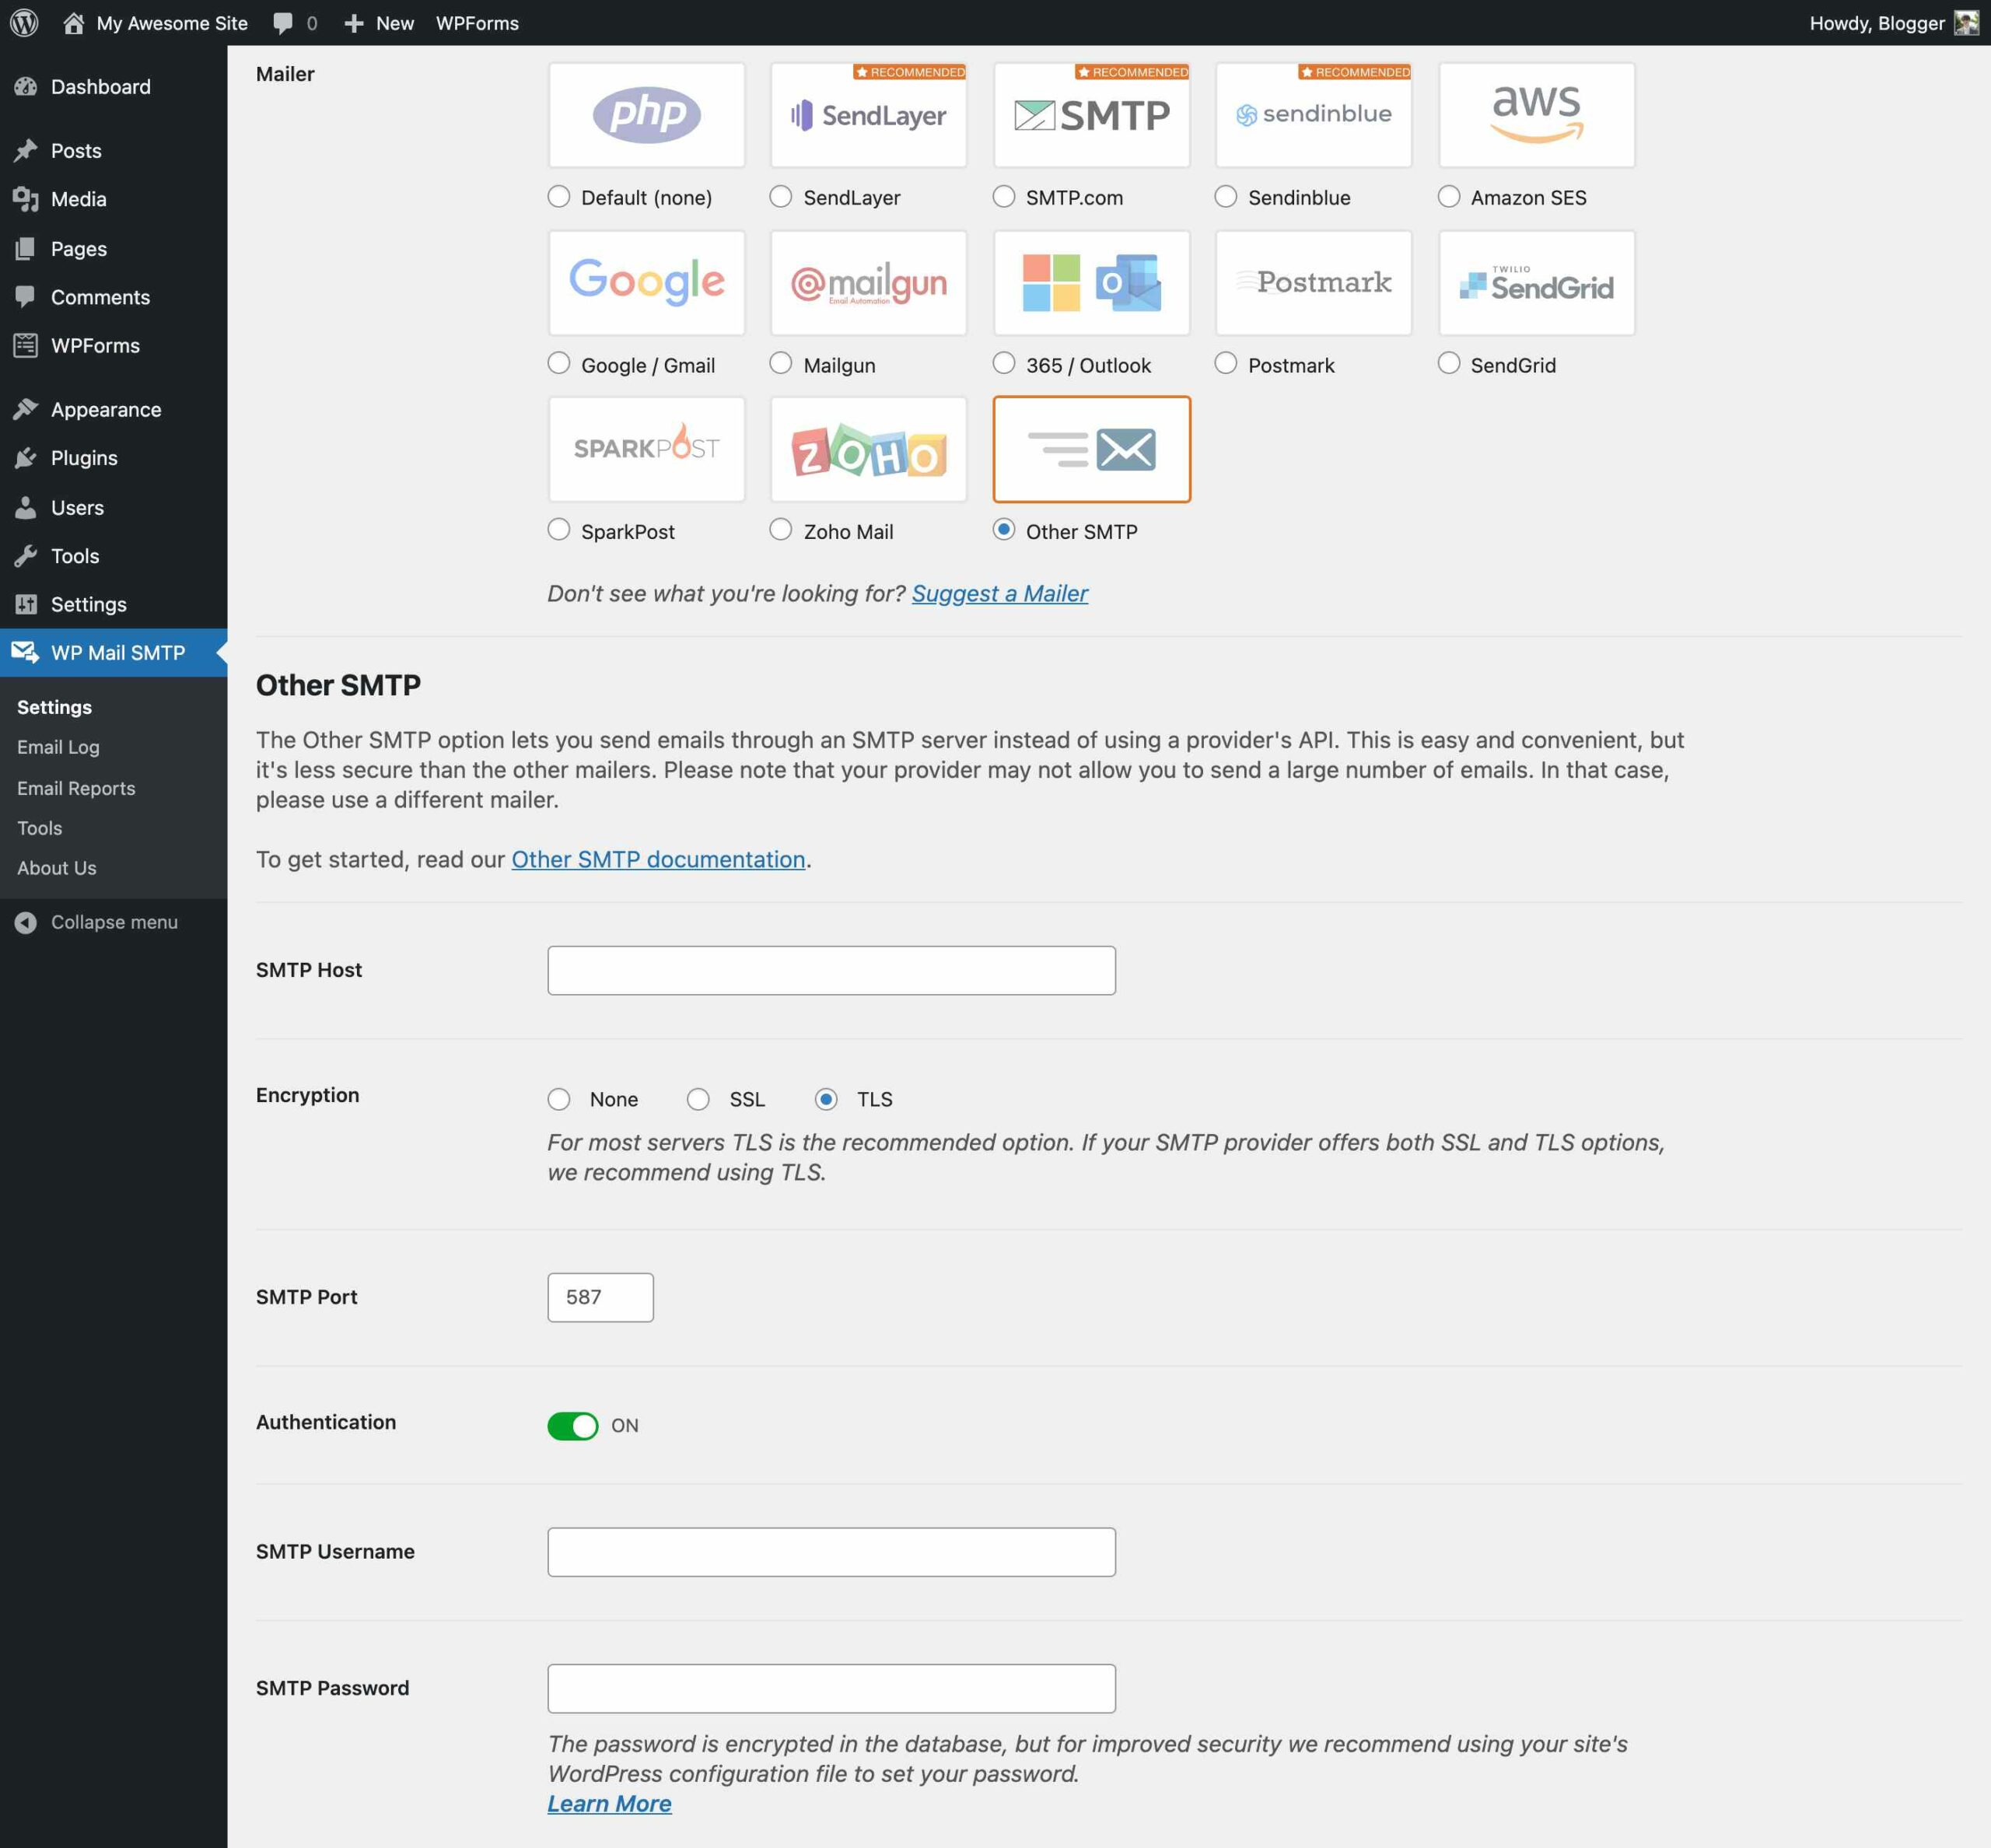
2. Enter your SMTP credentials and sender address
3. Send a test email to confirm delivery
For reliable delivery, your sending domain must have SPF, DKIM, and DMARC records configured. Your mailer provider will walk you through this during setup.
Omnisend users: If using Omnisend for your WooCommerce confirmation emails, sending domain configuration happens through Omnisend’s sender authentication settings. No separate SMTP plugin is required.
If the default WooCommerce emails feel lacking, Omnisend offers a comprehensive solution to elevate your order confirmations.
Whether you want WooCommerce to send a custom email after order placement or create fully branded customer journeys, Omnisend replaces basic emails with automated messages. These include dynamic order details, product recommendations, and professional designs, no coding needed.
Start with installing the Omnisend WooCommerce integration plugin to sync your store data. Then follow these steps to improve your WooCommerce order confirmation emails with Omnisend:
Log in to your Omnisend account and navigate to the Automation section from the dashboard.
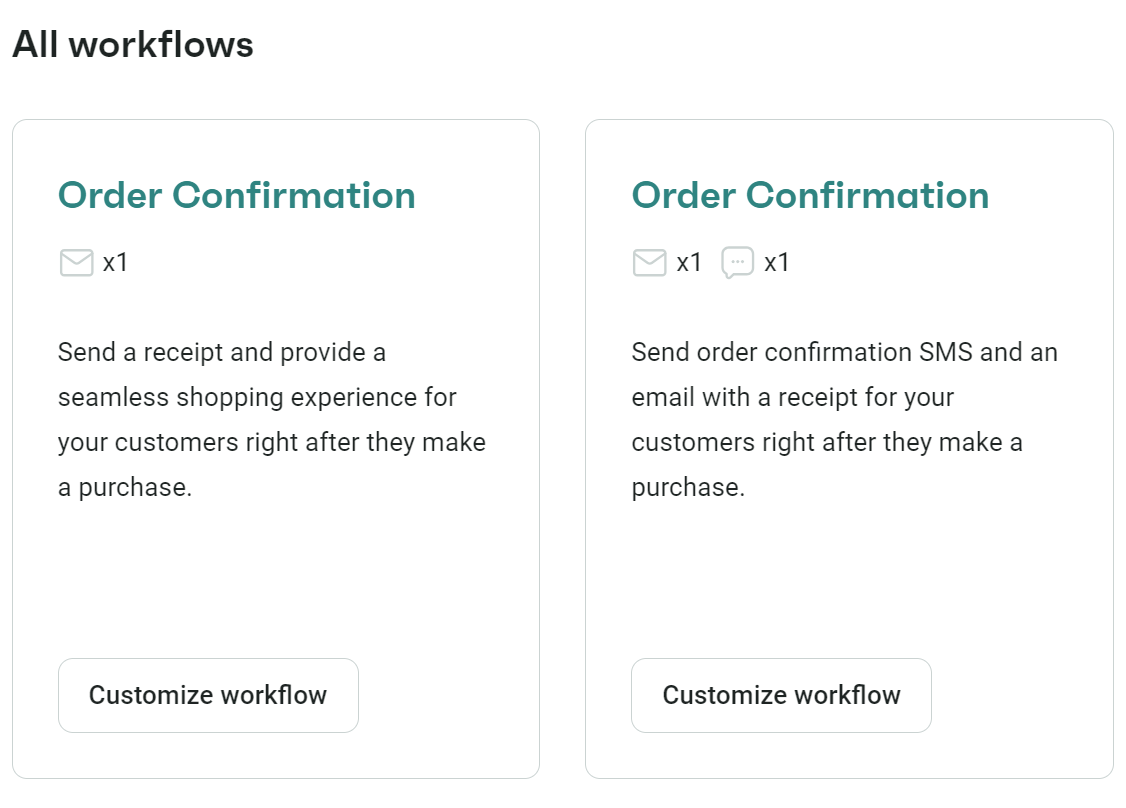
Click the “+ Create workflow” button. Omnisend provides a library of pre-built automation templates. In the search bar at the top, type “Order Confirmation” (or filter by the Transactional category) to find the Order Confirmation workflow template.
Click on Order Confirmation and choose “Customize workflow”. This will launch Omnisend’s visual workflow builder, loaded with the default order confirmation flow. You should see a preset trigger (Order Placed) and an email ready to be configured, among other elements.
Note: Omnisend’s workflow builder is designed for speed and clarity. It uses predictive AI to segment customers automatically and generative AI to help you write engaging copy that fits your brand tone. Combined with Omnisend’s five‑year customer‑service award streak (since 2022), you get expert support and intelligent automation that saves time while improving results.
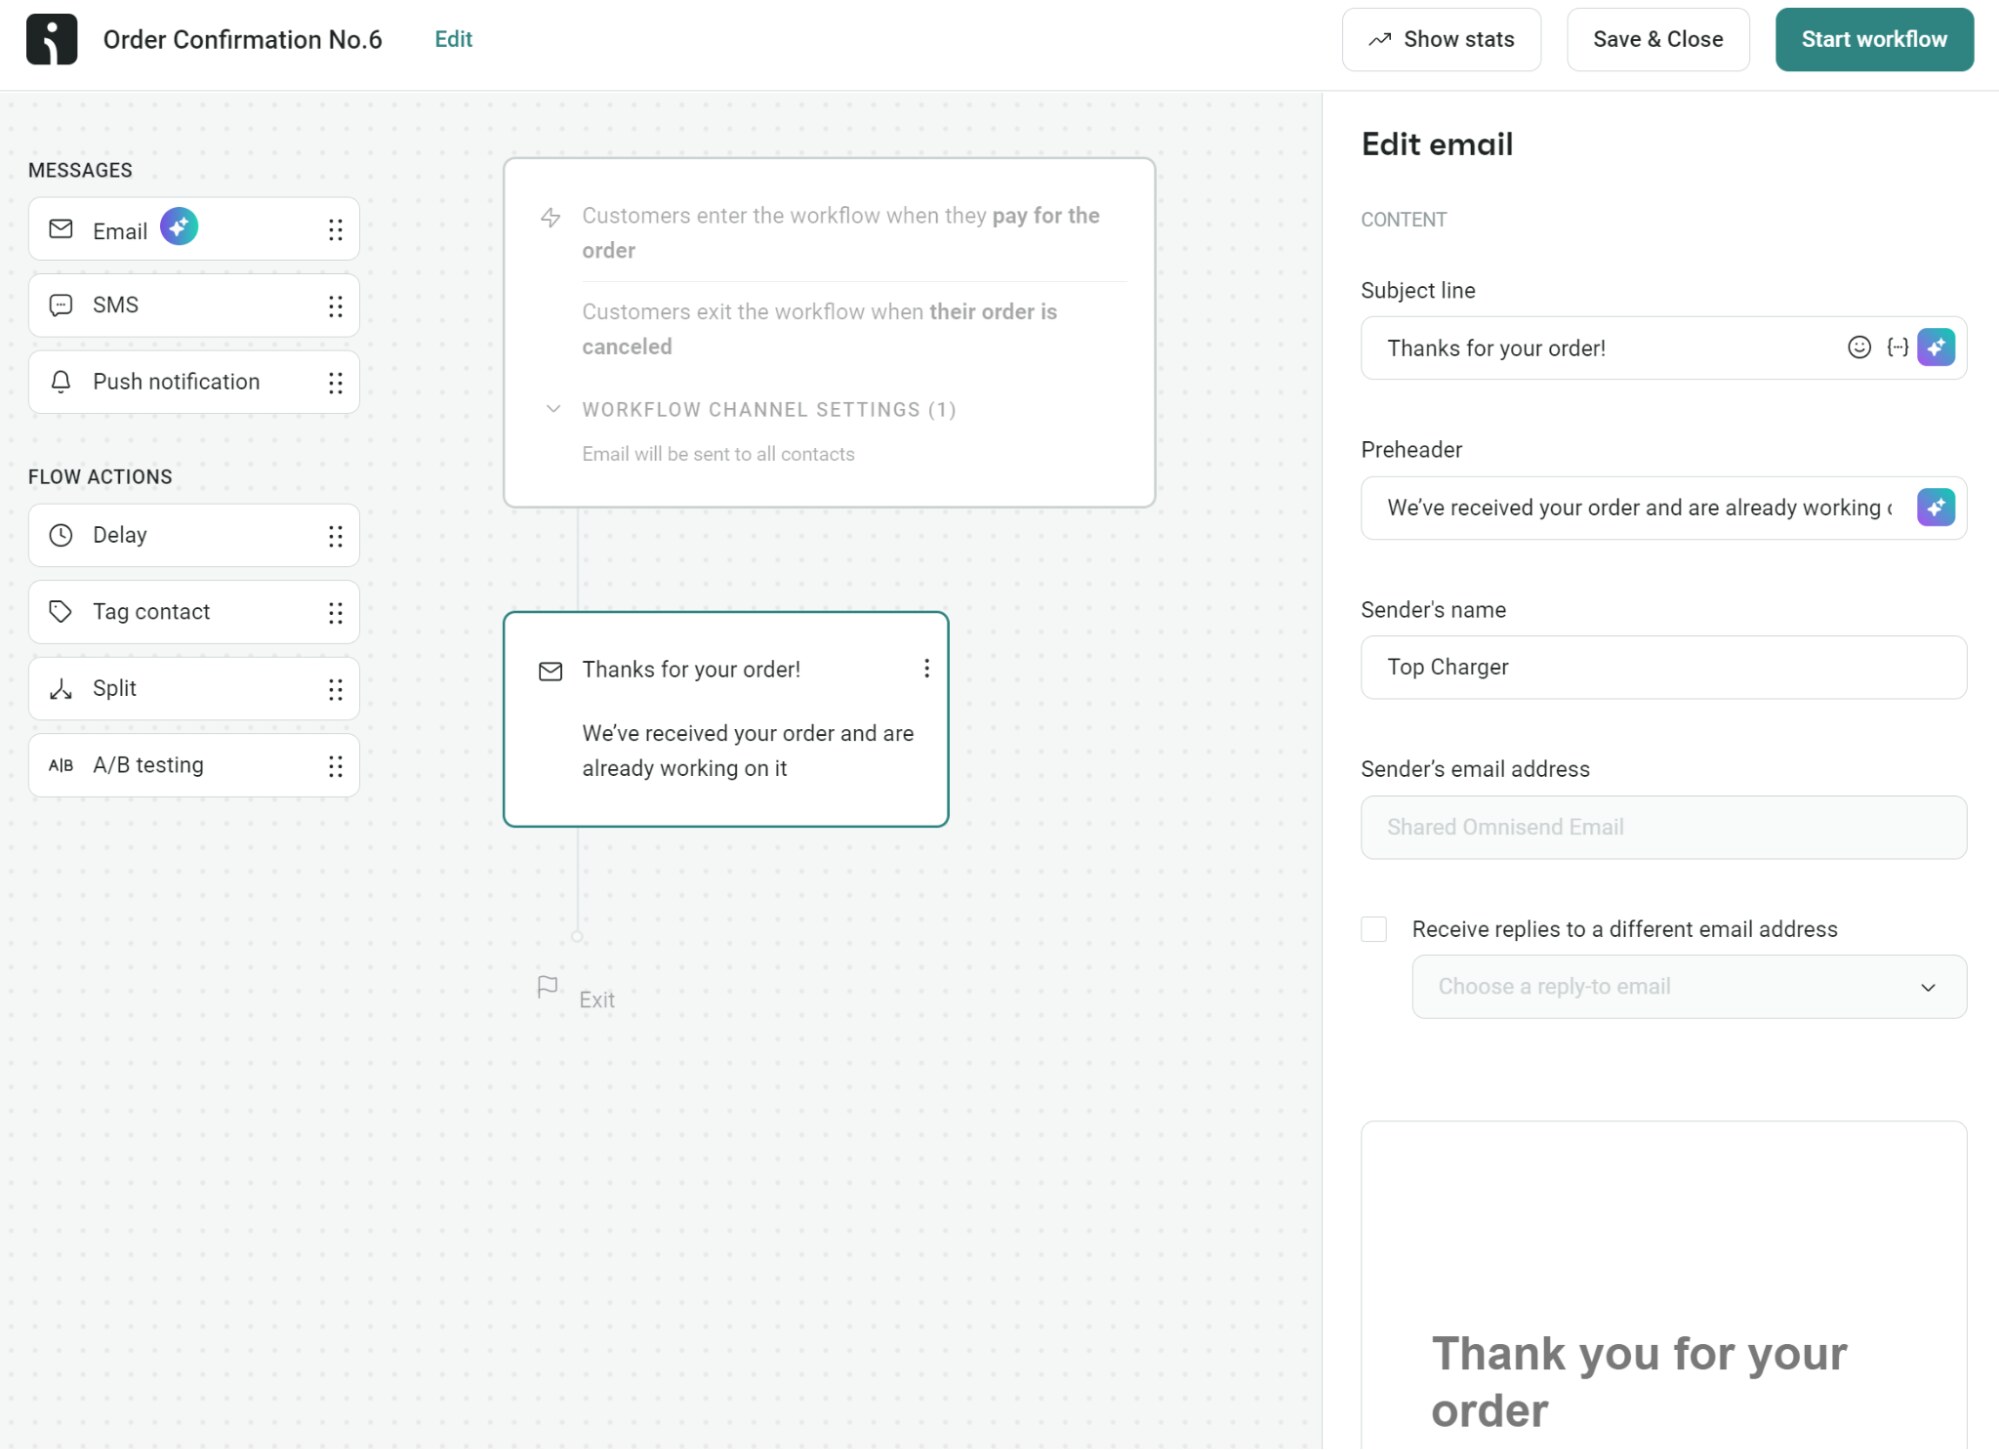
In the workflow diagram, click on the Email block (the email step that’s included by default in the Order Confirmation workflow). This opens the settings sidebar for that email.
Set up the basic details in the sidebar as you edit your WooCommerce confirmation emails:
Subject line: Craft a clear yet engaging subject. For example, “Order #{order_number} confirmed – thank you, {first_name}!” This uses merge tags to include the actual order number and customer’s first name for a personal touch.
Preheader: This is the preview text that appears after the subject in inboxes. Use it to provide a sneak peek or incentive. E.g., “Your order is on its way – track it here and enjoy 15% off next time.”
Sender’s name: Specify the name you want the email to appear from (usually your store or brand name).
Sender’s email: Enter the email address that the email will be sent from. Just like in WooCommerce, you should use your own domain here (e.g., [email protected]) for better deliverability. Omnisend will handle the proper authentication for you once your domain is verified on the platform.
Reply-to address: Optionally, set a reply-to email (for instance, your support inbox) if you want customers’ replies to go to a different address.
Save these settings. Omnisend will apply them to the email in this automation. This ensures your confirmation email has a compelling subject line and is coming from a trustworthy sender identity.
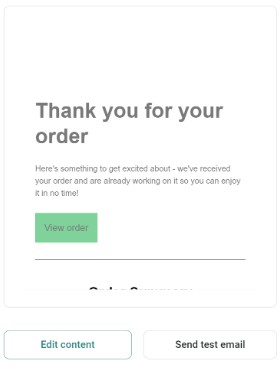
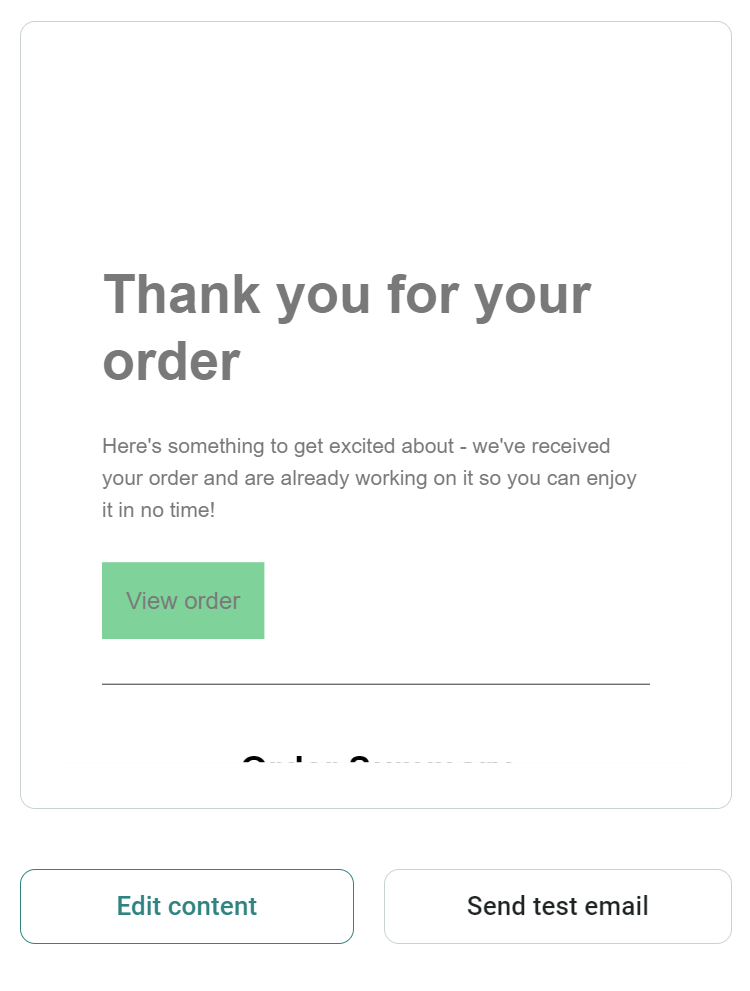
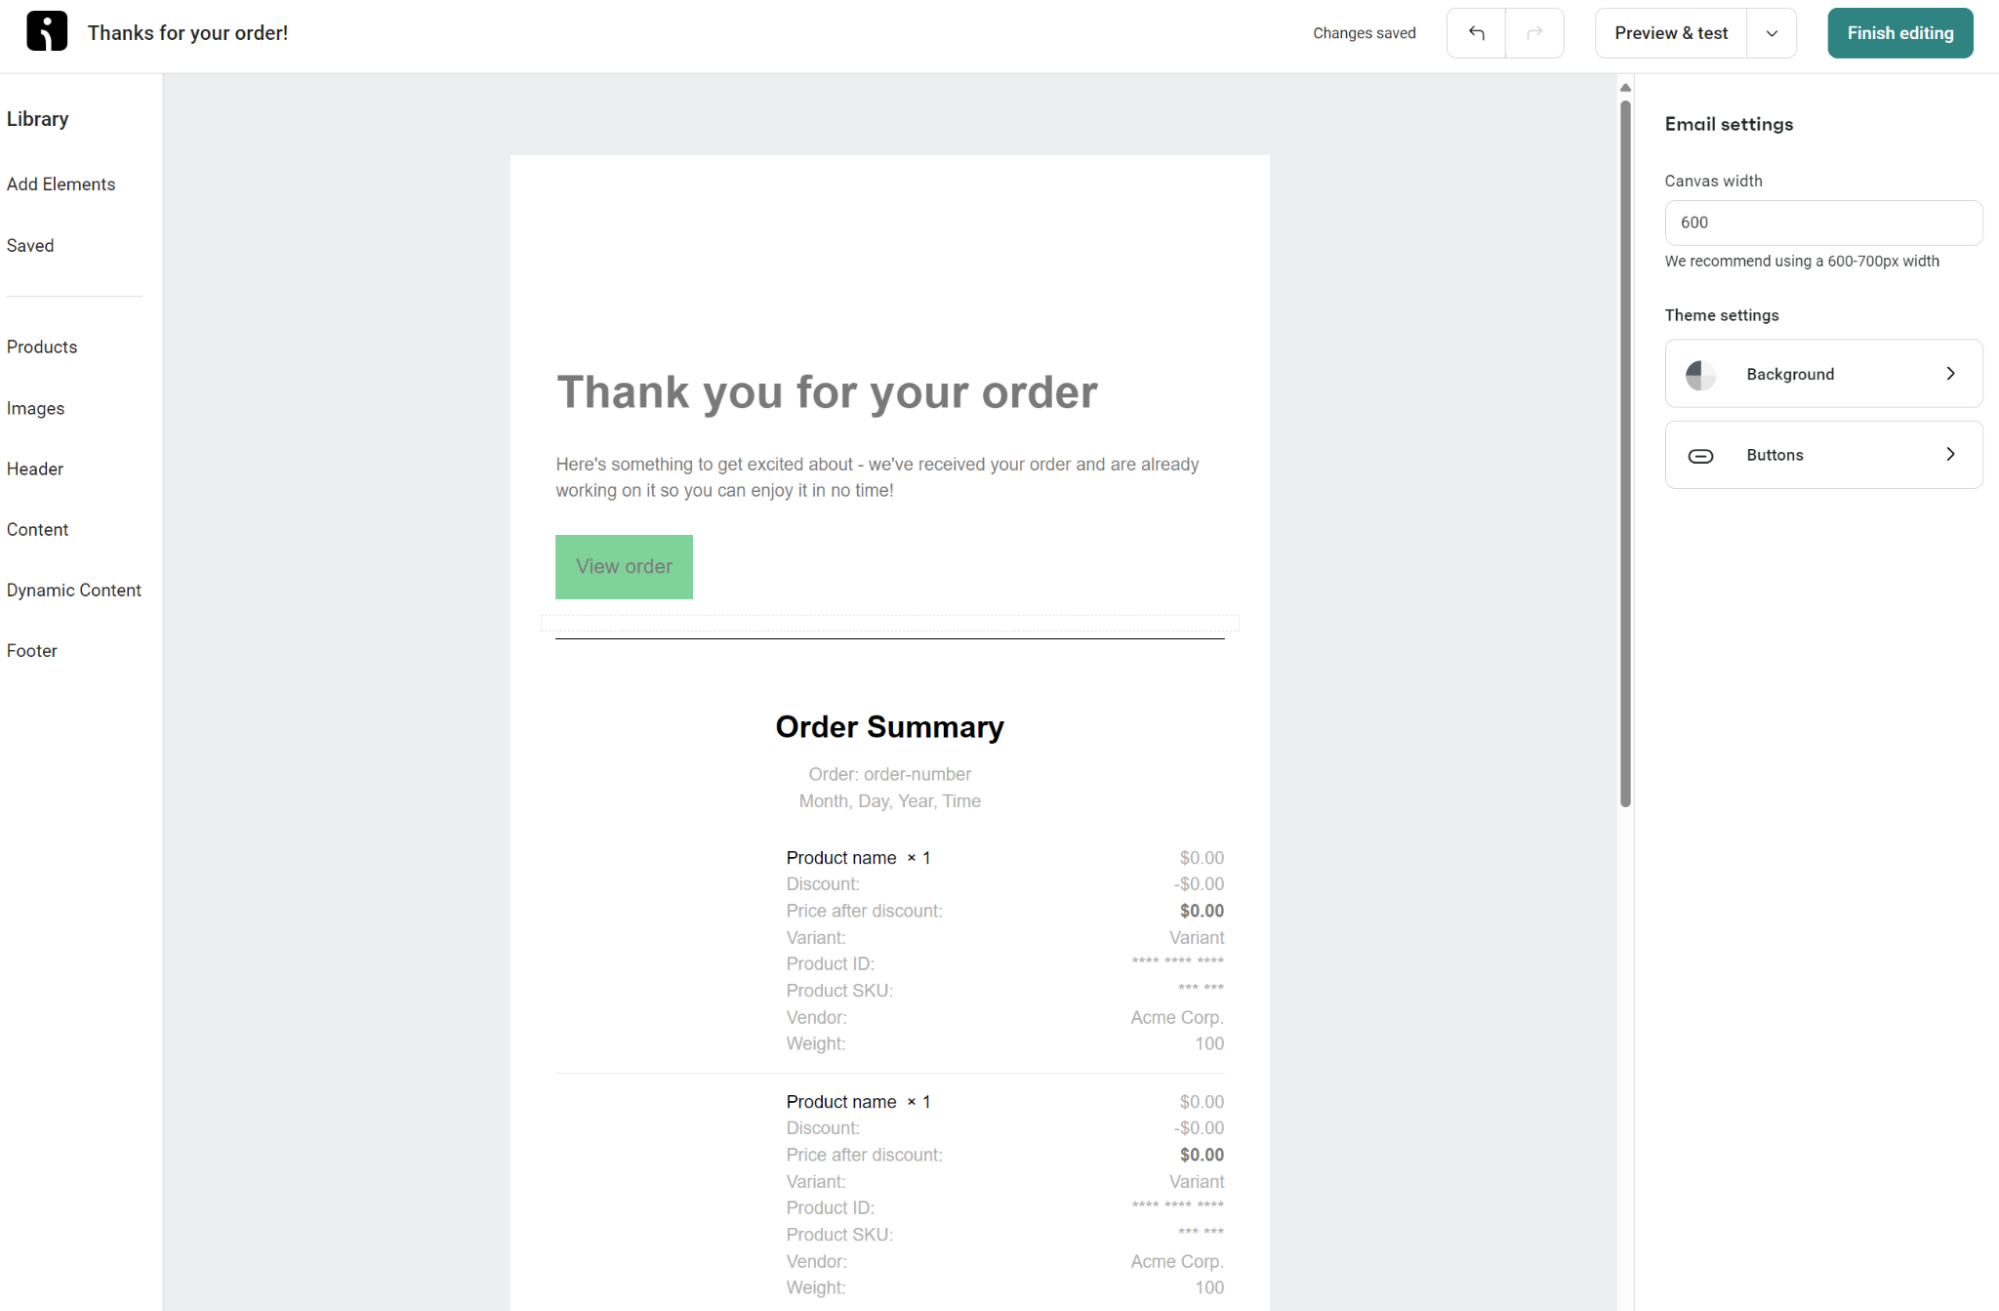
Here’s an example of an unformatted, unbranded order confirmation email in Omnisend:

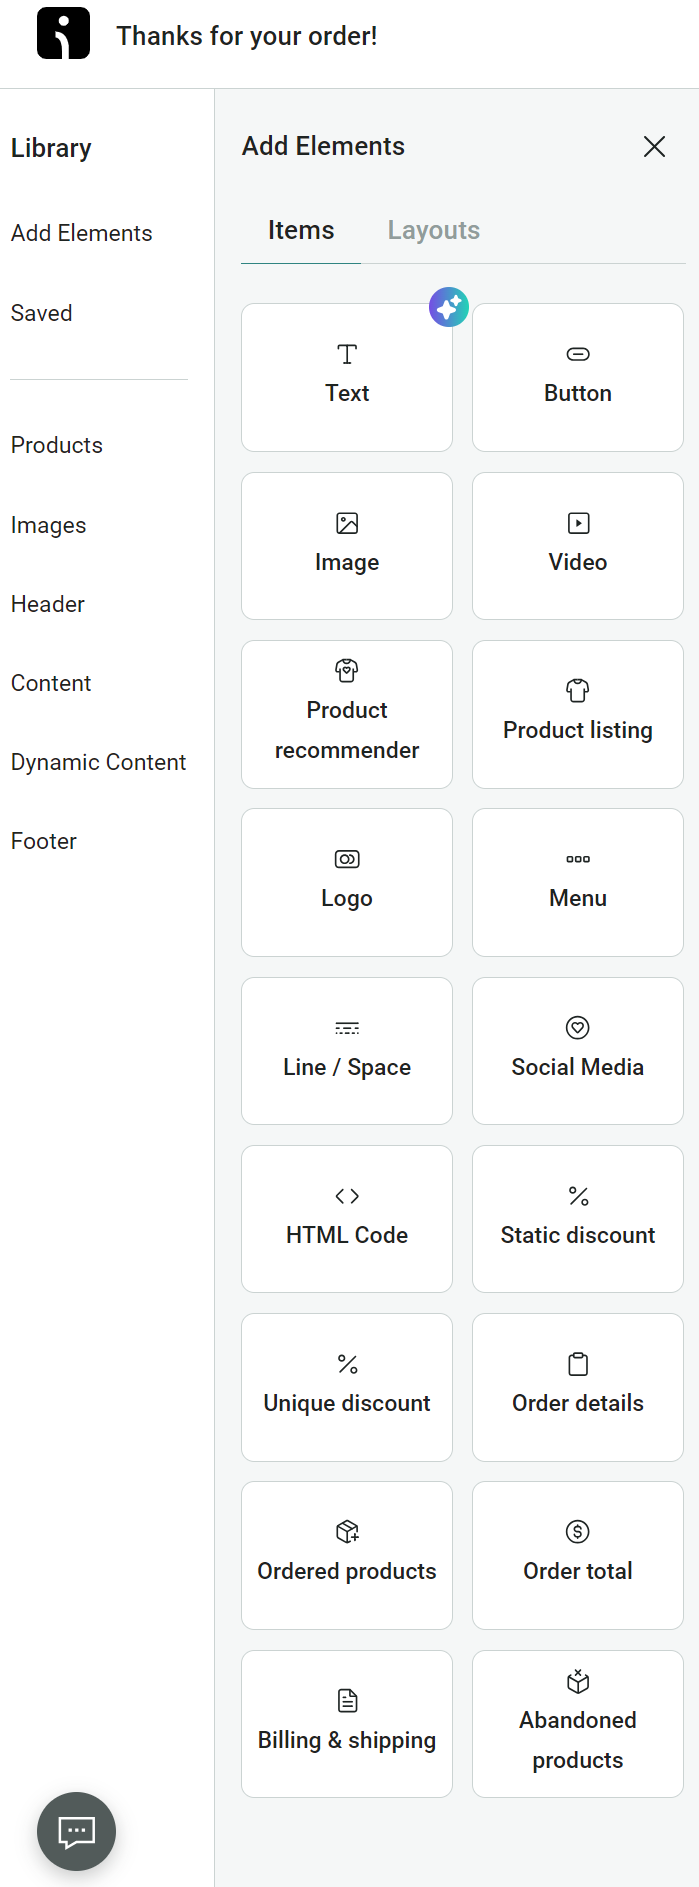
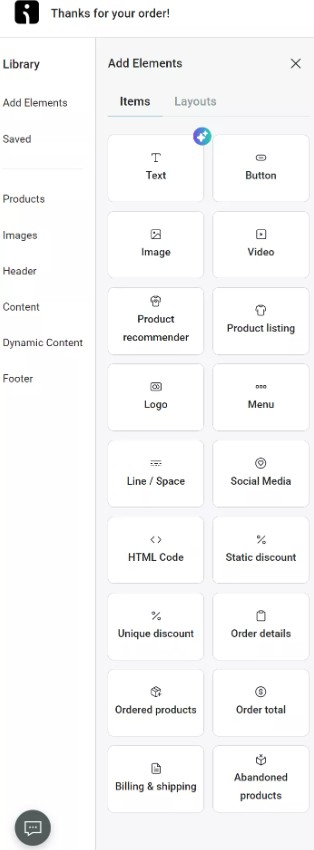
You can customize the look and feel extensively: add your logo at the top, change colors and fonts to match your brand, and modify text as needed. All of this is done with a visual editor – just drag in content blocks or click to edit text/styles. For instance, you might want to add a thank-you message at the top, or a discount code at the bottom for the customer’s next purchase. Simply drag in a text block or coupon block.
A huge advantage of Omnisend is you can easily include product recommendation blocks even in a confirmation email. For example, you could drag in a “Recommended Products” section to showcase items similar to what they purchased (great for upsells). This is something not possible with WooCommerce’s default email without custom coding.
While editing, you can see a live preview of exactly what the email will look like. You can also click “Send test email” at any time to send a test copy to yourself to verify formatting and deliverability.
Once you’re happy with the design, click “Finish editing” to save your changes and return to the workflow view.
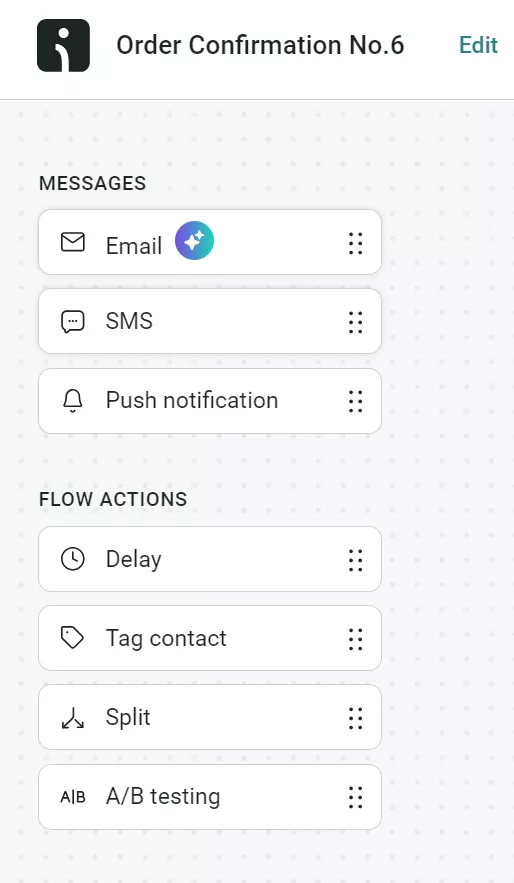
Here’s an image showing what you can add to your WooCommerce order confirmation flow:
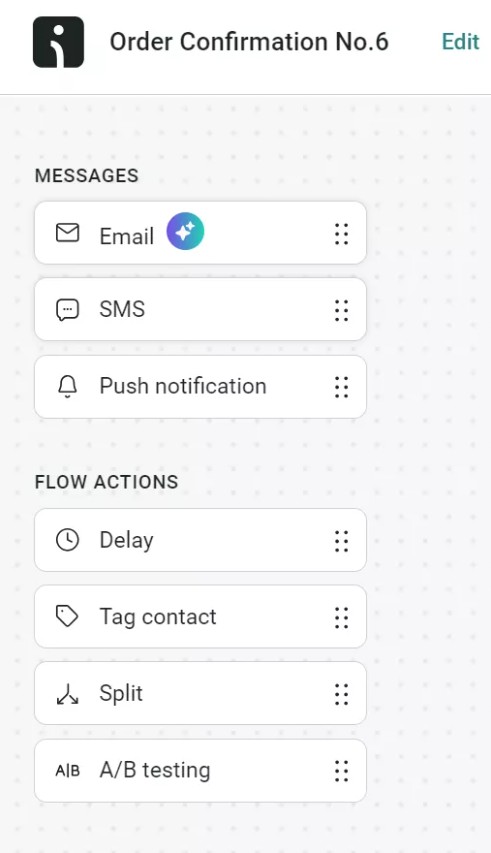
One of the powerful things about Omnisend’s workflows is that you’re not limited to just sending an email. You can enhance the Order Confirmation automation with additional elements if needed. For example:
These enhancements are optional, but they can turn a simple confirmation into a more robust retention workflow. For instance, adding a small delay and a second email that goes out when the order is delivered (“Hope you’re enjoying your purchase! Review it here for 10% off your next order.”) can boost engagement and repeat sales.
Once you have Omnisend handling your order confirmation, you don’t want WooCommerce sending a duplicate email. To avoid confusing customers, go back to your WordPress admin > WooCommerce → Settings → Emails. Find Processing order (the same one we enabled earlier) and click Manage.
This time, uncheck the “Enable this email notification” box and save changes. This turns off WooCommerce’s version of the email.
If you set up Omnisend workflows for other types of notifications (like shipping confirmations or refunds), you would disable those corresponding WooCommerce emails too. For now, you can at least turn off the order confirmation so that Omnisend’s email is the only one customers receive for order placement.
By doing this, you’re ensuring that Omnisend’s infrastructure handles all order confirmation emails, which means better deliverability and a more polished experience for your shoppers (no more plain default emails).
Time to test the Omnisend automation. Place a new test order on your WooCommerce store (you can use a real order or a staging site).
Verify that the Omnisend workflow triggers correctly – you should see the order appear in Omnisend’s automation logs and the email should arrive in the customer inbox (since you might be using a test email of yours, check that inbox).
Check the email on both desktop and mobile to ensure the design is responsive and looks as expected. Omnisend’s templates are mobile-friendly, but it’s always good to double-check images, text alignment, and other elements on a phone screen.
Monitor for any issues on the first day. Omnisend provides reports for automations, so you can see if the email was sent and delivered. Down the line, you can also track open and click rates for this confirmation email in Omnisend’s reporting dashboard. This is a big improvement over WooCommerce’s zero analytics.
Finally, go live with the workflow by making sure it’s enabled (Omnisend usually prompts you to activate it). From now on, every customer order will receive the shiny new confirmation email from Omnisend.
If you want to see Omnisend’s order confirmation workflow in action, check out our video walkthrough. And for broader tips, below you might find our guides on transactional emails best practices and post-purchase email strategies helpful in making the most of these messages.
WooCommerce includes 11 default email notifications covering order management, customer communication, and account activity. You can find all of them under WooCommerce → Settings → Emails in your dashboard.
Here’s a screenshot of all the default emails in WooCommerce:
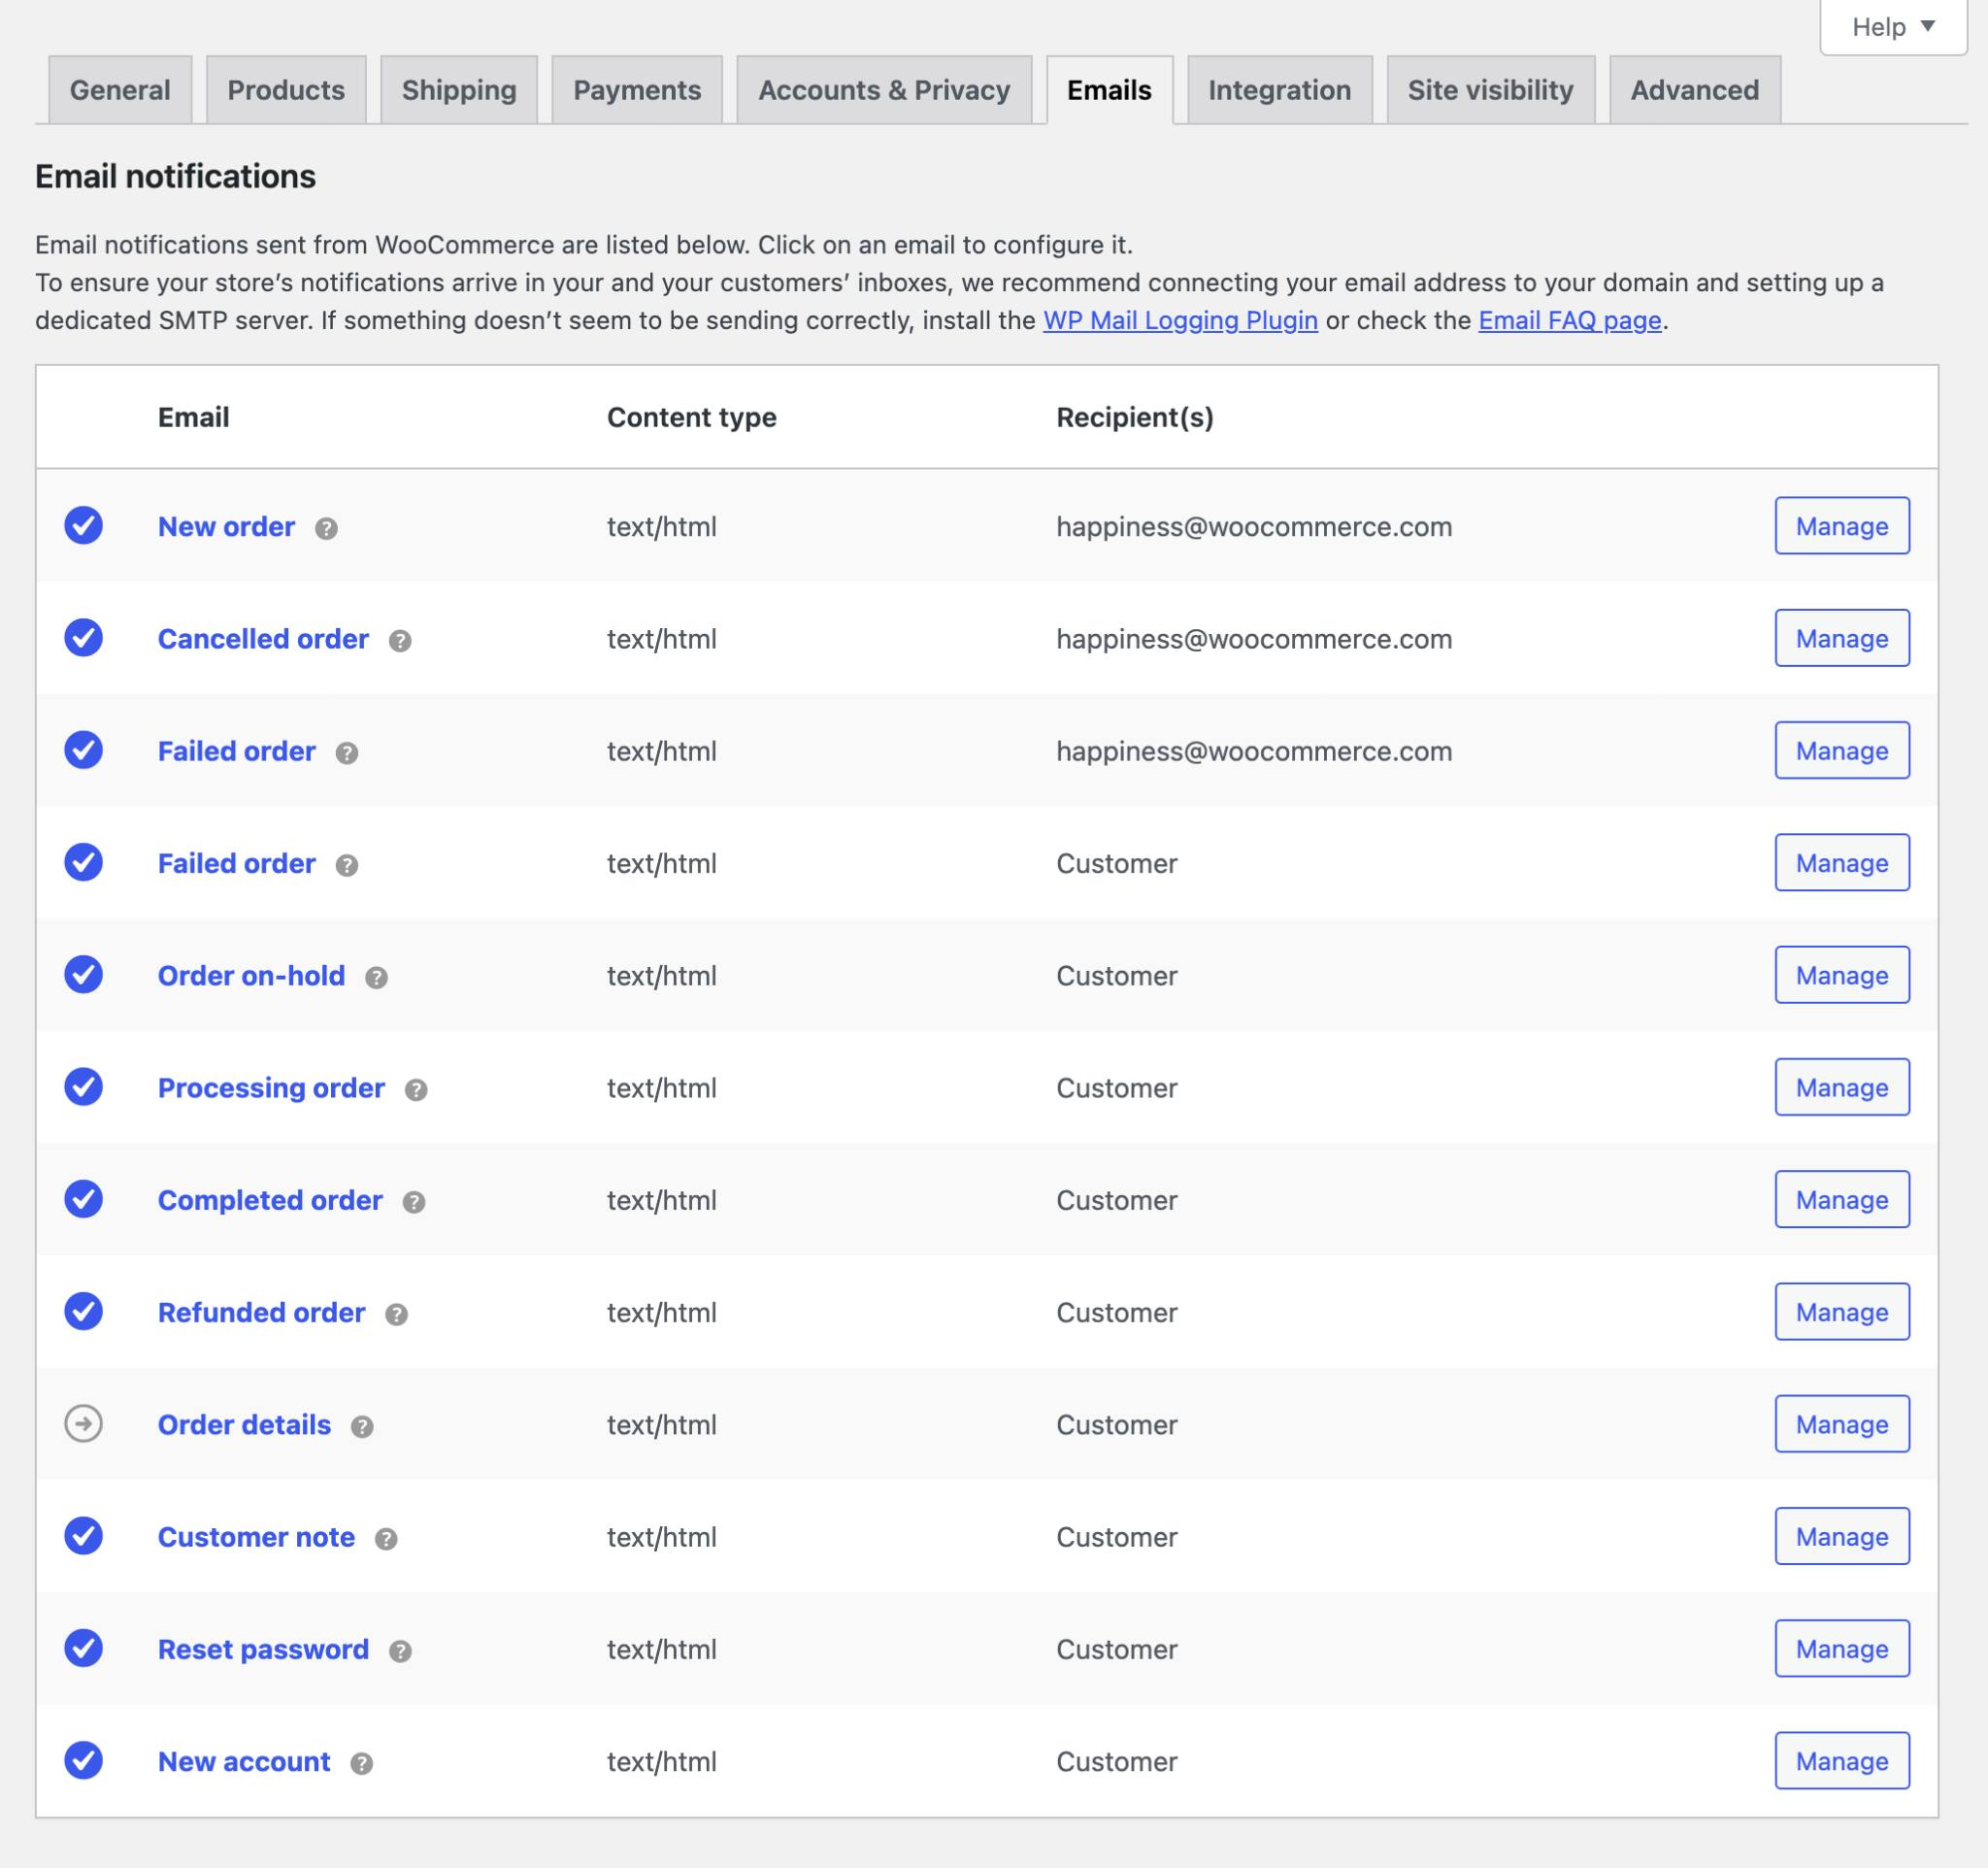
This is how the default email types in WooCommerce compare.
| Email type | Trigger | Recipient | Default enabled? | Customizable in native WC? |
|---|---|---|---|---|
| New order | New order placed | Admin | Yes | Yes (Full) |
| Cancelled order | Order cancelled after processing | Admin | Yes | Yes (Full) |
| Failed order | Payment or order fails | Admin and customer | Yes | Yes (Full) |
| Order on-hold | Payment pending or manual review | Customer | Yes | Yes (Full) |
| Processing order | Payment received, order processing | Customer | Yes | Yes (Full) |
| Completed order | Order marked fulfilled (shipped) | Customer | Yes | Yes (Full) |
| Refunded order | Full or partial refund issued | Customer | Yes | Yes (Full) |
| Customer invoice/order details | Sent manually from order actions | Customer | Yes | Yes (Full) |
| Customer note | Store owner adds a customer note | Customer | Yes | Yes (Full) |
| Reset password | Customer requests password reset | Customer | Yes | Partial |
| New account | New customer account created | Customer | Yes | Partial |
Alerts you when orders arrive. Shows customer info, items, and payment details. Enable under New order settings — add multiple admin emails separated by commas for team notifications.
Notifies about cancellations after processing starts. Perfect for stopping shipments quickly. It uses the same setup as new orders — just verify your recipient list includes fulfillment staff.
Two emails — diagnostic details for you, and a payment retry link for customers. The customer email can include a link back to checkout, and you can customize it to sound helpful.
Explains payment delays to anxious customers, triggering automatically for bank transfers or manual reviews. Edit the template to include your typical verification timeframe and reduce support questions.
This is the main order confirmation email sent after successful payment. It reassures customers that the order was received and is being prepared. Many merchants choose to customize or replace this email because it is often the highest-engagement post-purchase message.
💡Omnisend’s WooCommerce integration can replace or supplement this email entirely. Use it to get a fully branded, automated workflow that includes dynamic order details, product recommendations, and professional design.
Often referred to as the WooCommerce “Order Completed” email (or the WooCommerce completed order email). It’s sent when an order is fulfilled and marked Completed.
Many stores use this email as a shipping or fulfillment confirmation. Including tracking information and delivery expectations can reduce “Where is my order?” support requests. You can add a tracking number via a plugin or the built-in WooCommerce Shipment Tracking.
Processing vs Completed order: What’s the difference? The Processing Order email is the primary WooCommerce order confirmation email. It’s sent after payment is received and confirms the order is being prepared. The Completed Order email is sent later, when the order has been fulfilled or shipped. Think of Processing as the purchase confirmation and Completed as the fulfillment confirmation.
Separate templates for full and partial refunds. They trigger automatically when you issue refunds. Customize both to specify when customers should see funds in their account.
This email isn’t automatic on order events — it’s something you can trigger manually. For example, if customers need to pay for orders you created in the admin, send them Customer Invoices with payment links.
It’s also used to send order details to the customer on demand. In the order admin screen, you choose “Email invoice” from the actions and WooCommerce sends it. Make sure to enable the payment link option if you want it to include a one-click payment for unpaid orders.
Your Swiss Army knife for updates. Add any Note to customer on orders to trigger personalized emails — shipping delays, thank-you messages, special instructions, anything goes.
Security email for password recovery. Customers trigger it from the login page. Can’t customize much here — WooCommerce prioritizes security over branding for password resets.
Welcome email for fresh registrations. Includes login details and account page link. Customize this heavily — first impressions matter. Add welcome discounts or setup guides here.
Each of these emails can be toggled on/off and have their basic text customized in WooCommerce’s settings. However, redesigning layouts or adding complex logic (like showing different content based on products purchased) quickly runs into native limitations.
That’s when you either resort to custom coding the templates or using a platform like Omnisend to create advanced email workflows. For example, you could use Omnisend to handle order confirmations, send follow-ups after order completion, or automate win-back campaigns.
At a minimum, a WooCommerce order confirmation email should confirm the purchase, answer common post-purchase questions, and reassure customers that their order is on track.
Here’s a checklist covering what to include:
The goal is that after reading the email, the customer feels informed and confident. They should know what they bought, how much they paid, when it’s coming, and that you’re grateful for their business. Anything that a customer might email you to ask – try to have the answer in the confirmation email. This reduces support load and increases customer satisfaction.
Tools like Omnisend make it easy to add all of these elements with a drag-and-drop builder, so you can create professional emails without coding. As a bonus, a well-designed, friendly email leaves a positive impression of your brand.
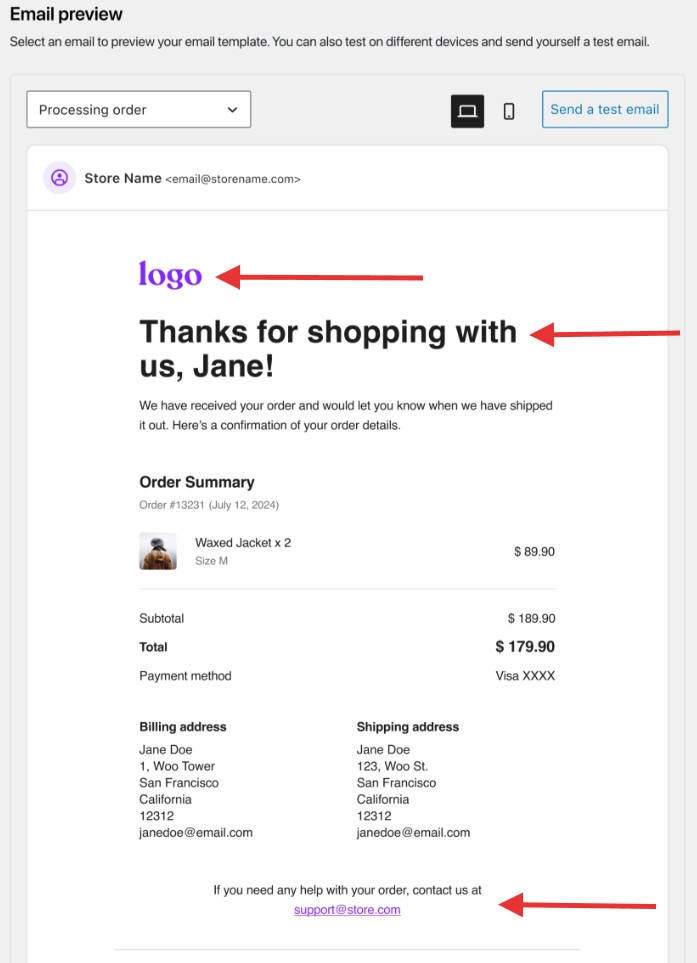
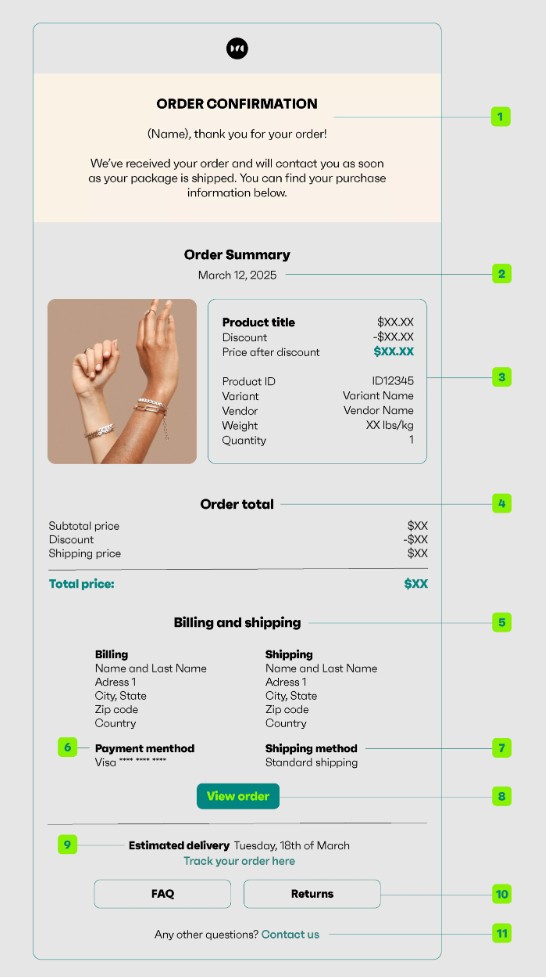
Illustration: An example of a WooCommerce order confirmation email template with key elements labeled. Notice the personalized greeting, clear order details and pricing, shipping information and address, a prominent call-to-action button to view the order, FAQ and Returns buttons and customer service contacts. By covering these elements, your confirmation email will preempt common customer questions and reinforce trust.
As WordPress expert, entrepreneur, and “Tutor on YouTube” Ferdy Korpershoek notes, WooCommerce’s default confirmation emails “do not look that good” and are hard to adjust. That’s why tools like Omnisend are essential to create professional, customer-friendly designs.
Expert quote from Ferdy Korpershoek
“By default, the WooCommerce confirmation emails do not look that good, and it seems hard to adjust the content in those emails… When people buy a product through your WooCommerce shop, you want to send them a confirmation email that looks good. Not a boring purple email with a few standard sentences.”
Writing an order confirmation email from scratch can be daunting, so it’s helpful to start from a template. Below are a few order confirmation email templates that you can adapt for your own WooCommerce store.
Each WooCommerce order confirmation email template has a different style or purpose, and you can tweak the wording to fit your brand voice. To use any, copy the text and paste it into your WooCommerce email settings (or Omnisend email editor), then adjust placeholders and details as needed.
Pro tip: Send yourself a test message to check that everything displays correctly before making your order confirmation email live.
Subject: Order #[order_number] Confirmed
Hi [customer_first_name],
Thank you for your purchase. We’re processing your order now and will email tracking details when it ships.
Order summary:
— Order #[order_number]
— Date: [order_date]
— Total: [order_total]
Delivering to: [shipping_address]
Reply to this email with any questions.
[store_name]
Subject: [customer_first_name], your [store_name] gear is on the way!
Excellent choice on the [product_name], [customer_first_name].
Order #[order_number] made it through to our fulfillment center. We’ll dispatch the same day if you ordered before 2 PM.
You spent [order_total] and chose [shipping_method] delivery, which typically takes [delivery_estimate].
Chat soon, [employee_name] and the [store_name] crew
P.S. Follow us @[social_handle] for sneak peeks at new arrivals
Here’s an example of a branded order confirmation email.

Subject: ✓ Success! Plus a surprise from [store_name]
[customer_first_name] —
Perfect timing. Your [order_total] purchase just synced with our inventory system.
[order_details_table]
Now here’s something cool — because you bought [product_category], you have access to our VIP collection. Use code INSIDER15 to save 15% on these curated picks:
— [recommended_product_1]
— [recommended_product_2]
— [recommended_product_3]
No rush — the code works for 30 days.
Thanks for trusting us with your business.
[founder_name] Founder, [store_name]
Subject: [store_name] Receipt #[order_number]
[order_details_table]
View: [order_status_link]
[store_name]
Thank you for your order. We’ll send shipping details soon.
Want to use these templates inside a fully automated WooCommerce workflow? Omnisend’s drag-and-drop builder lets you implement any of these designs with personalization, A/B testing, and analytics — no developer needed.
Missing order emails frustrate customers and flood your support inbox. If your WooCommerce confirmation email isn’t sending, here’s a quick checklist to run through first:
Note: If you’re using the Email Verification for WooCommerce plugin, ensure you’re running version 3.2.4 or newer. Older versions, like 2.8.10 and earlier, were affected by a reported SQL injection vulnerability. While this has been fully patched, it’s a good reason to always keep the plugin updated.
7. Dark mode rendering issues: Most email opens now happen on mobile, making dark mode optimization increasingly important. If your confirmation email uses hardcoded dark text on white backgrounds, it can become unreadable when a device inverts colors. Ensure your email design inherits colors correctly in dark mode, especially text, buttons, and form fields, to maintain contrast and legibility.
Perhaps you’ve gone through all the above and the order confirmation email still isn’t sending. The best solution is usually to stop relying on PHP mail and switch to a more reliable method.
Solution: Configure SMTP or use a dedicated email service. WooCommerce’s documentation and many experts strongly recommend using an SMTP plugin to send emails. Plugins like WP Mail SMTP can be set up to route your store’s emails through a proper SMTP server (Gmail, Outlook, SendGrid, and others — many options, some free). This bypasses the host’s PHP mail and dramatically improves deliverability.
Alternatively, use a service like Omnisend (or other transactional email services such as Mailgun, SendGrid, Amazon SES). This ensures emails are sent via servers designed for high deliverability. These services handle the technical bits like authentication and reputation, so your emails have a much better chance of reaching the inbox.
Once SMTP is set up, test again by placing an order. In most cases, this resolves the issue. And remember, if you use Omnisend’s workflow for order confirmations, those emails will be sent through Omnisend’s system. This already optimizes deliverability, often making these issues a thing of the past.
WooCommerce confirmation emails are more than just receipts. They’re an opportunity to build customer trust and enhance the post-purchase experience. These emails provide clear information (like tracking links and order details), match the email design and sender details to your brand, and proactively fix delivery issues. In short, they help turn a simple notification into a standout customer service moment. They also matter more than many merchants think: they set the tone for the customer’s entire fulfillment experience.
The default order confirmation email in WooCommerce “works” in a bare-bones way. However, leveraging tools like Omnisend can transform it into a professional, high-converting message. With visual builders, automation workflows, and multi-channel messaging, you can deliver the polished, engaging experience customers expect. You don’t even have to worry about technical limitations or deliverability glitches. In short, WooCommerce gives you the basics, but Omnisend helps you level up.
Quick sign up | No credit card required
A WooCommerce order confirmation email is an automated message sent after a customer places an order. It confirms payment, shares order details, and reassures buyers that the purchase was successful. WooCommerce calls it a “Processing order” email.
Yes, WooCommerce automatically sends transactional emails after certain order actions. The default setup includes processing order and completed order emails.
However, you can customize your WooCommerce confirmation email using plugins or marketing platforms like Omnisend. This gives you access to better branding and automation features.
To send an order confirmation email in WooCommerce, go to Settings → Emails. Click Manage next to “Processing order” and check “Enable this email notification.” WooCommerce will then send the message automatically after checkout.
To customize your WooCommerce order confirmation email template, go to WooCommerce → Settings → Emails. Click the Manage button for “Processing order” to edit the header, footer, colors and content.
For deeper changes to WooCommerce email templates, edit PHP files or use plugins. Tools like Omnisend’s no-code drag-and-drop email builder offer full design control, including branded layouts and product blocks.
To manually resend a WooCommerce order confirmation email:
This process resends the confirmation to the customer’s email address on file.
Since WooCommerce doesn’t include built-in email verification, you can add this feature through plugins or email marketing platforms.
Enabling double opt-in via Omnisend, for example, ensures customers confirm their address before receiving emails. This reduces fake accounts and improves both list quality and delivery rates.
Common reasons include spam filters, a misconfigured SMTP setup, or a conflict with your hosting provider. To fix this, install an SMTP plugin like WP Mail SMTP and authenticate your sending domain.
Alternatively, use a reliable email marketing platform like Omnisend or Mailchimp if wary of plugin conflicts. Also, check WooCommerce → Settings → Emails to confirm the Processing Order email is enabled.
A WooCommerce confirmation email should include the customer’s order summary:
You can also add a thank-you message, product recommendations, or a subtle next-purchase offer to drive repeat sales.
Yes. A WooCommerce Mailchimp order confirmation email setup is straightforward and effective for basic marketing needs. Meanwhile, Klaviyo leans more toward advanced segmentation and data‑driven campaigns for larger stores.
But Omnisend offers deeper ecommerce automation through its native WooCommerce integration. You get robust AI features, faster and intuitive setup, and 24/7 support. There’s also a very generous free plan.
TABLE OF CONTENTS
TABLE OF CONTENTS
What’s next


No fluff, no spam, no corporate filler. Just a friendly letter, twice a month.