Omnisend AI

 OFFER
OFFER








The potential for downtime and data loss is a worry when switching your email service provider (ESP), but migrating from Klaviyo to Omnisend is straightforward.
Omnisend has a built-in tool that migrates contacts, opt-in status, tags, and segments. Your Klaviyo account stays live and sending during the switch.
Switching to Omnisend offers up to 35%* cost savings on Standard email plans at comparable contact tiers, plus you can request a free Klaviyo migration service if you have 250 or more contacts. You also get 24/7 live chat support.
Learn the five steps to switch from Klaviyo to Omnisend below.
Quick sign up | No credit card required
Quick email provider pricing comparison
Quickly and easily compare the top email marketing providers so you can find the best platform for your ecommerce store needs.
prices for:
You can compare Omnisend and 2 more providers at once.
- Omnisend
- Klaviyo
- Mailchimp
- Drip
- Moosend
- Active Campaign
- Get Response GetResponse
- MailerLite
You can compare Omnisend and 2 more providers at once.
Select at least one provider.
Try out the full version of this calculator
Step 1: How to prepare for Klaviyo to Omnisend migration
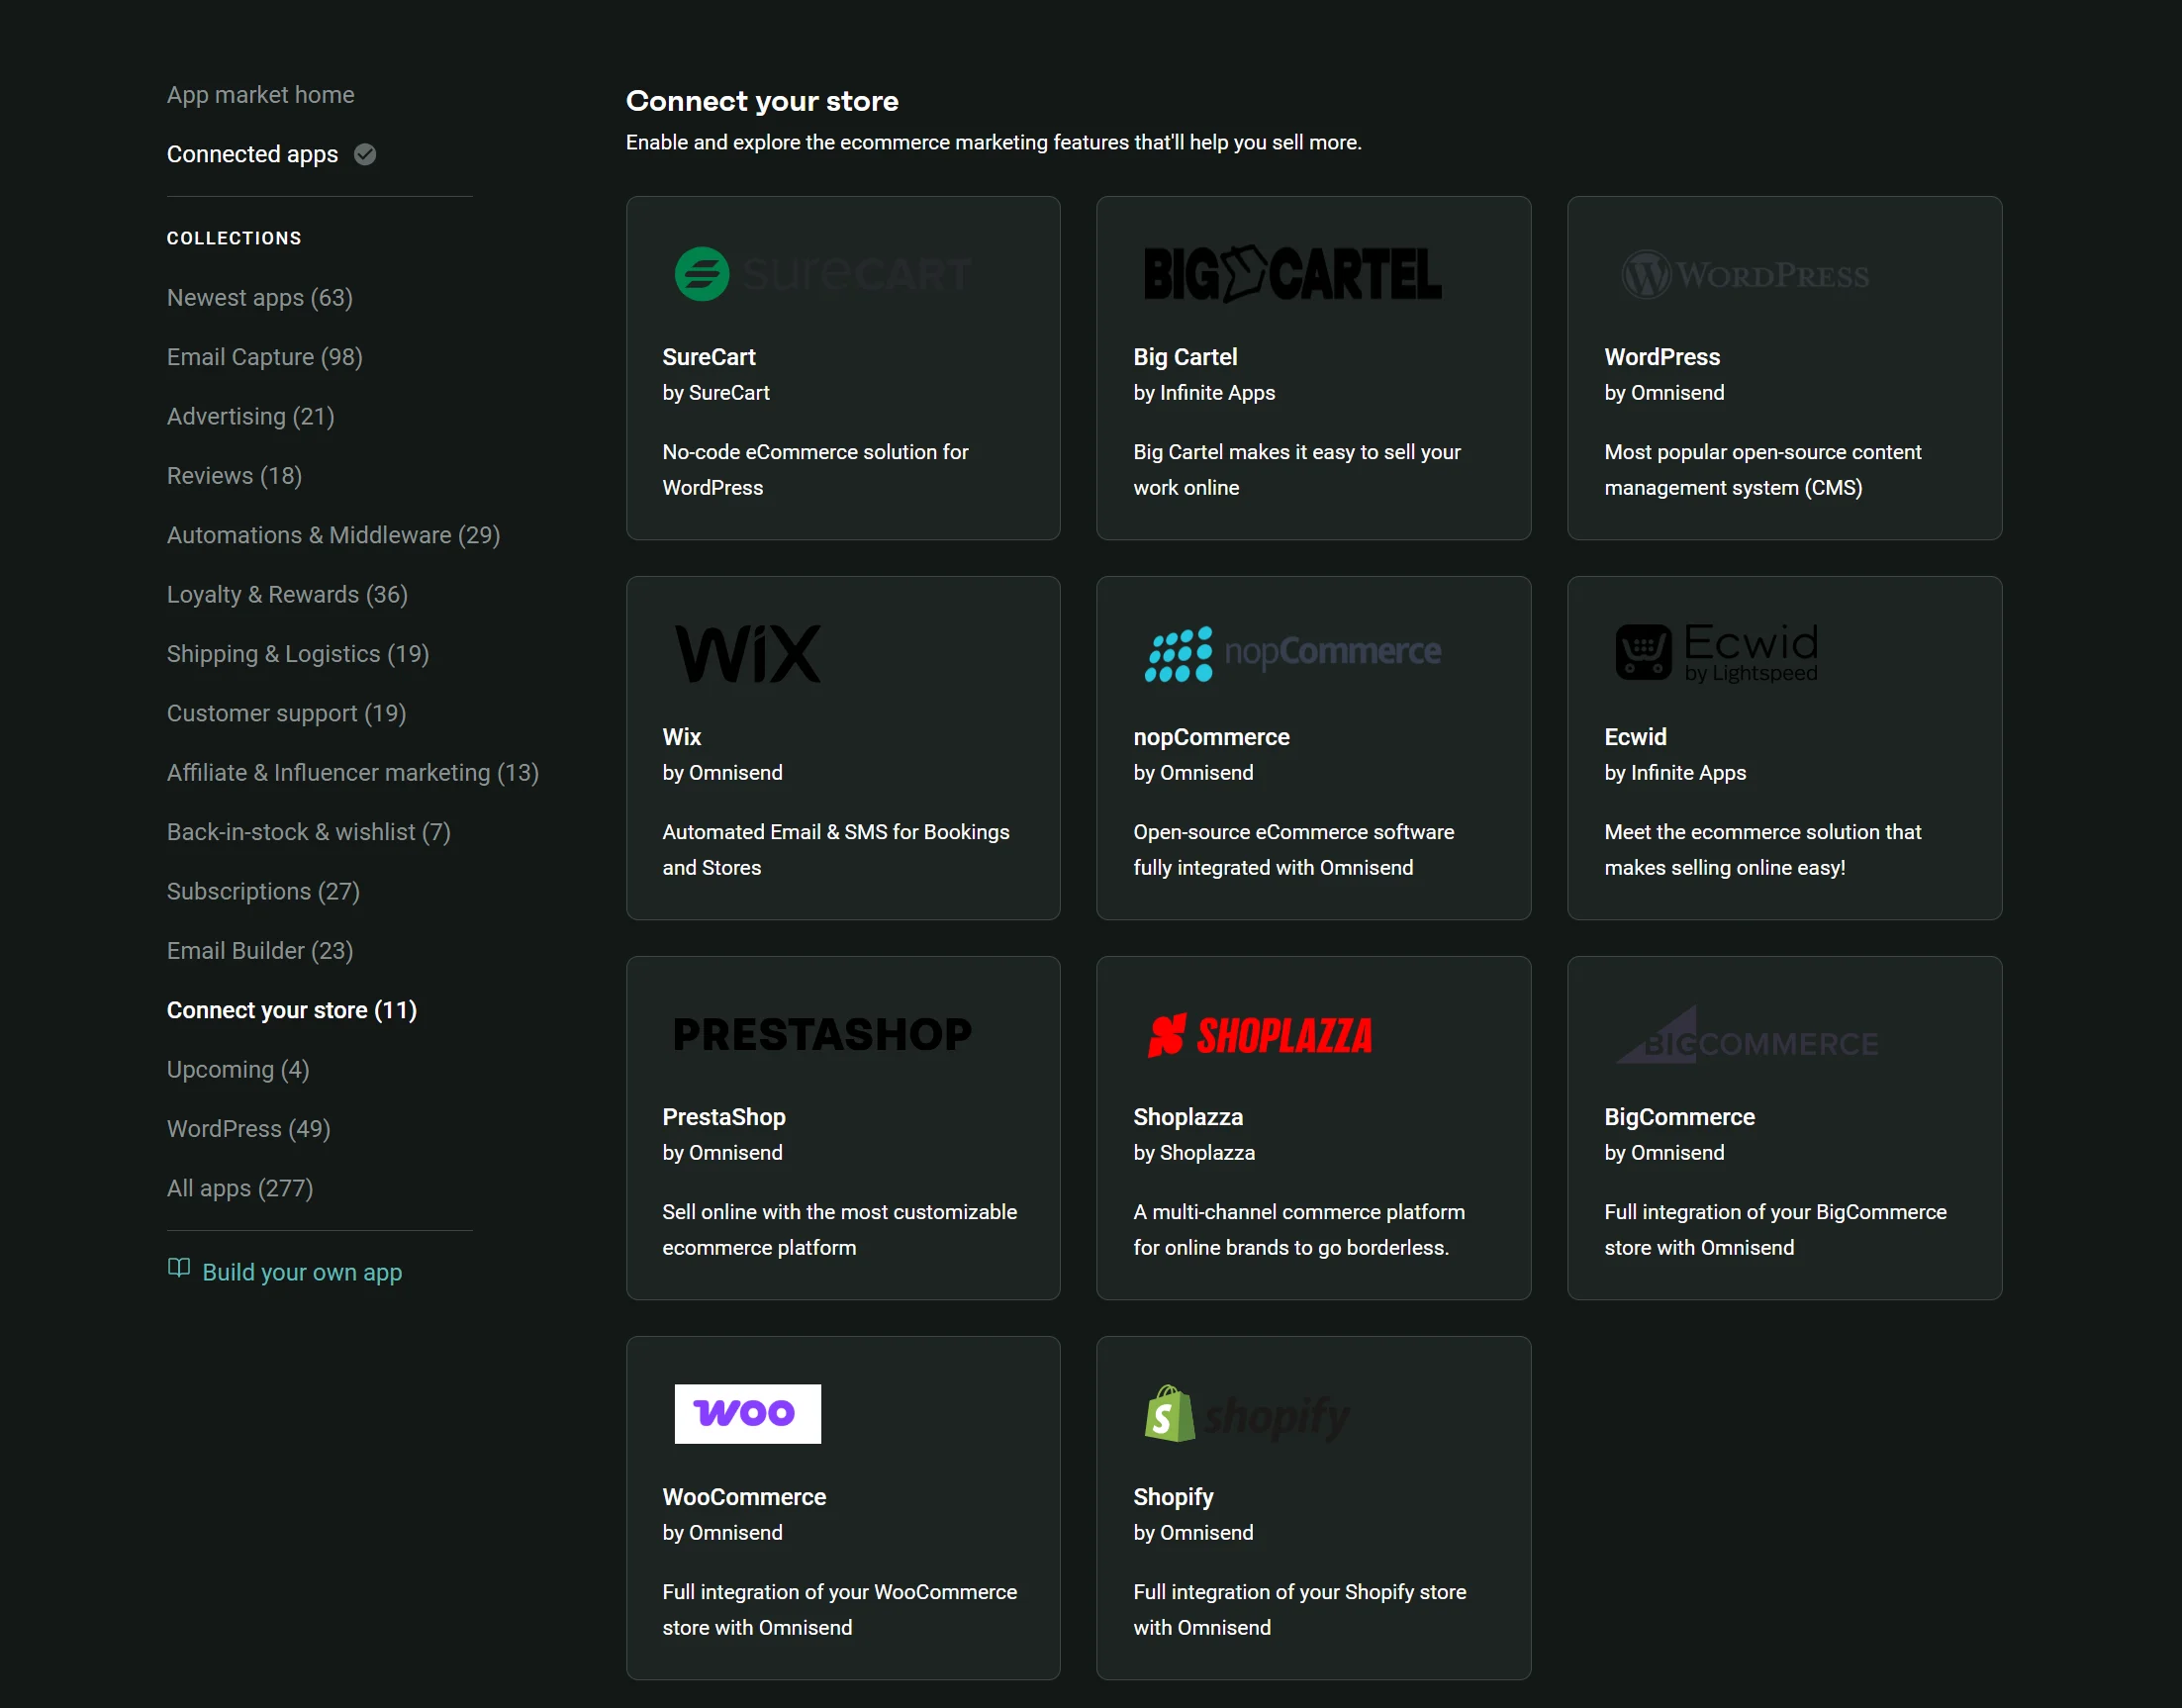
First, connect your store to Omnisend using a native app for Shopify, WooCommerce, BigCommerce, or whichever platform you’re on. Connecting to Omnisend syncs your store-held data and lets you build forms and workflows.
You can find the Omnisend app in your ecommerce app marketplace or by clicking Apps in the Omnisend top menu and navigating the App Market:
Keep your Klaviyo account active during the switch. An active account is needed to generate a private API key that connects to Omnisend’s Klaviyo Data Import Tool and to re-sync and catch new data during the migration.
Log in to Klaviyo and export your historical reports, such as for campaigns. Reports don’t sync to Omnisend, and they aren’t recoverable once you close your Klaviyo account.
What must be rebuilt when you migrate from Klaviyo to Omnisend?
The Klaviyo Data Import Tool transfers contact and most segment data over. But the elements you built in Klaviyo, such as workflows, need rebuilding in Omnisend. The table below scopes what does and doesn’t transfer automatically when you switch:
| What transfers automatically | What must be rebuilt | What can't be moved |
|---|---|---|
| Contacts (emails, phone numbers, names) | Automation workflows | Historical reports and stats |
| Custom properties (with klaviyo_ prefix) | Sign-up forms | Campaign opens and clicks |
| Subscription statuses and opt-in/opt-out dates | Email templates | Revenue and performance history |
| Consent records (email and SMS) | Segments that use unsupported filters | Aggregate engagement history |
| Compatible segments (~70%, tagged [OS]) | ||
| Store data: orders, product views, carts |
Prefer a hands-off migration? How Omnisend’s free migration service works
Omnisend offers free expert-assisted migration to customers with 250 or more Klaviyo contacts, regardless of their Omnisend plan.
By default, the Migration team moves:
- Contacts and supported segments
- All live automation workflows
- All live sign-up forms
- Your 10 most recent email templates
You can request more templates, workflows, or forms. Some Klaviyo-specific features or integrations may need adjustments or manual setup in Omnisend.
Migration takes around five business days, counted from when the Migration Team receives access to your Klaviyo account, not from when you send the request. Your Klaviyo account will remain active during the migration, so there won’t be any interruption to your marketing activities.
How to request migration
If you choose Klaviyo as your previous email platform when you sign up for Omnisend, you’ll see the Migration Dashboard during onboarding:
- 250 or more contacts: Request expert-assisted migration from the dashboard
- Fewer than 250 contacts: Omnisend imports your audience data automatically
The Help Center guide covers each step. No Migration Dashboard in your account? Eligible customers can request migration through our Kickstart service instead.
Self-serve migration tools are always available regardless of your Omnisend plan, so if that’s your preferred route to migrate from Klaviyo to Omnisend, continue to step two in our guide.
Step 2: How to import contacts and map properties
You can import contacts and properties into Omnisend using the Klaviyo Data Import Tool, which connects to Klaviyo via a private API key. It syncs contacts in batches of 500 every five seconds; a list of 10,000 finishes in around two minutes.
Get your private API key first:
- Log in to Klaviyo
- Click your account name in the bottom menu item and select Settings
- Click API keys on the General settings page
- Click Create Private API Key
- Name your Private API Key and select Read-Only Key

- Click Create
- Copy your Private API Key and save it somewhere safe; Klaviyo only shows the complete key once after generation
Next, connect to Omnisend’s Klaviyo Data Import Tool:
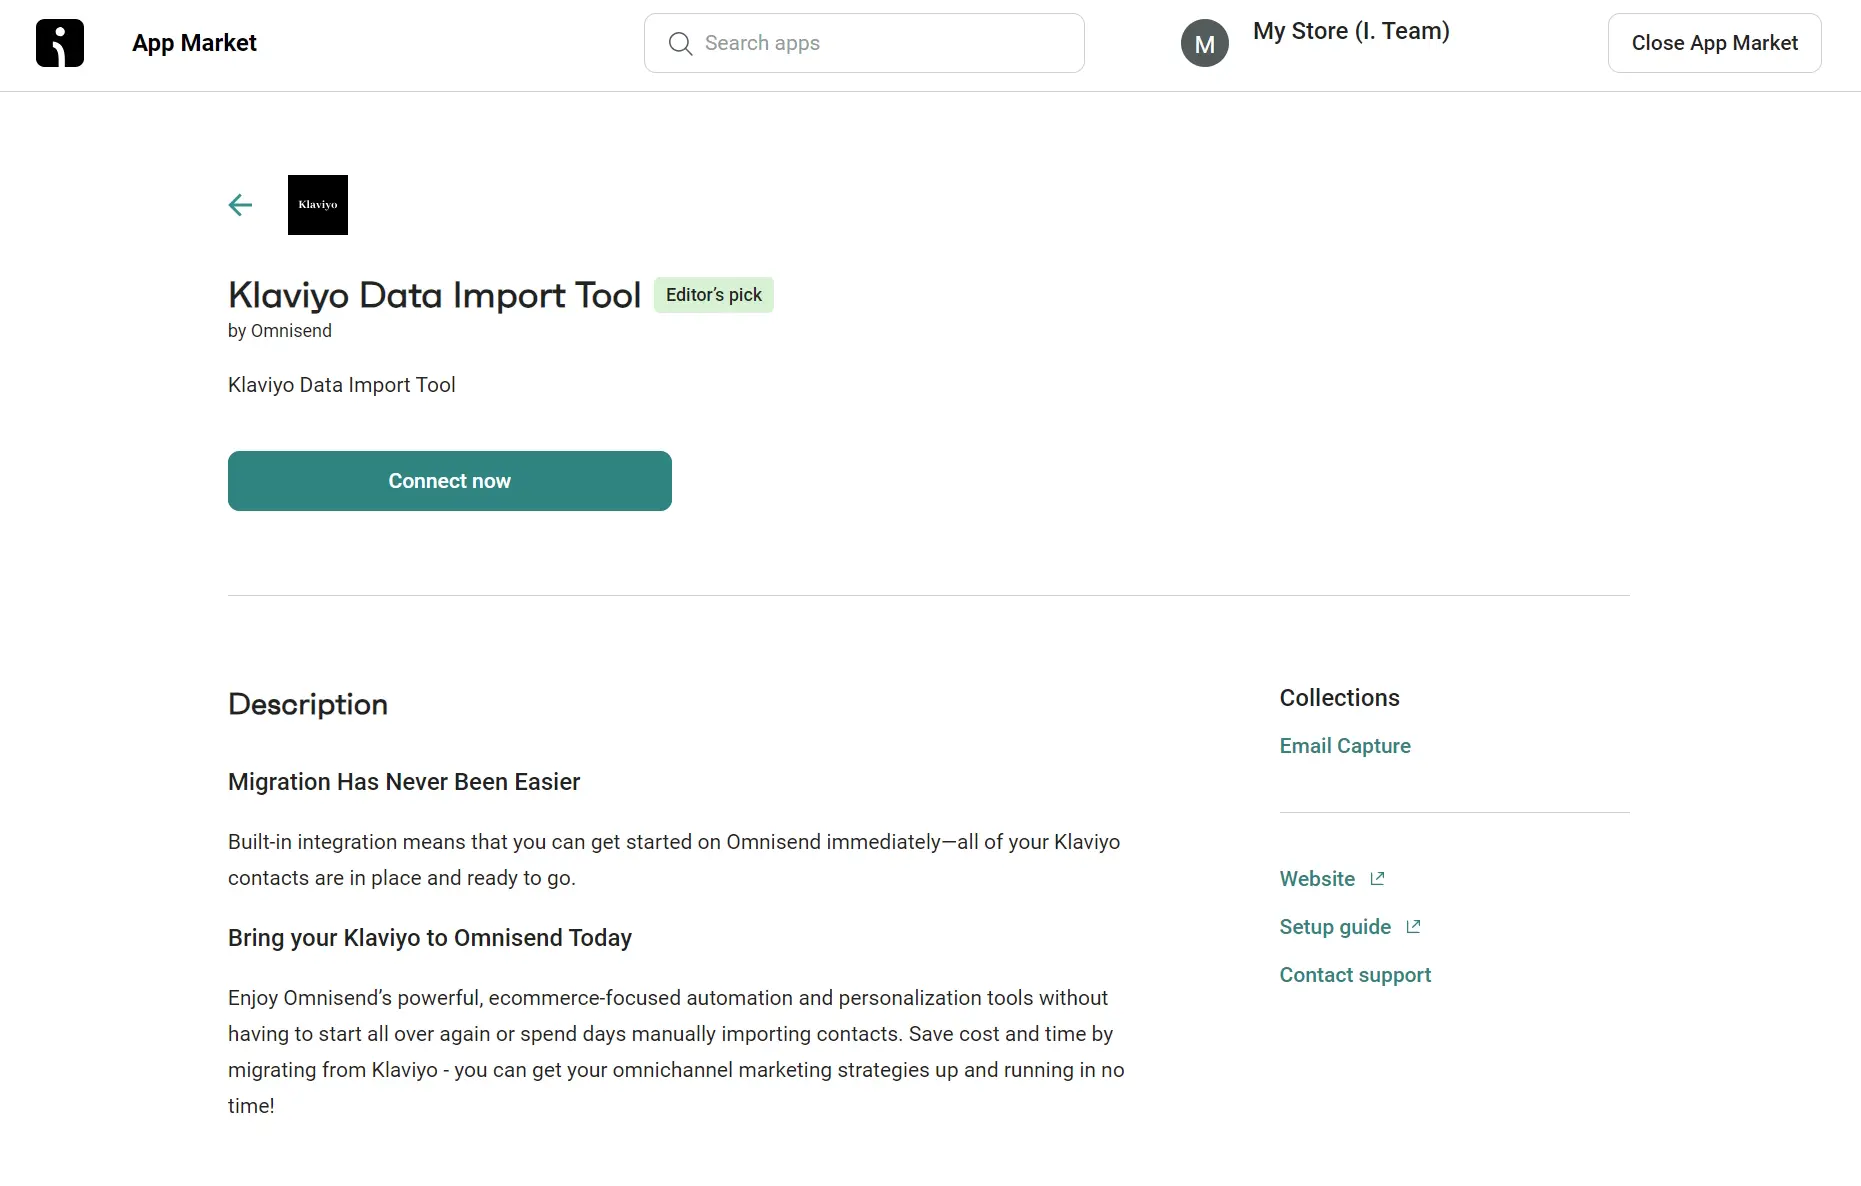
- Log in to Omnisend and click Apps in the top-right corner
- Search for Klaviyo Data Import Tool and select the dropdown result
- Click Connect now
- Add the Private API Key that you generated in your Klaviyo account
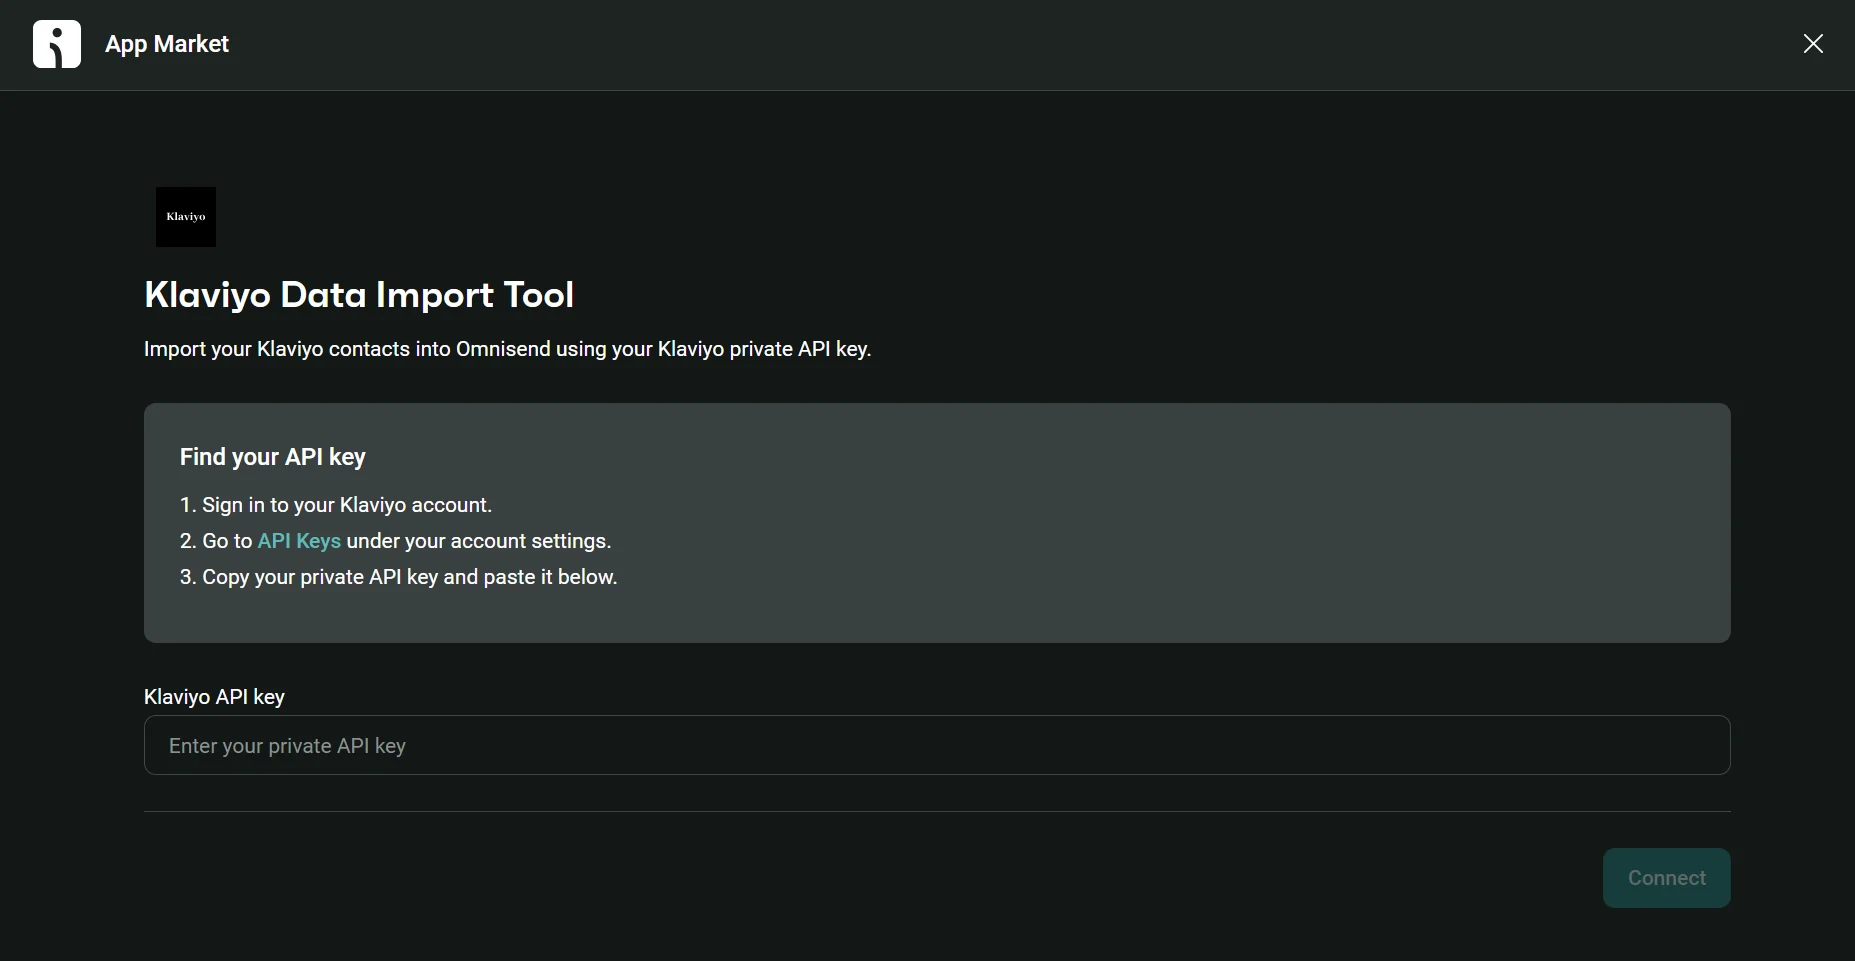
- Click Connect
- Click Sync contacts & segments
Your contacts will now move over to Omnisend, with all imported contacts getting a klaviyo_import_app tag, useful for filtering your migrated contacts.
Email and first name are standard fields that carry over directly. Custom properties have the klaviyo_ prefix to prevent them from clashing with your Omnisend fields. Subscription statuses also arrive with opt-in dates and status.
The sync captures data at that moment and doesn’t auto-sync, so a re-sync is necessary if you’re still sending in Klaviyo while switching.
Step 3: How to migrate and recreate segments
Omnisend’s Klaviyo Data Import Tool moves approximately 70% of your segments with an [OS] prefix in the name. Segments migrate successfully when Omnisend has filters and conditions that are compatible with Klaviyo’s. The other 30% need recreating.
You can see which segments did and didn’t arrive in the Klaviyo Data Import Tool’s Segments Migration table. They have a Migrated or Failed status.

Recreating failed segments is possible by importing contacts into Omnisend and having it build new segments from that imported data.
Here’s how to recreate your segments when you migrate from Klaviyo to Omnisend:
- Log in to Klaviyo and open the segment
- Select Export to CSV and complete the download
- Log in to Omnisend and go to Audience > Imports > Add or update contacts
- Select Import contacts from a file
- Upload your CSV
- Continue to Organize
- Select the Create a segment checkbox
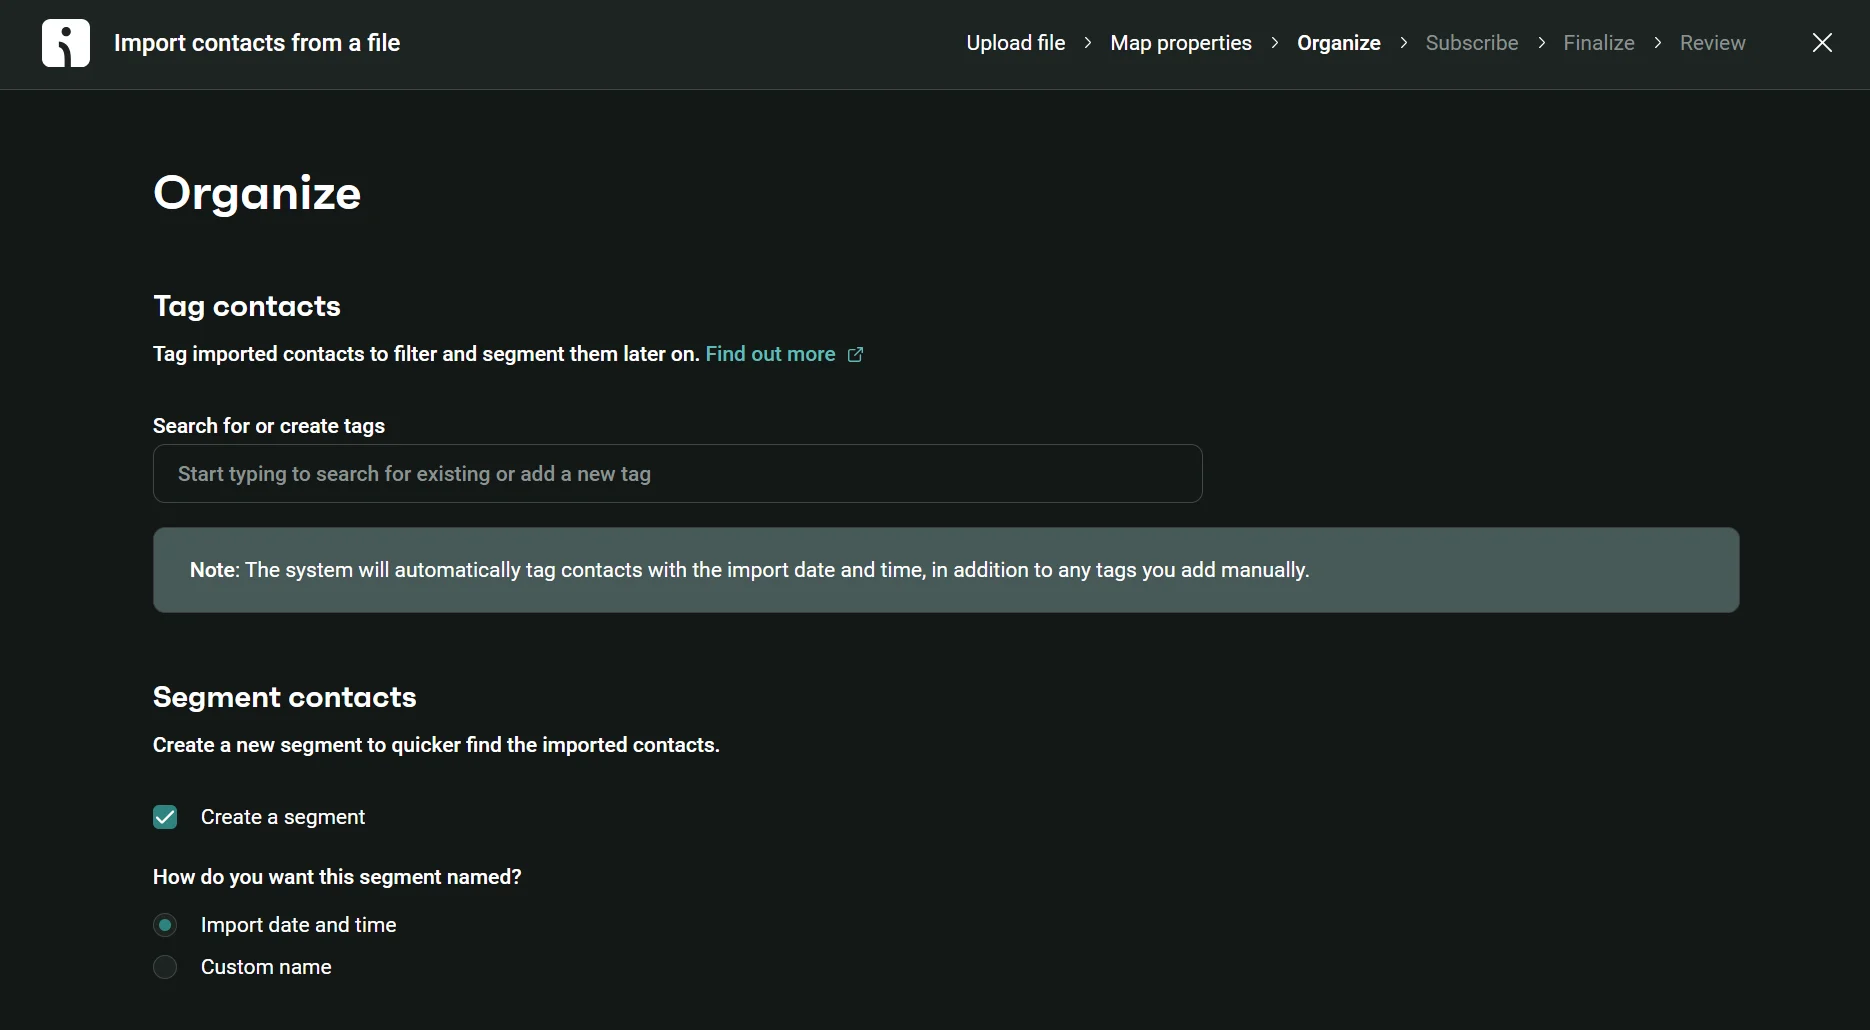
- Select the name type: Import date and time, or Custom name
- Complete the steps until the Review page, then click Finish import
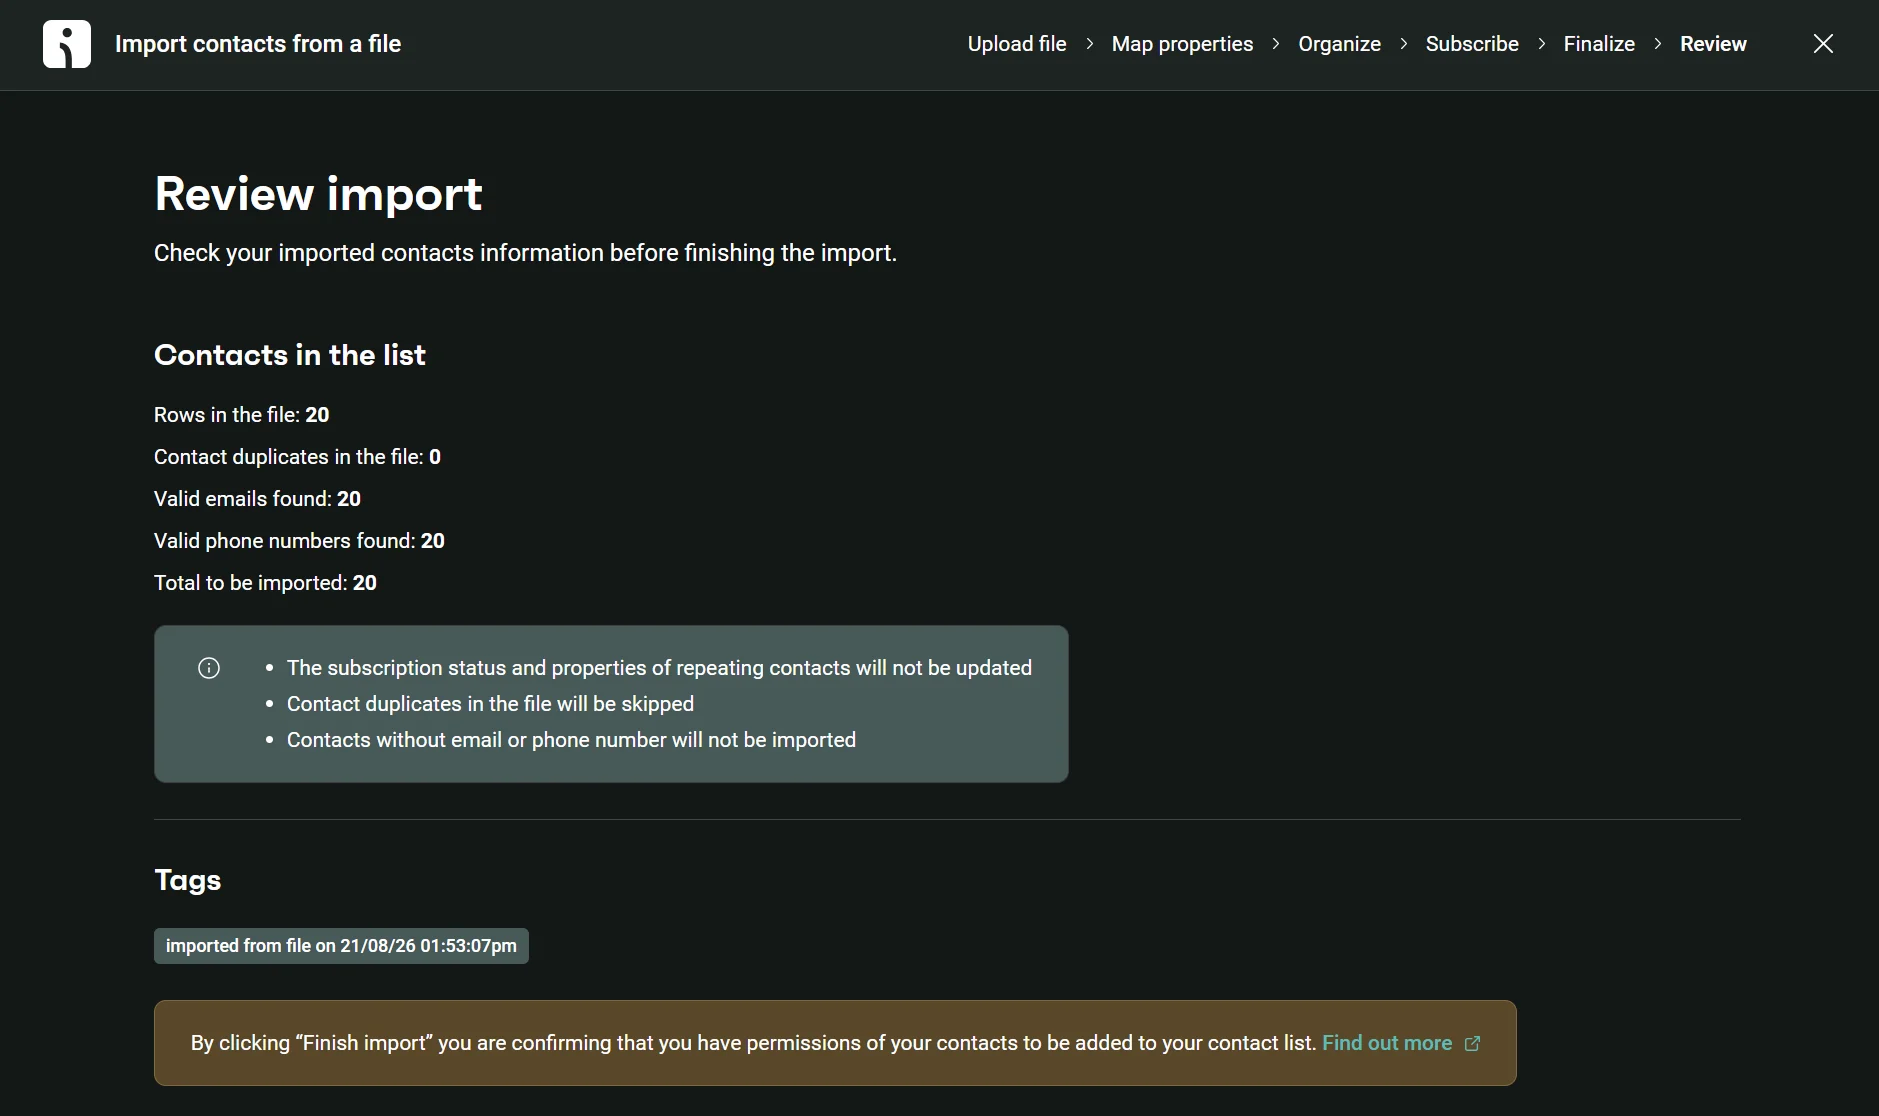
Omnisend will generate a segment using the imported data. You can then head to Audience > Segments and manage your segments further.
Step 4: How to rebuild templates, workflows, and forms
Email templates, workflows, and forms don’t transfer over to Omnisend using the Klaviyo Data Import Tool, so you must rebuild them, if you’re migrating on your own.
Rebuilding workflows
Omnisend has 30 pre-built workflows for email-only and email + SMS automations. The Automation library lets you filter by goal, such as reactivating customers, and type, such as welcome, to narrow down the templates you need.
Alternatively, you can create workflows from scratch. Omnisend’s workflow builder has a trigger element to get you started and uses a drag-and-drop interface.
It’s helpful to open Omnisend’s workflow builder in a new tab alongside the Klaviyo flow builder to recreate the workflow as precisely as possible.
Follow these steps to start rebuilding workflows:
- Select Automation in the menu
- Click + Create workflow
- Select a pre-built template or click Create from scratch
- Edit the workflow in Omnisend’s builder to match your Klaviyo flow
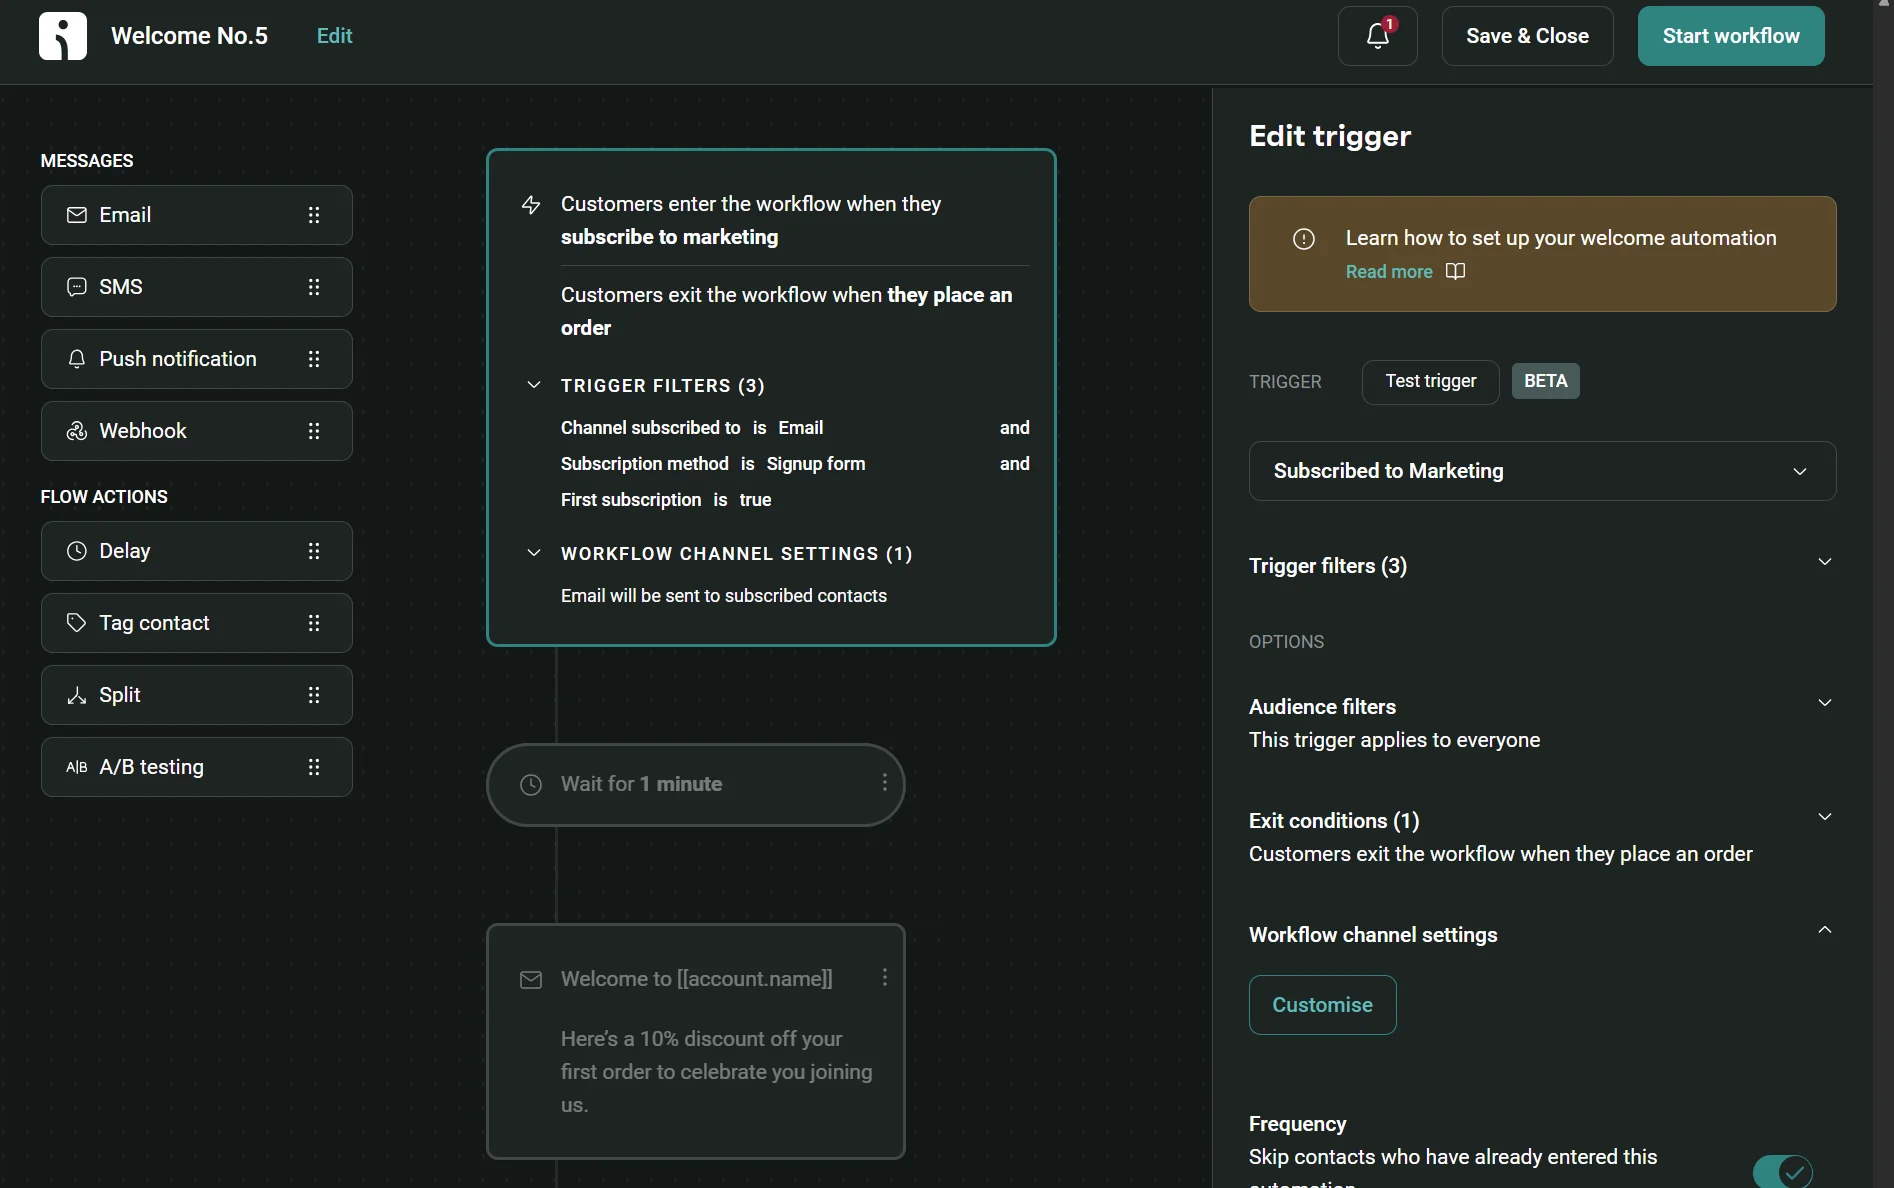
- Click Save & close or Start workflow, depending on what you want to do with it
Rebuilding email templates
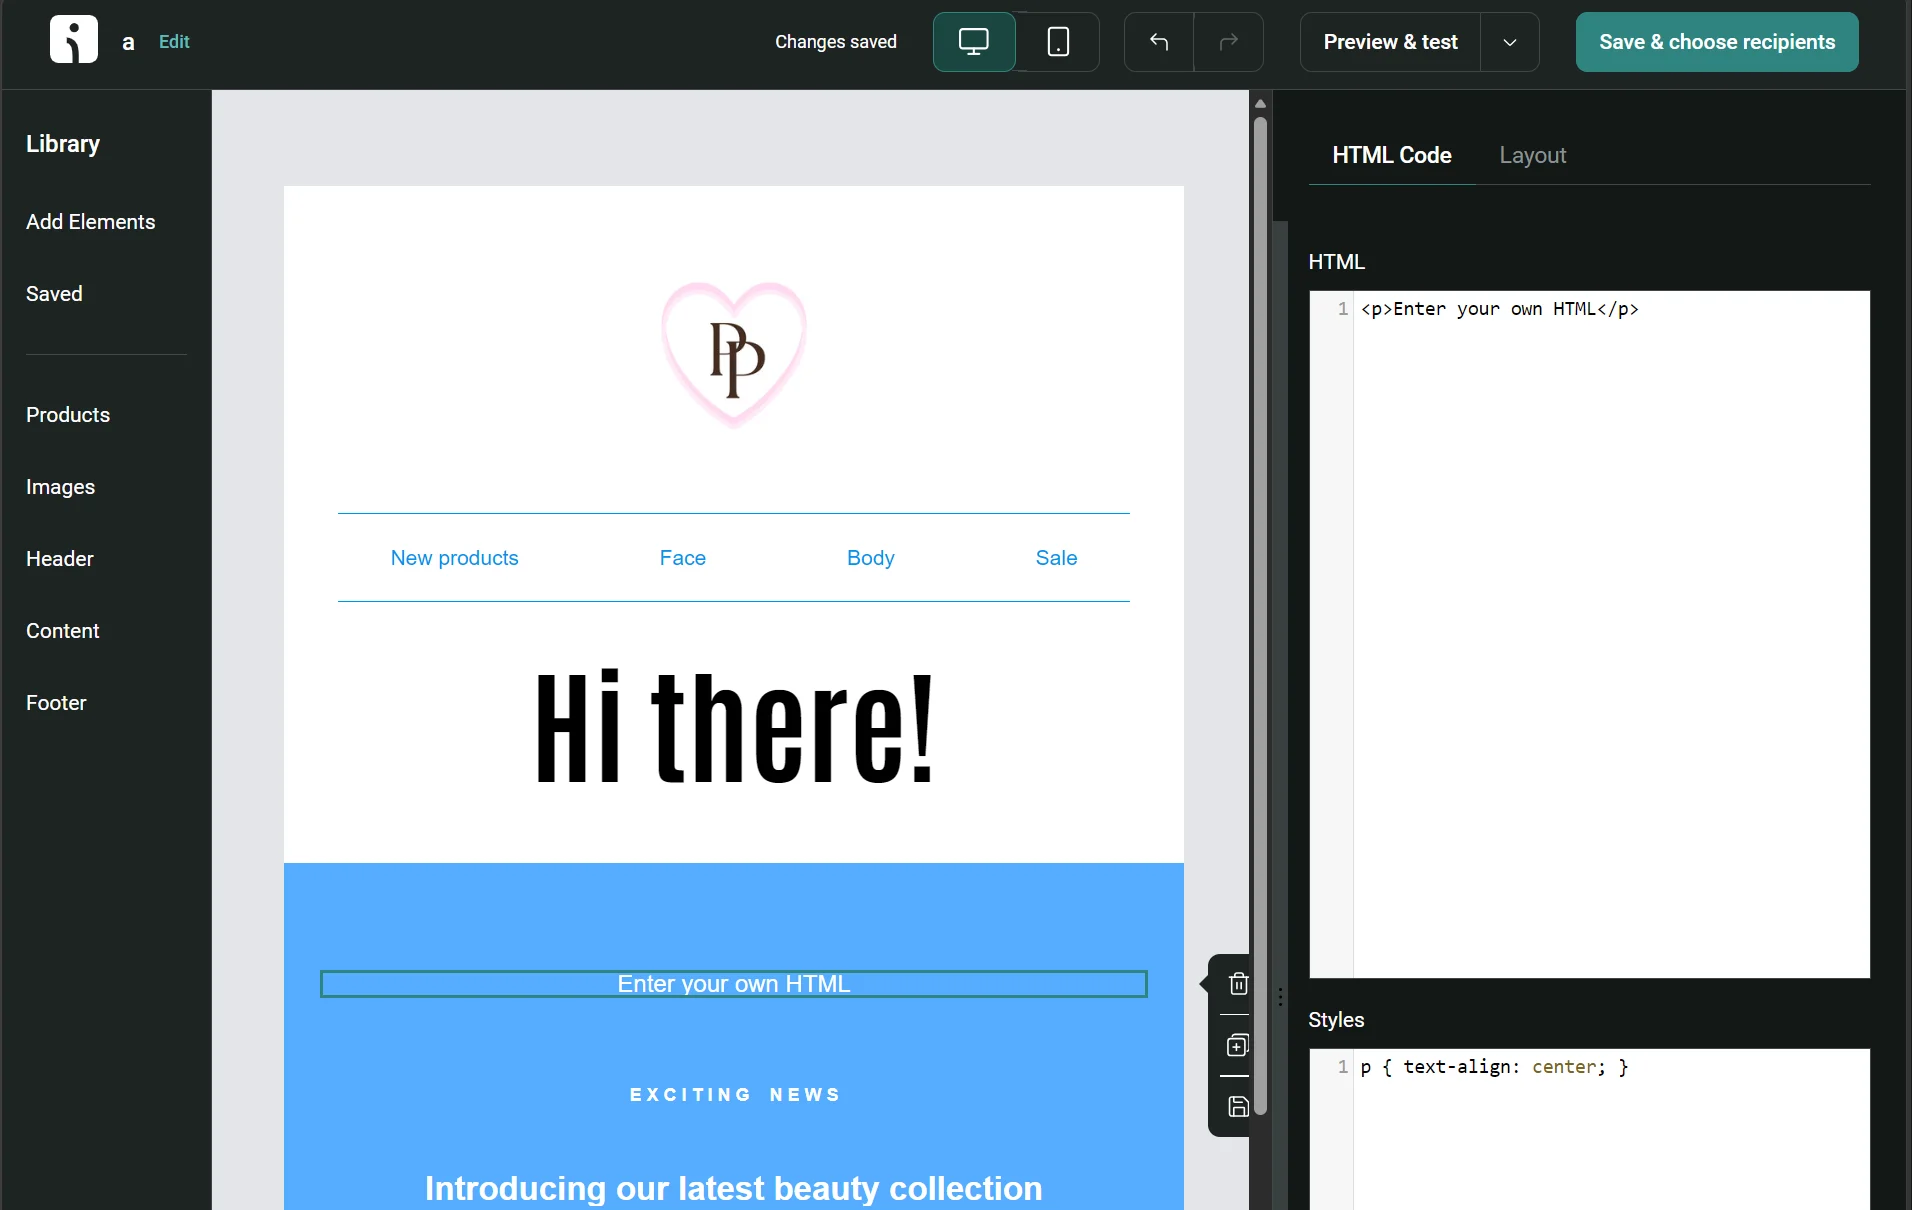
Omnisend has 250+ pre-built email templates with a drag-and-drop editor. The HTML Code item in Omnisend lets you import HTML from your Klaviyo template, supporting the body content only, rather than full-document tags.
You must clean your code before adding it to the HTML Code item for it to render properly. The table below details our removal recommendations:
| Tag | Why remove it |
|---|---|
| <!DOCTYPE>, <head>, <body> | Not supported because the HTML Code item takes body content only |
| <iframe>, <script>, <div>, <font>, <video>, <audio>, <object>, <embed> | Unsupported elements that trigger errors |
Inline CSS is required for styling, and layouts need nested <table> elements in place of <div> positioning. Empty <p></p> wrapper tags should be retained. Also, point images to a publicly accessible https:// URL.
All your templates will import your brand assets, such as logos and colors, once uploaded, and you can save templates for reuse.
Here’s how to recreate your email templates in Omnisend:
- Select Campaigns in the menu
- Click + Create campaign
- Click Create Email
- Complete the email settings and click Choose email template
- Hover over any template and click Use template to start editing it
- Click Add Elements in the menu and locate the HTML Code item
- Paste the HTML from your Klaviyo template into the HTML Code item
Rebuilding forms
Omnisend has 80+ forms spanning embedded, flyout, pop-up, and fullscreen formats, as well as landing pages. These use a drag-and-drop editor.
Recreating your Klaviyo forms in Omnisend requires picking a template with a similar layout and editing it. You can change the rules that govern scheduling, display, targeting, visibility, frequency, and add new items such as checkboxes to match your forms.
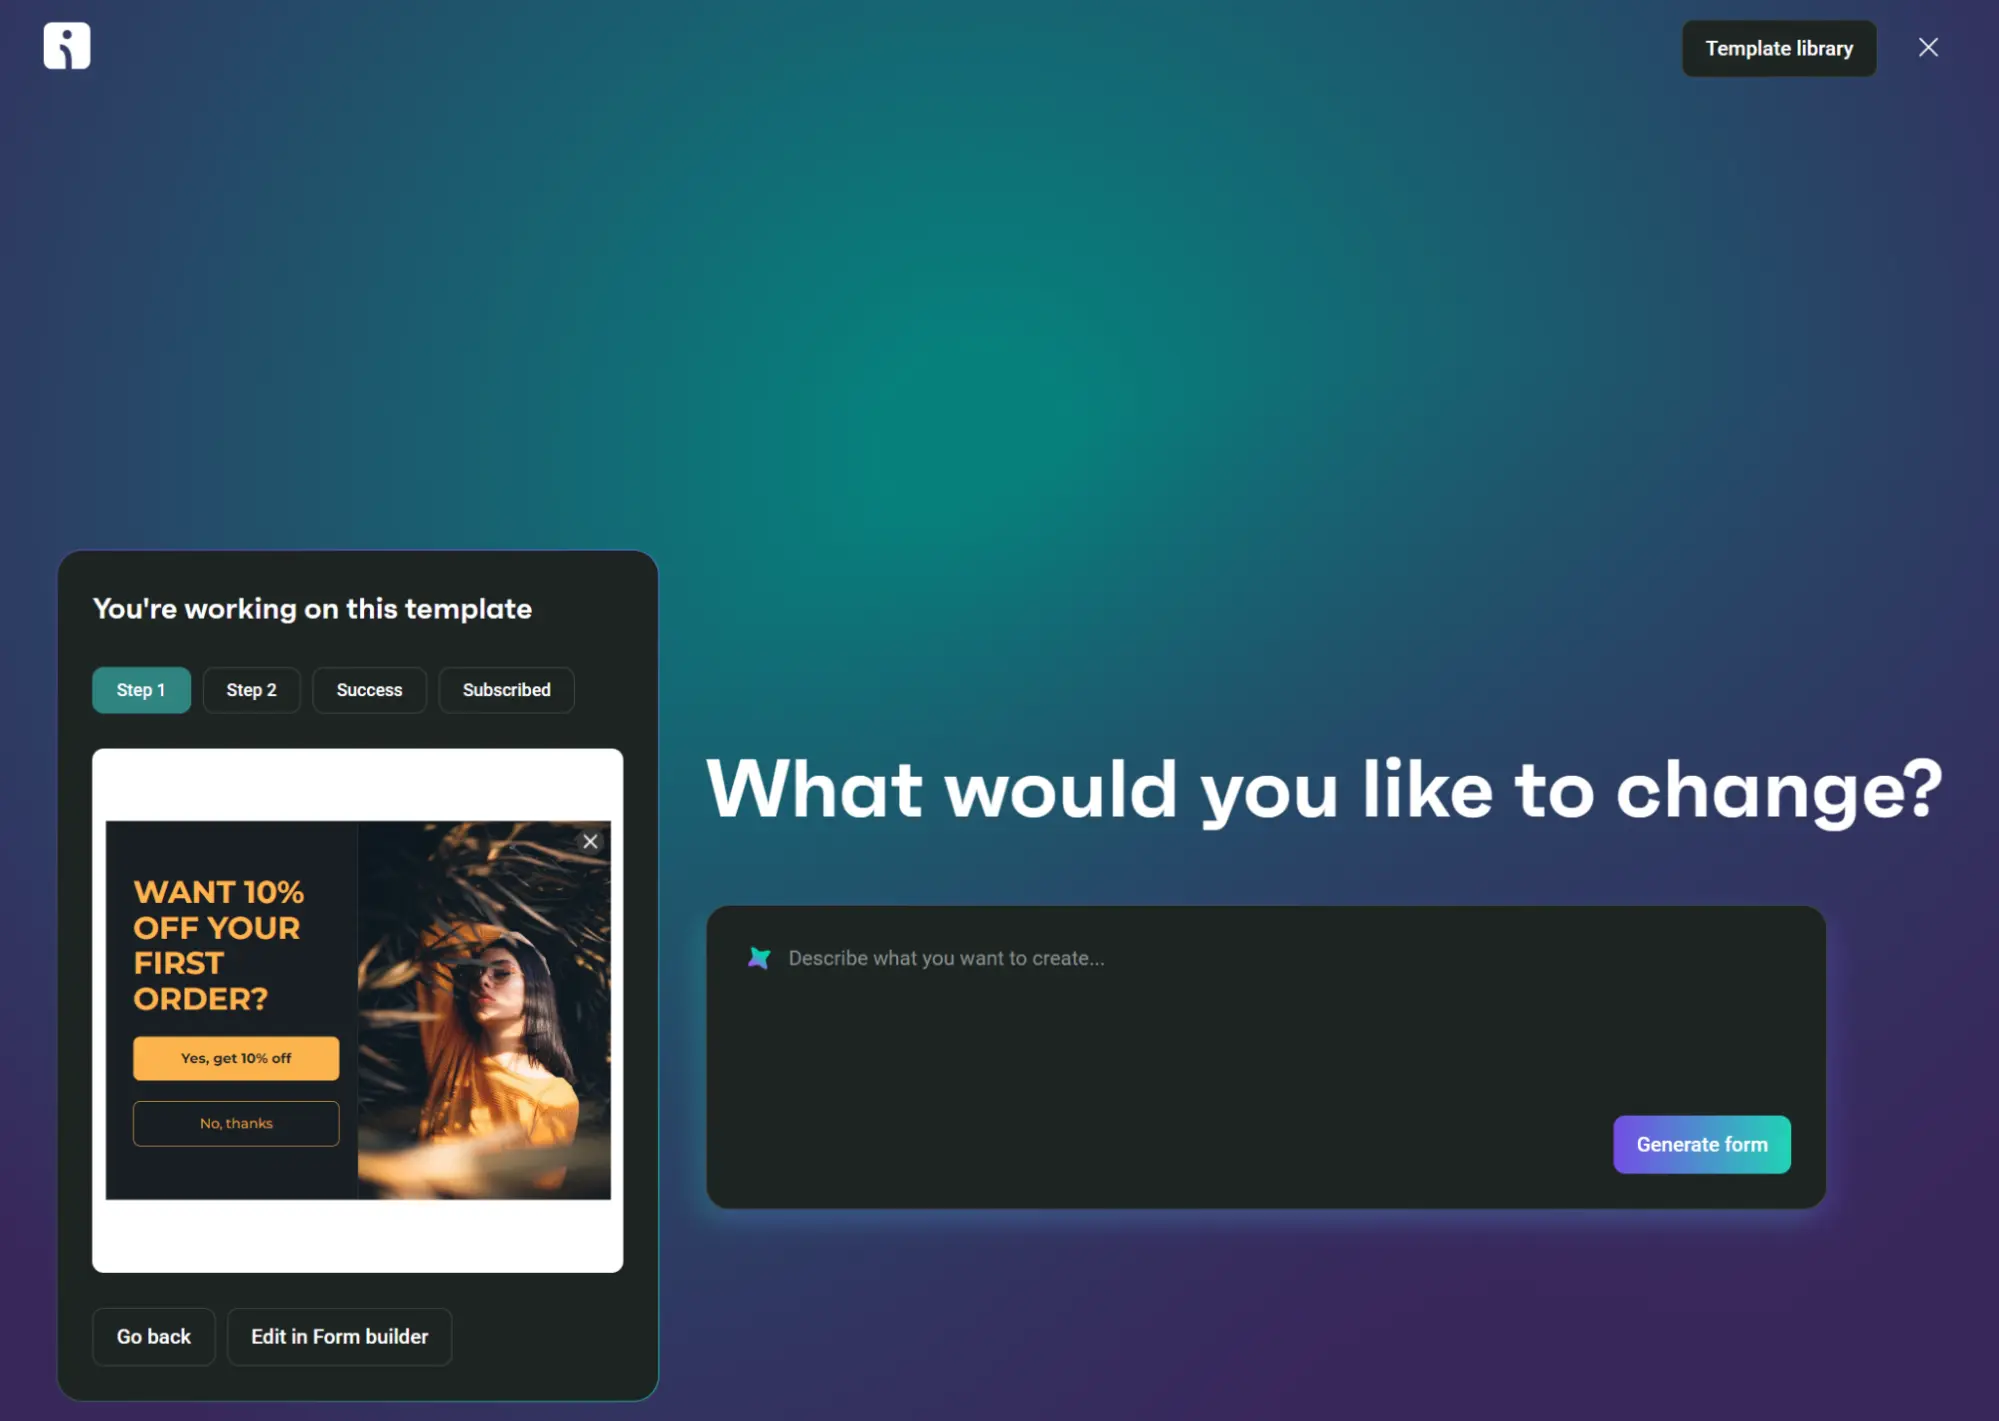
Alternatively, if you’re a Standard or Pro plan customer, you can prompt Forms AI and get it to build forms for you and generate new ideas.
Here’s how to start rebuilding your forms:
- Select Forms in the menu
- Click + Create form
- Hover over any form templates
- Click Edit with AI or Edit in Form builder
- If you click Edit with AI, describe what you want; add a description of what your Klaviyo form looks like and what fields it uses
- If you click Edit in Form builder, use the drag-and-drop editor, Items, and Layouts to recreate your form
CoinGate Gift Cards wanted to save money on its marketing but not at the expense of capabilities. It switched to Omnisend from Klaviyo in July 2025, and has since overseen a 25–30% increase in email conversion rates.
Read the success story > CoinGate Gift Cards
Step 5: How to ensure email deliverability and SMS compliance
Switching from Klaviyo to Omnisend provides you with a newly authenticated sender domain with no reputation. Being treated as a new sender can make it more difficult to land in inboxes, but a few steps will maximize your placement.
Domain authentication
Adding a sender domain to Omnisend writes SPF, DKIM, and DMARC records to your DNS, which prove that you own the domain and satisfy Gmail and Yahoo.
SPF validates the servers you send from, DKIM adds a digital signature to your emails, and DMARC sets rules for what happens if an email fails SPF or DKIM.
Warm up your domain
Warming up your domain builds your sender reputation. Omnisend has a Most engaged email subscribers segment you can target in your first messages over two to four weeks to warm up your domain. Increase volumes by 25–35% daily.
Toll-free verification for SMS
Your toll-free number can move with you to Omnisend from Klaviyo, or you can request a new number. Verification or re-verification is necessary in both cases.
A new U.S. number takes around five business days, up to two weeks in some cases; transfers can take up to three weeks, and you can’t send during the transfer.
SMS compliance
Consent records move to Omnisend with the Klaviyo Data Import Tool, where Klaviyo has them logged, but that doesn’t mean you can legally send marketing texts to those contacts.
The United States (TCPA) and Canada (CASL) require express opt-in for marketing texts. You should review all records and segment your contacts based on opt-in status.
Omnisend places opt-out language in text messages by default and maintains consent records to support SMS compliance. It’s up to you to avoid sex, hate, alcohol, firearms, and tobacco (SHAFT) content and follow regulations in the markets you serve.
Format phone numbers in E.164
SMS contacts need phone numbers in international E.164 format when you migrate from Klaviyo to Omnisend. That’s the plus sign and country code followed by the number, with no spaces or dashes: +1234567890.
Check the phone number column is formatted this way when you export SMS contacts from Klaviyo to CSV, and your subscribers will import into Omnisend ready to receive texts.
Ready to switch from Klaviyo to Omnisend?
Switching from Klaviyo to Omnisend is self-serve, or we’ll manage it for you for free if you have 250 or more Klaviyo contacts.
By default, our Migration Team moves your contacts, supported segments, live forms and workflows, and 10 most recent email templates, with more available on request. The migration takes around five business days once the team has access to your Klaviyo account.
Omnisend’s Standard plan offers up to 35%* savings versus Klaviyo at comparable contact tiers, and you’ll receive 24/7 support in all plans.
*Based on publicly available pricing of Omnisend’s Standard plan and Klaviyo’s Marketing (Email) plan as of August 2026. Excludes add-ons, including SMS.
Quick sign up | No credit card required