
 OFFER
OFFER


Drive sales on autopilot with ecommerce-focused features
See FeaturesIf you’re looking to sell digital products on WooCommerce, now’s the right time to start. The demand for ebooks, courses, software, and other non-physical items is on the rise. So, you’re likely wondering how to capitalize on this growing opportunity.
WooCommerce is the leading platform for creating and managing an online store. You can use it to sell physical products, as well as digital goods and downloadable items. This WordPress plugin comes with order and product management, payment integrations, and other essential features.
In this post, we’ll show you how to sell digital products on WooCommerce share some best practices for marketing your store and boosting your income.
Automate your marketing and sell more digital products — get started with Omnisend today
Quick sign up | No credit card required
Why sell digital products with WooCommerce
WooCommerce is a free, open-source platform. It has all the functionality you need to set up a store and start selling digital products.
Here are the main benefits of this platform:
- Low overhead costs: Since WooCommerce is a free tool, your launch costs are much lower than those of other platforms. Plus, with digital products, there’s no need for physical inventory, storage, or shipping. This means you can reduce operational expenses and maximize profits.
- Scalability: WooCommerce lets you create an unlimited number of digital products, and it scales with your business as it grows. You can install WooCommerce extensions to expand your store’s functionality and manage your growing catalog more efficiently.
- Flexibility and customization: With WooCommerce, you’ll have full control over the design of your store. You can customize product pages to match your branding, simplify the checkout process for a smooth user experience, add multiple payment gateways to suit customer preferences, and more.
- Seamless integration with WordPress: WooCommerce is perfect for bloggers and content creators looking to monetize their sites. If you already have a WordPress site, adding WooCommerce should be a straightforward process.
If you don’t already have a WordPress website, you’ll need to pay for web hosting and a domain name. The costs of creating a WooCommerce store are relatively low compared to all-in-one ecommerce solutions like Shopify.
How to set up digital products in WooCommerce
Now, let’s look at how to set up WooCommerce and start selling digital products. For this tutorial, we’ll assume you already have a WordPress website.
Step 1: Install and activate WooCommerce
As mentioned earlier, WooCommerce is a completely free plugin. You can install it from your WordPress dashboard and create your store straightaway.
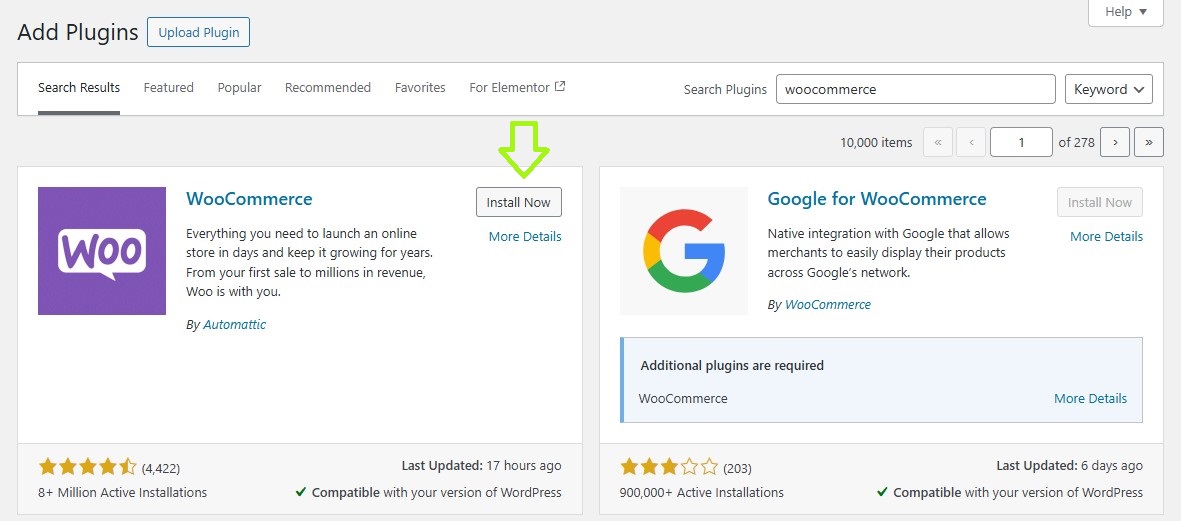
Navigate to Plugins > Add New Plugin and use the search bar to look for the plugin. Click on the Install Now button:
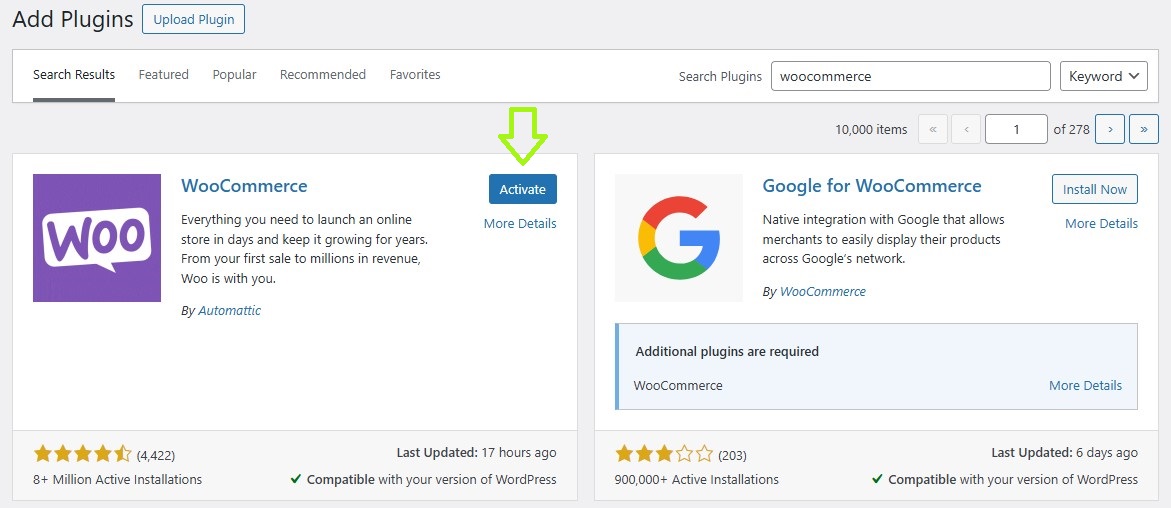
Then, hit Activate:
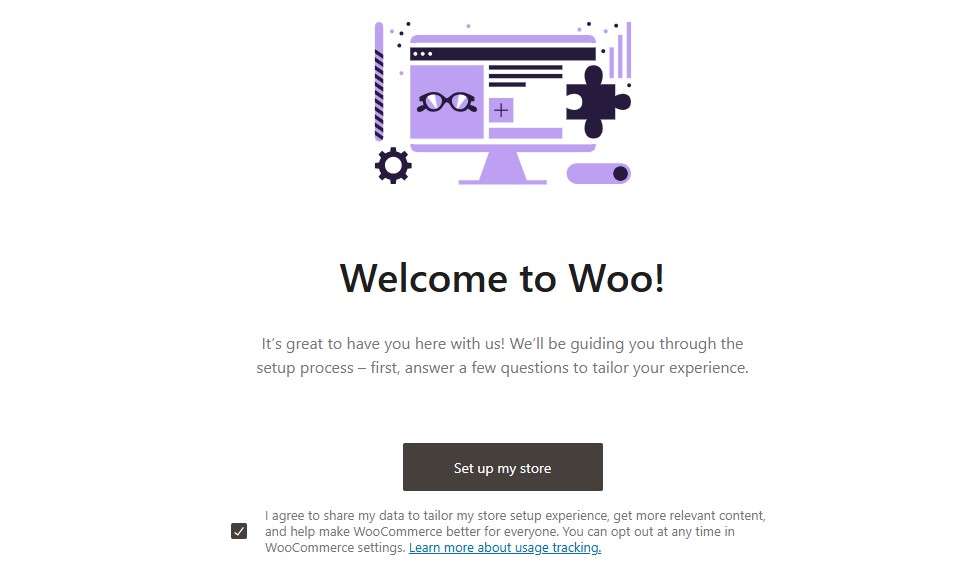
Once you activate WooCommerce, the plugin will walk you through a setup wizard. You can also access this guide by going to WooCommerce > Home in your WordPress dashboard.
Click on Set up my store to get started:
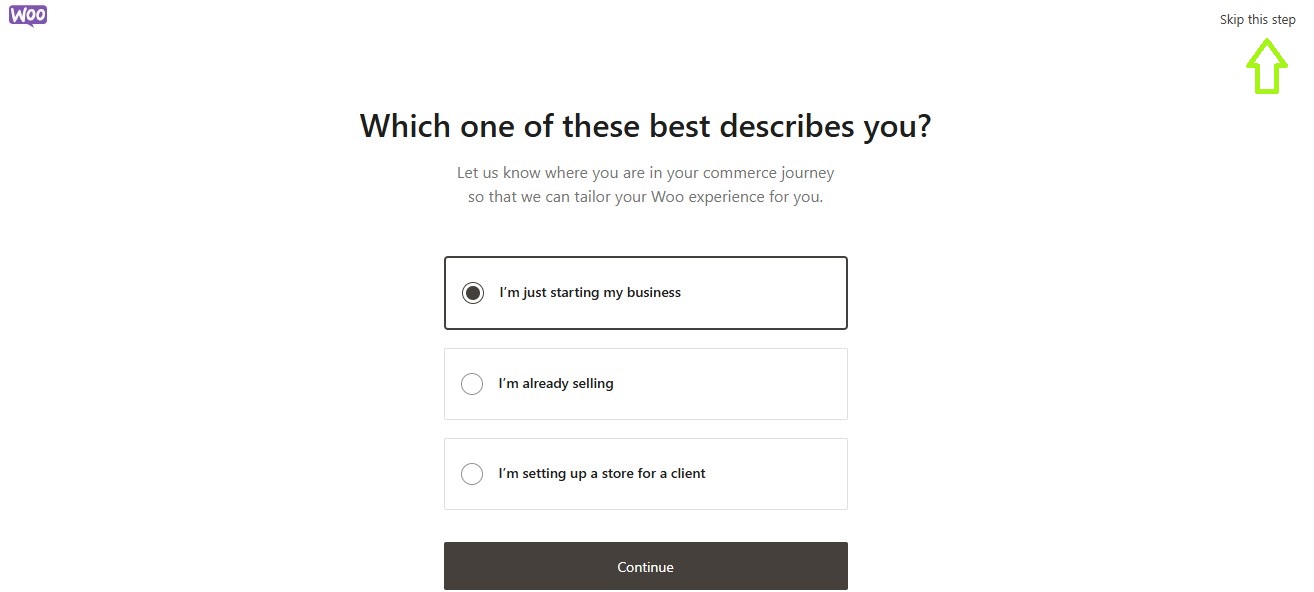
WooCommerce will ask you a series of questions. If you don’t want to answer them, just select Skip this step in the top right-hand corner, or return to the WordPress dashboard:
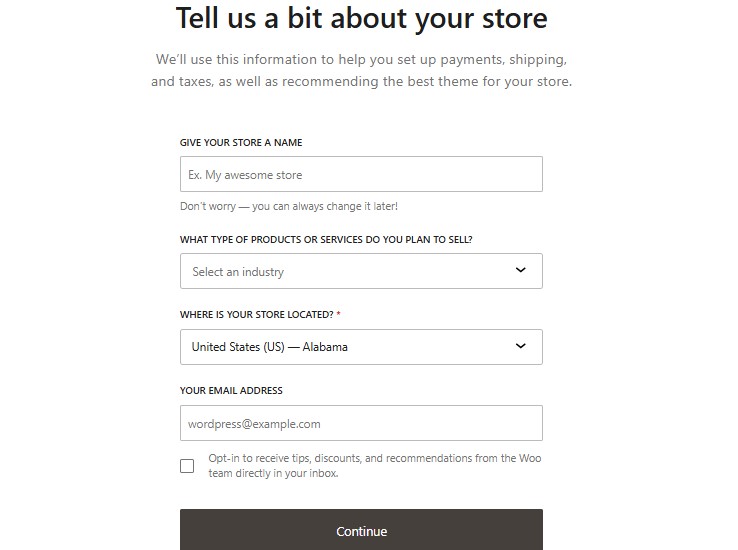
If you proceed with the setup guide, you’ll need to provide some information about your business, such as the name and location of your store:
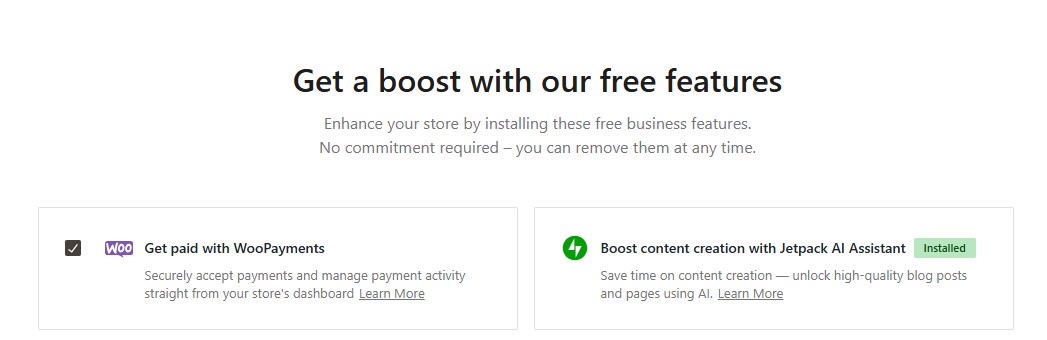
Finally, you can choose which free features available with WooCommerce you’d like to add to your store. This includes essentials like WooPayments and Jetpack:
When you’re done, WooCommerce will direct you back to the WordPress dashboard, where you can start working on your store.
Step 2: Configure WooCommerce settings for digital products
Next, you’ll want to configure important settings. Let’s start with payments.
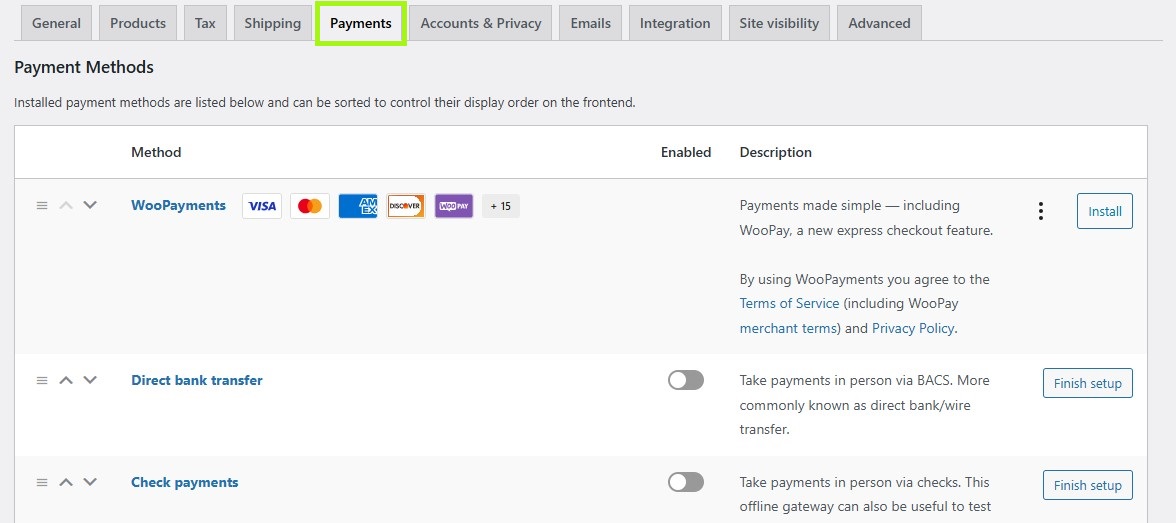
In your dashboard, go to WooCommerce > Settings and click on the Payments tab.
Here, you’ll see a list of available payment methods:
If you haven’t already set up WooPayments, select the Install button to do that now.
WooCommerce will then ask you to verify your business details:
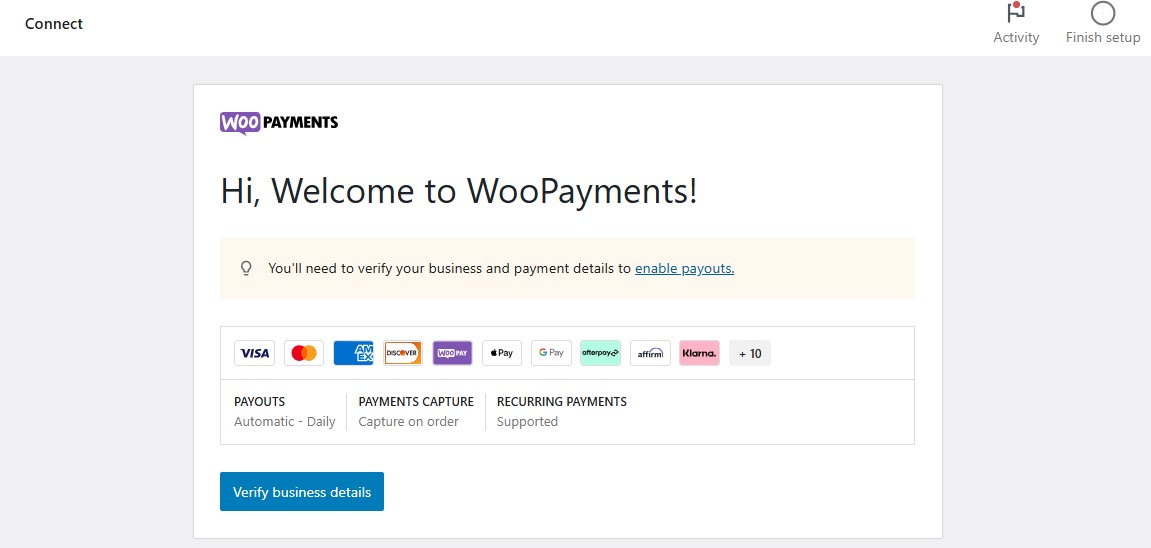
Follow the prompts to complete the WooPayments setup. Then, return to WooCommerce > Settings > Payments to set up other gateways, including PayPal:
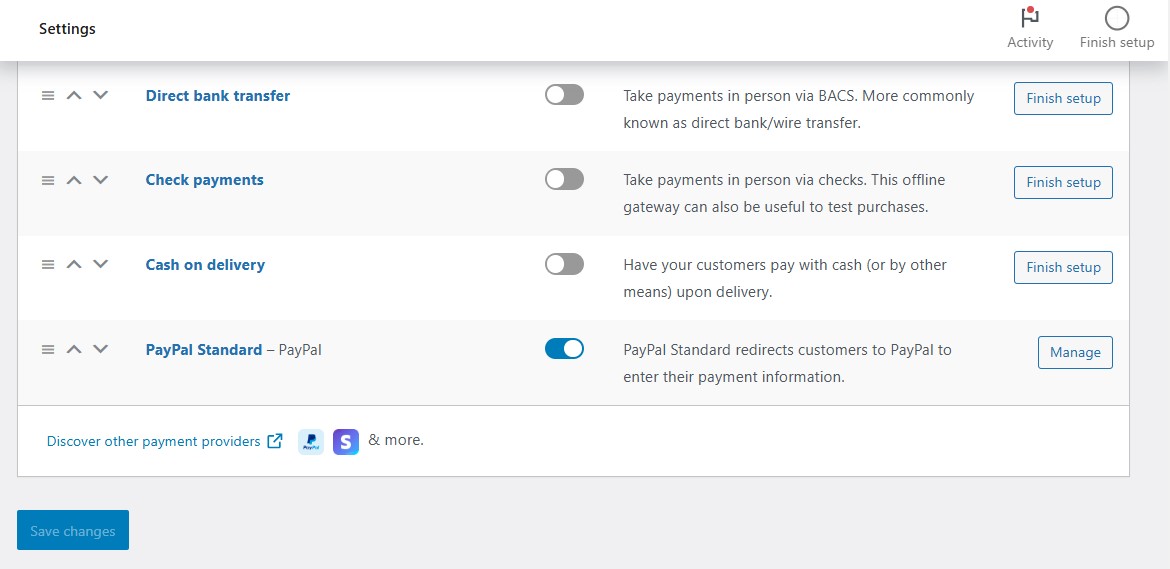
Click on Save Changes when you’re ready.
Now, navigate to the Products tab and select Downloadable products:
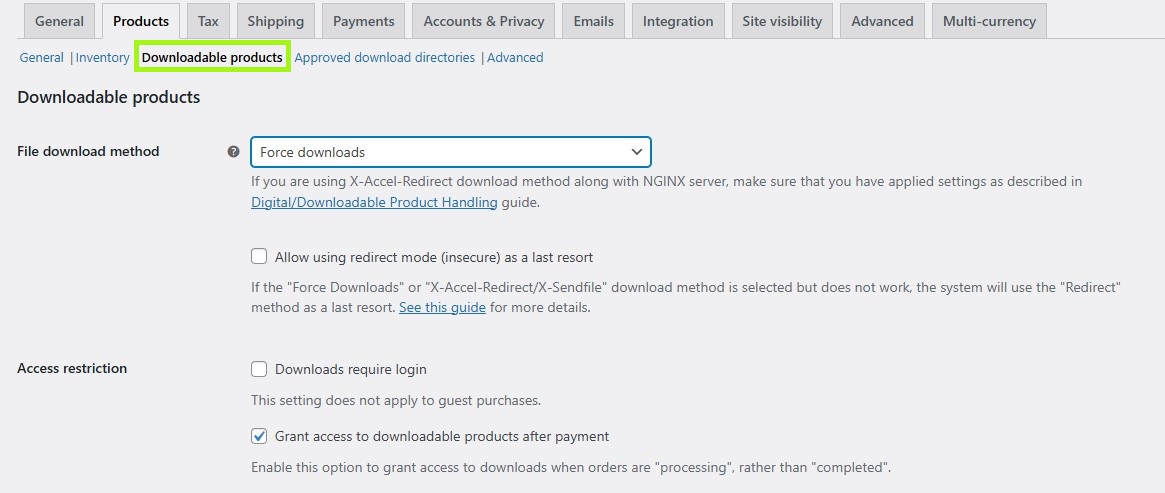
Choose a file download method from the dropdown menu:
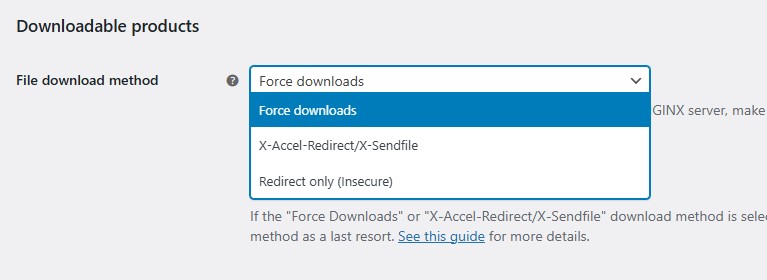
We recommend Force downloads or X-Accel-Redirect/X-Sendfile to protect your downloads against unauthorized sharing.
The first option forces the file to download without loading its URL in the browser. This way, customers won’t be able to copy the link and share it with others.
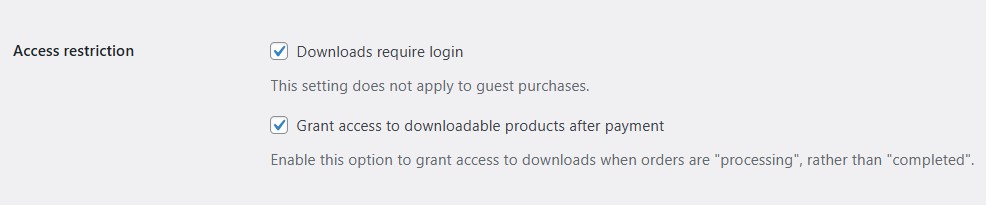
Then, configure access restrictions. If you tick the box for Grant access to downloadable products after payment, customers can download the item as soon as they’ve paid. You might also require them to log in to access the downloads:
Feel free to explore the other settings on this page. Just remember to click on Save changes when you’re done.
Step 3: Add a digital product to WooCommerce
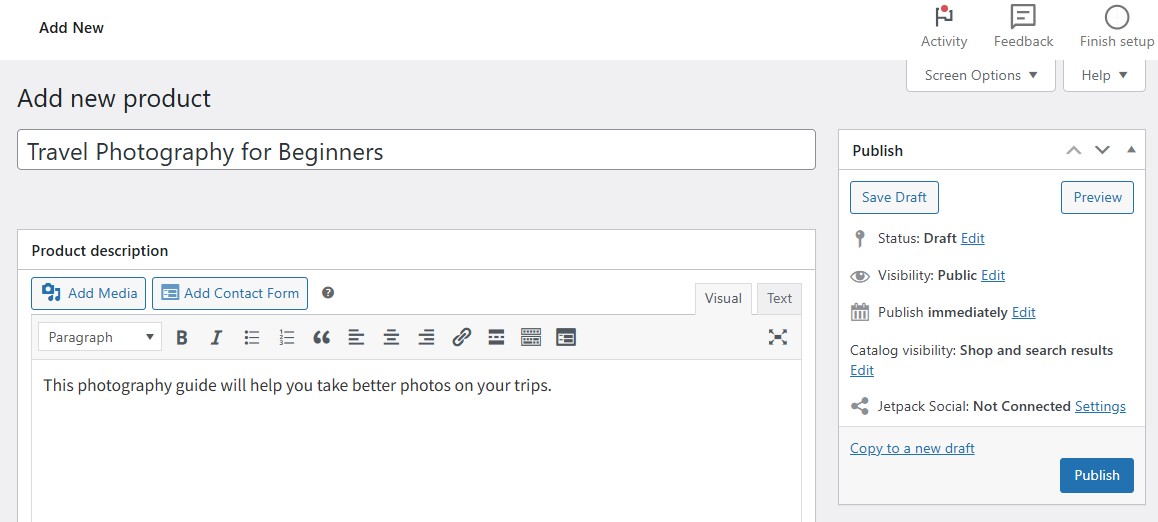
Go to Products > Add New to create your first download. Enter a name and description for your product:
Then, scroll down to the Product Data section and tick the boxes for Downloadable and Virtual, as shown in the image below:
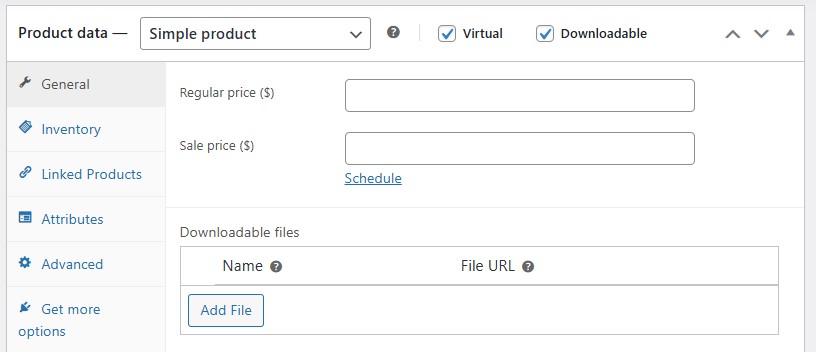
Enter a price for your download. Then, in the Downloadable files section, click on Add File to upload your product.
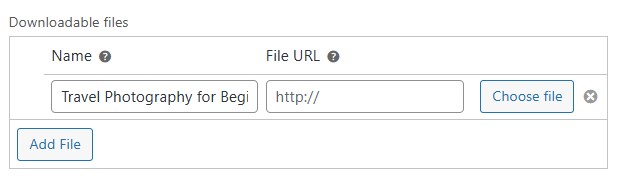
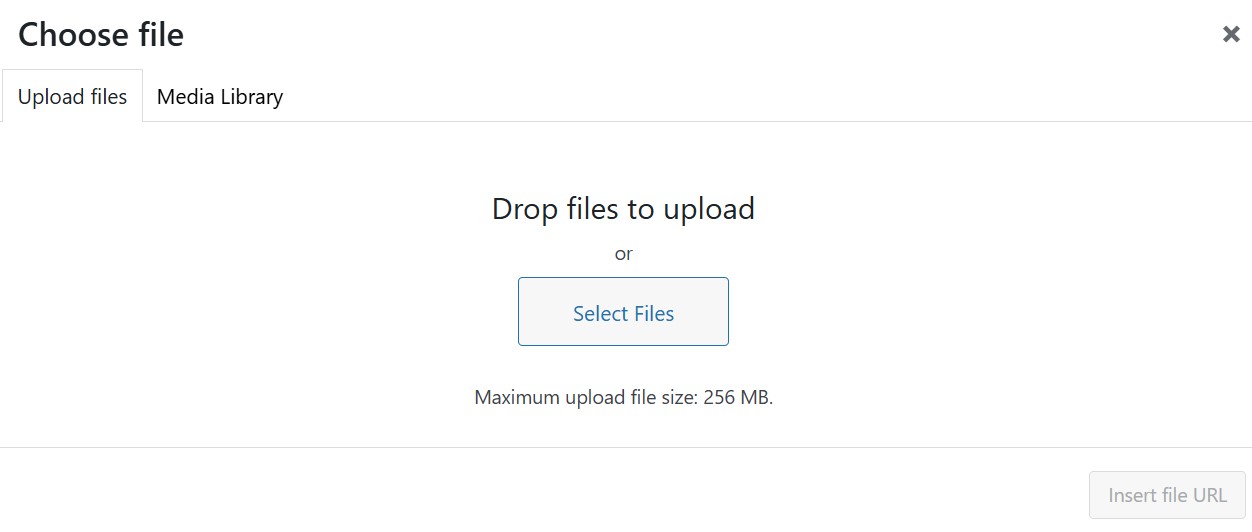
Write the name of the file and select Choose file:
This will open the Media Library, where you can locate your file or upload it to your site:
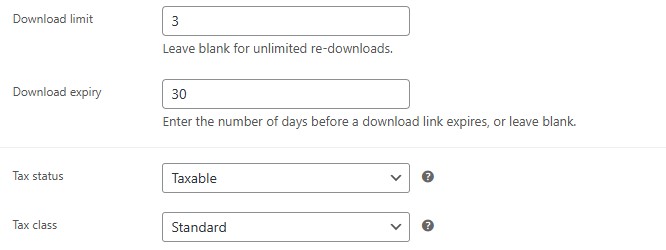
Then, set a download limit if needed and specify download expiration dates:
On the right-hand side, you’ll see options for uploading product images and adding tags and categories:
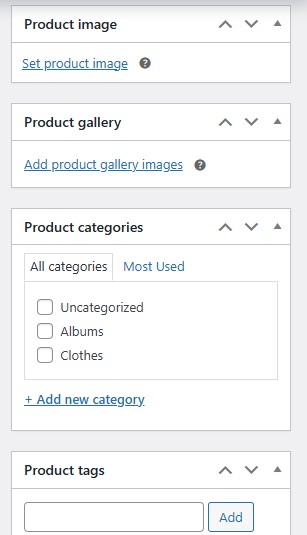
Don’t worry if you haven’t created any categories and tags yet. We’ll show you how to do that in the next step.
Click on Save Draft to save your product, or hit Publish to make it live.
Step 4: Set up digital product categories and tags
Categories and tags enable you to organize your products by type, theme, and other attributes. For example, if you sell travel products, you might create a category for guidebooks and another one for itineraries.
Customers can then see a list of products in the category they’re interested in.
Similarly, you might use tags to file your guidebooks and itineraries under different countries or cities. A customer can click on the Athens tag to see what other travel guides are available for that city.
As you can see, categories and tags make it easier for visitors to navigate through your products. It helps them find what they’re looking for more quickly.
Taxonomies can also be good for your search rankings. They provide information about the type of products you sell, helping search engines index your pages more efficiently. Your products may then appear in results for relevant searches (e.g., Athens travel guide).
Go to WooCommerce > Categories and give your category a name and slug (URL):
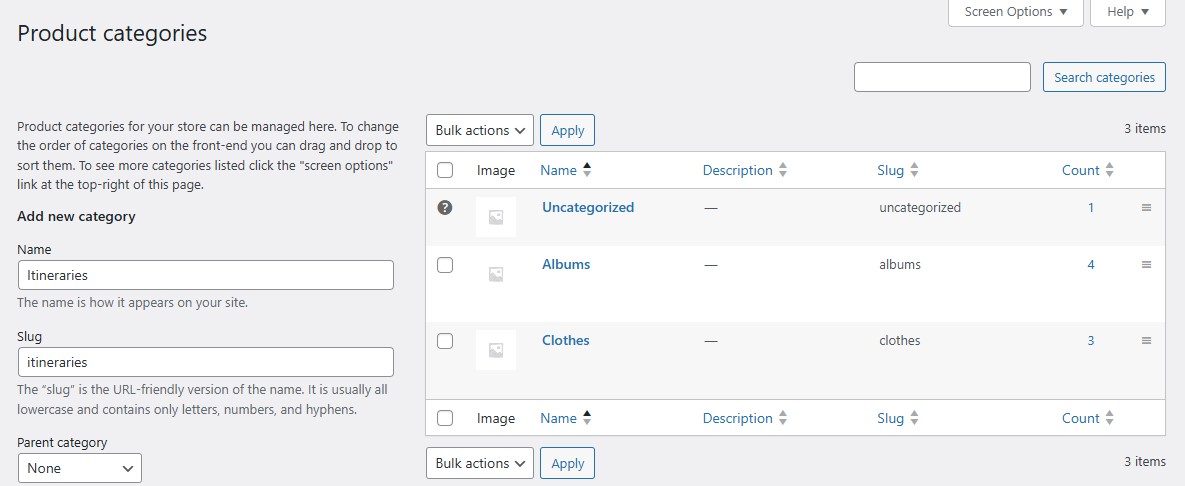
Click on Add New Category to save your changes. You can then assign that category to an item from the product page (as shown in the previous step).
To create tags, head to WooCommerce > Tags and do the same thing.
Step 5: Install additional plugins for selling digital products
So far, we’ve looked at how to sell WooCommerce digital products like ebooks and other downloads. You might be wondering how to sell other types of virtual goods, like memberships and subscriptions.
You can find dedicated WooCommerce plugins for different digital product types. With these tools, you’ll be able to add features like memberships, enable recurring payments, and facilitate secure deliveries for your online courses and other digital products.
WooCommerce Subscriptions lets you sell subscriptions for products or services:
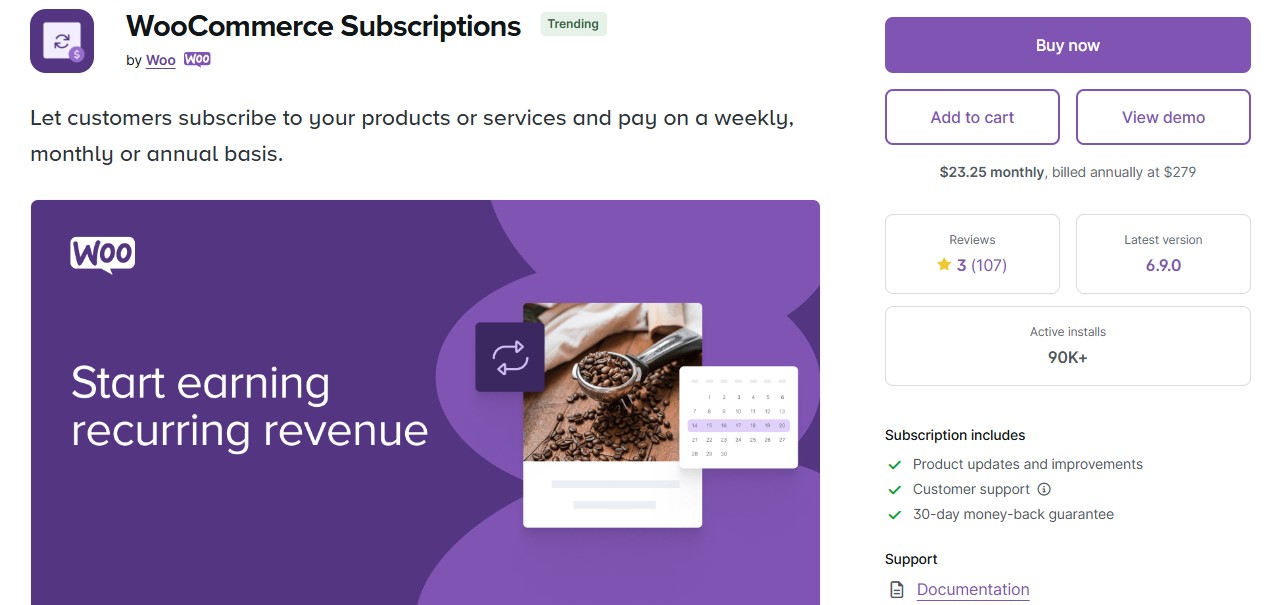
For instance, you might sell monthly bundles of photos. A basic plan would give subscribers 30 downloads per month, while an advanced plan would give them 50 downloads.
Subscribers can manage their plans and upgrade or downgrade according to their preferences. They’ll also receive notifications when it’s time to renew their subscription.
The plugin lets you set up automatic recurring payments with over 25 payment gateways. It also supports manual renewals.
WooCommerce Memberships is ideal for selling online courses or paywalling your blog content:
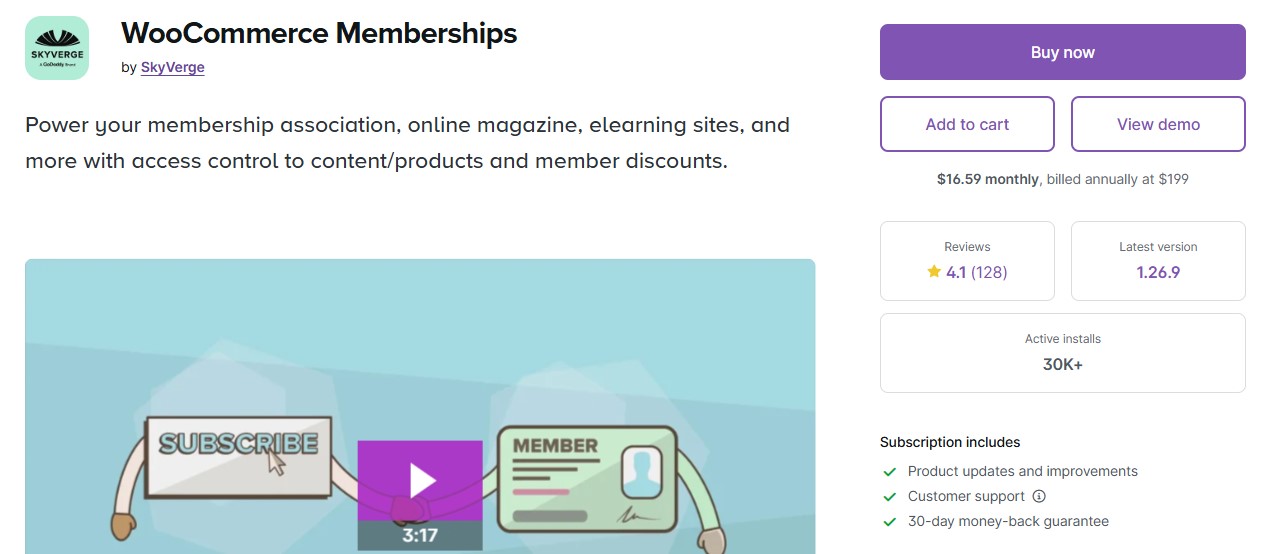
You can set up multiple membership levels and tie your digital offerings to different plans. The plugin includes advanced content access and restriction settings.
There’s also Easy Digital Downloads, a free plugin that generates secure and unique links for your downloadable products:
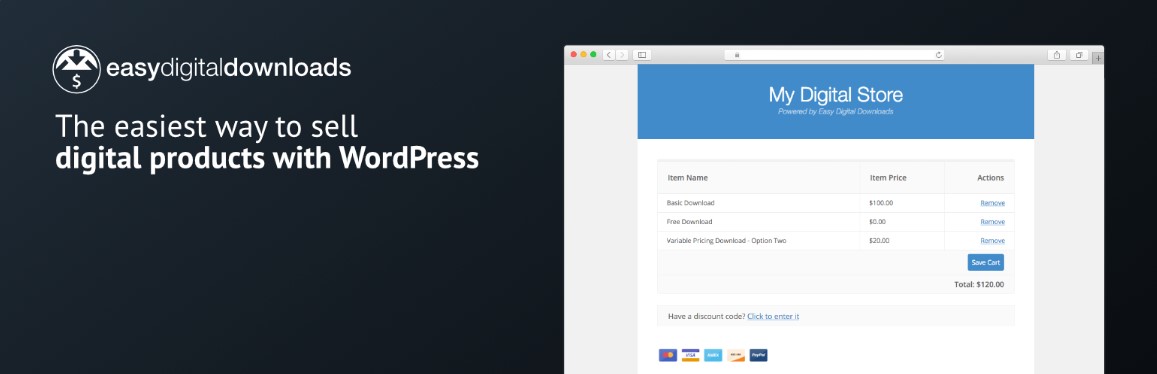
This plugin supports Stripe, PayPal, Apple Pay, Google Pay, and other secure payment gateways.
Best practices for selling digital products with WooCommerce
Uploading your digital products to WooCommerce is not enough. You’ll also want to ensure that you present them to your customers in an appealing way.
Here are some tips for selling WooCommerce digital products:
Choose the best WooCommerce theme for digital products
A messy or hard-to-navigate site will make it difficult for customers to browse through your digital offerings. They may even feel frustrated and leave your site.
Therefore, you’ll want to use a responsive or mobile-friendly theme. This should ideally be designed for selling digital products.
Let’s look at some of the best WooCommerce themes for digital products:
Storefront
There’s Storefront, which is an official WooCommerce theme:
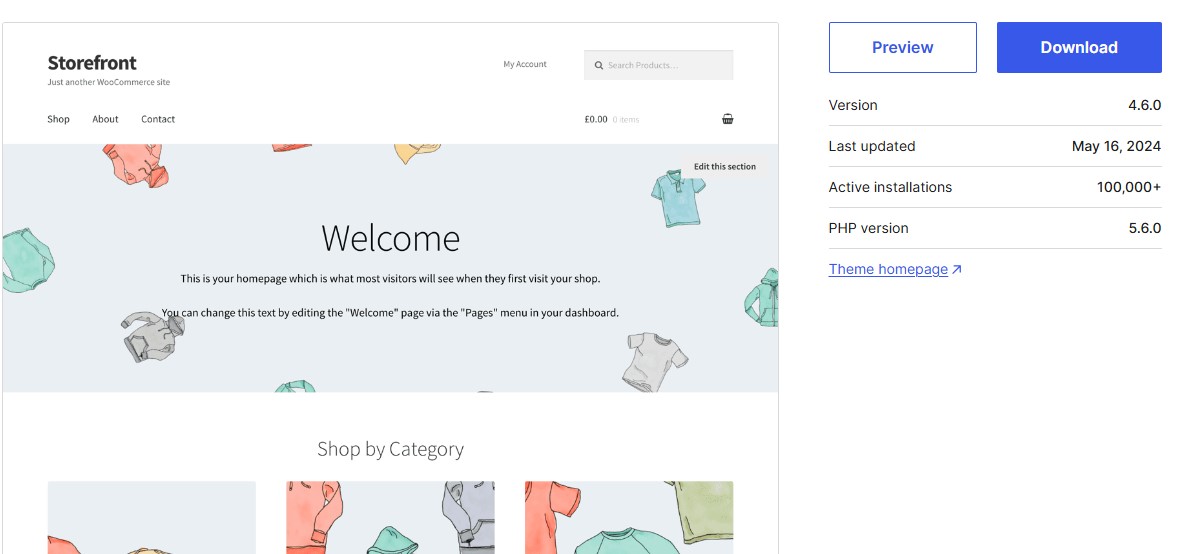
It has a clean and minimalist design, with several layout and color options. Besides integrating fully with WooCommerce, it also works well with many WooCommerce extensions.
Astra
If you want more customization options, choose a theme like Astra. It has a starter template specifically designed for digital download stores:
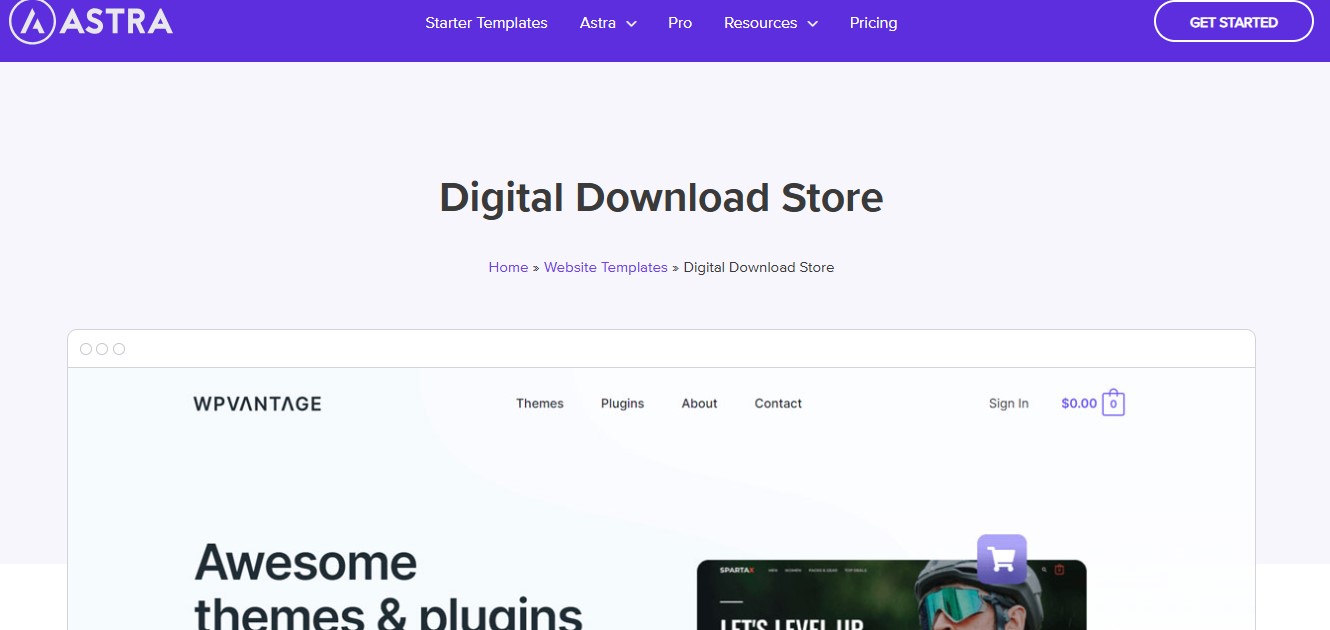
Astra is a lightweight theme, so it can help you maximize your site speed as well.
GeneratePress
Another good option is GeneratePress. This theme has a selection of ecommerce starter templates to choose from:
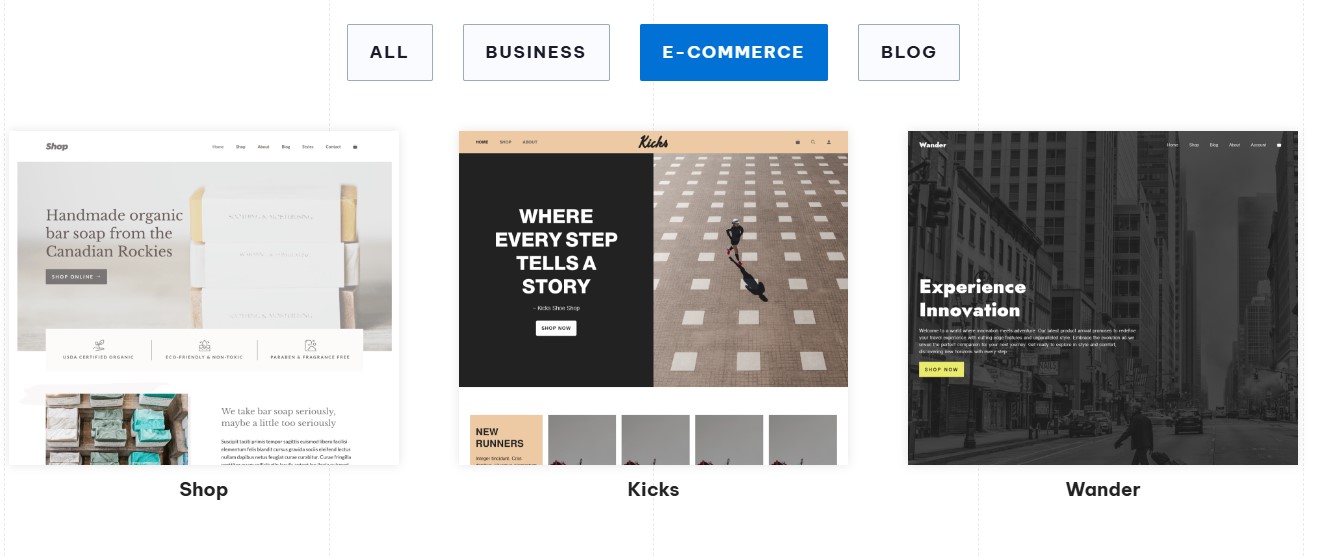
With the theme, you’ll also get a set of WordPress blocks that you can access from the block editor. These include elements like grids, accordions, and buttons, which you can use to design unique shop and product pages.
Create high-quality product pages
Even though you won’t be selling physical items like clothes and ornaments, you’ll still want to include eye-catching photos of your products.
If you’re offering templates, photos, or digital art, you could add watermarked copies of those items. If it’s ebooks or online guides, just show the first few pages.
Besides high-quality images, you’ll want to include helpful descriptions of your products. Outline exactly what the product contains (e.g., 10 video lessons and a workbook) and how it will benefit your customers (e.g., you’ll learn how to take more professional travel photos).
If you’re selling courses and tutorials, you can even add video previews or presentations. In this clip, you can introduce yourself as an expert on the topic and share some information about the course (structure, prerequisites, outcomes, etc.). You might even feature testimonials from past students.
Finally, you’ll want to make sure you have a clear call to action on your product pages. This is a button that prompts visitors to take action, like “Enroll now” or “Purchase your digital copy.”
You’ll want to customize your WooCommerce product page to include all of the above elements.
Secure your digital products
You might be worried that once you upload a digital file to your store, everyone will have access to it.
Well, that’s not the case. WooCommerce enables you to restrict access so that only people who have purchased the product will be able to download it.
As shown in the tutorial, you can navigate to WooCommerce > Settings > Products and click on Downloadable products to configure access rules:
It’s important to select Force downloads as the file download method, as this will prevent people from sharing your file’s URL.
You can also limit the number of downloads per purchase from the product page, as demonstrated earlier:

If you’re using a membership plugin, you’ll be able to restrict access to those who have purchased a plan. For instance, only members who have purchased a Gold membership might have access to your step-by-step video tutorials.
When you create a digital product, you can select which membership tier or subscription provides access to it.
Offer bundles and discounts
An effective way to increase your average order value is to create bundles. For instance, if you sell digital photos at $10 each, you might offer a bundle of 20 photos for $150. This will entice customers to purchase the bundle, as they’ll get more pictures for less money.
If you deliver online courses, you could do something similar. Let’s say you offer three courses, at $200 each. If someone purchases all three courses, they’ll get a 20% discount and pay $420 instead of $600.
These bundled offers work best if the items are related. If you offer a complete course for starting a professional blog, your students might also be interested in your affiliate marketing and SEO courses.
You can use an extension to set up WooCommerce product bundles. For example, Product Bundles for WooCommerce lets you create bulk discount packages and recommend add-ons.
Alternatively, you might offer a discount when customers spend a certain amount at your store.
You can go to Marketing > Coupons in your WordPress dashboard to create your discounts — no additional plugin is needed:
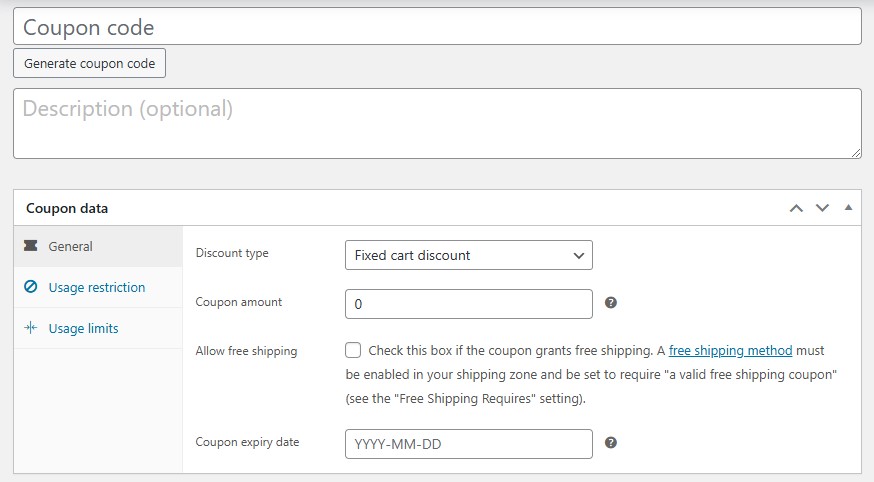
WooCommerce lets you set usage restrictions and limits for your coupons. You can specify a minimum and maximum spend, apply the coupon to certain products only, and more.
How to sell more digital products on WooCommerce
If you want to make a steady passive income from selling digital products, you’ll need to implement some effective marketing strategies.
Of course, you might be too busy to actively market your products. Fortunately, there are tools you can use to automate your marketing workflows, which we’ll cover in this section.
So, here’s how to generate more interest in your digital products and boost your conversion rate.
Capture abandoning visitors with exit-intent popups
Exit-intent popups can help you recover visitors who have decided to leave your site without making a purchase.
You’ll want to give them a compelling reason to continue browsing or complete their order. This will likely be a discount on their purchase or a complimentary product (like 10 free photos or an add-on to the course) when they use a particular coupon code (created specifically for abandoning visitors).
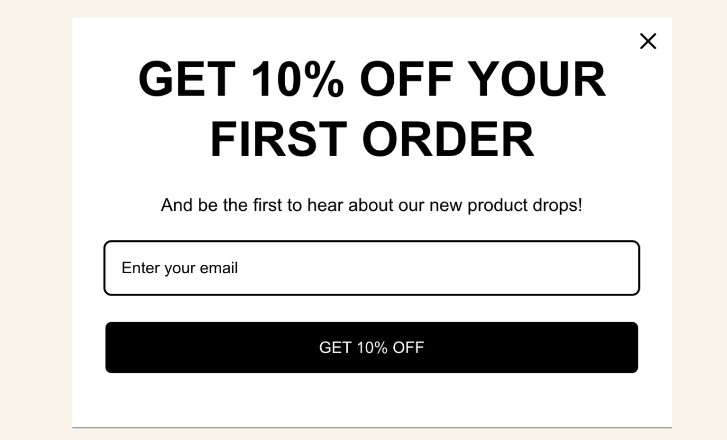
Omnisend helps you create exit intent popups that appear on a visitor’s page when they meet certain conditions. For instance, you might show it when a visitor tries to leave your store, or when they try to exit the checkout page.
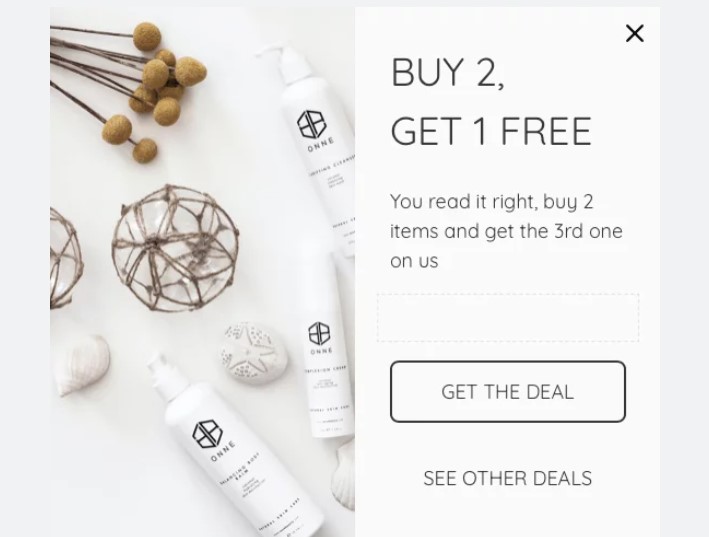
Omnisend offers several popup templates that you can use to collect email addresses from visitors in exchange for a discount or free gift like a downloadable guide:
With Omnisend, you can also send automated emails to visitors who have abandoned their carts. You might include a limited-time discount code to prompt them to return to your store and complete their purchase.
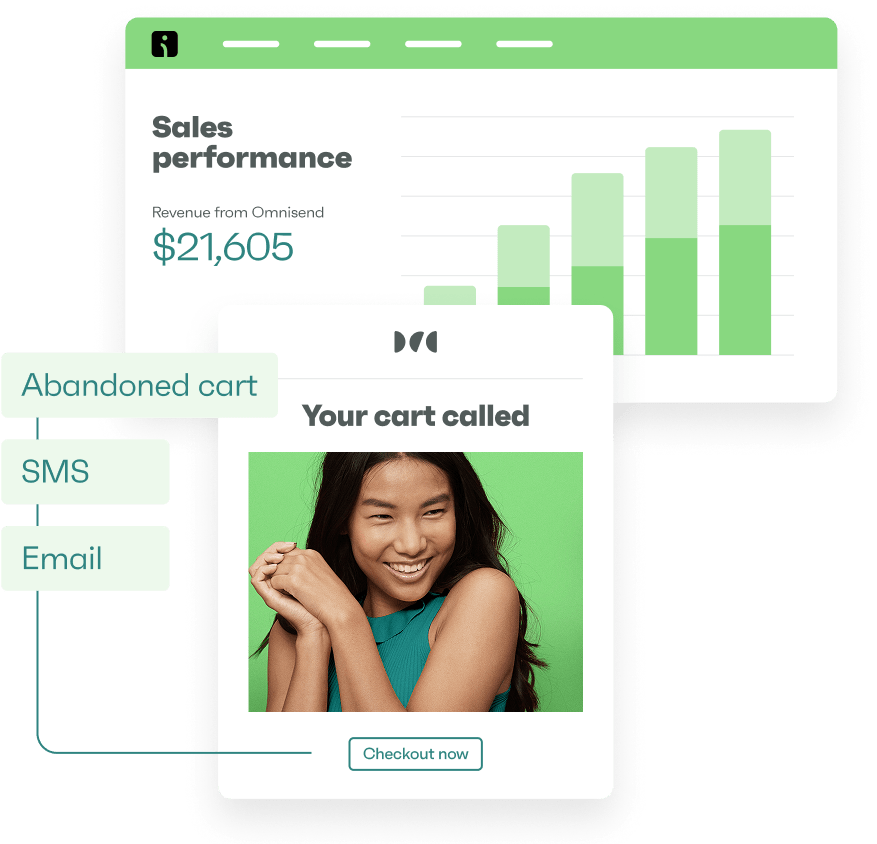
Use Omnisend’s powerful tools to engage customers with automated emails and discounts
Quick sign up | No credit card required
Incentivize your audience
First-time visitors may be wary of trying your course or downloading your software. If it’s a new product and you don’t have many reviews yet, it can be even more difficult to encourage purchases.
This is why you’ll want to offer incentives like limited-time discounts, free software trials, or exclusive deals.
You can set up more advanced offers with an extension like Product Dynamic Pricing and Discounts for WooCommerce. This plugin helps you create custom product prices, cart discounts, free gifts, and more.
You can then use Omnisend to send personalized offers based on customer behavior (like the pages they’ve viewed or the items they’ve added to their carts).
Once again, you have various templates to choose from:
Ideally, you’ll want to focus on limited-time offers or exclusive deals to urge customers to take action before it’s too late. It’s a good idea to add a countdown timer to further create a sense of urgency.
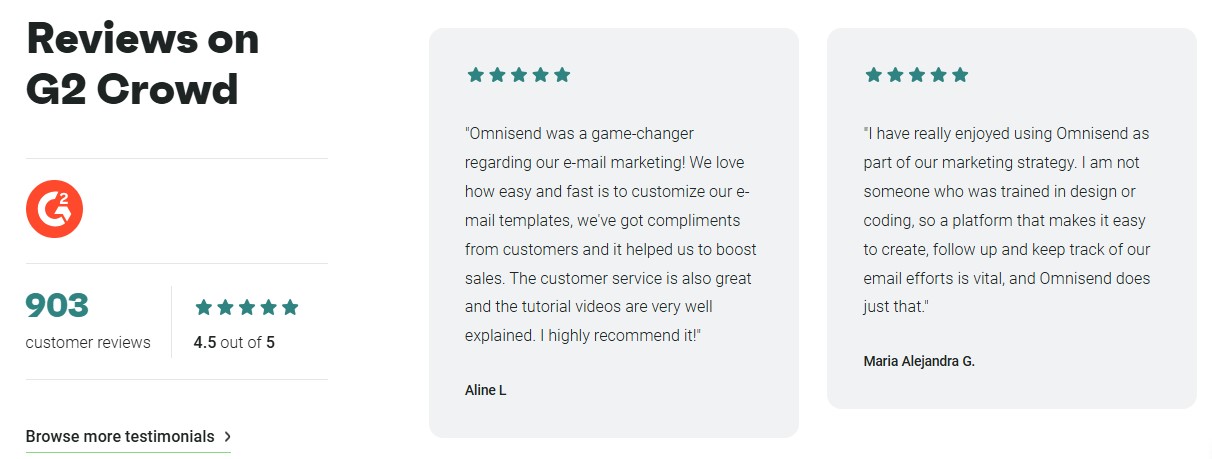
Add social proof to product pages
When you launch your store, you want to start building trust in your business. You can do this by displaying social proof like customer reviews and testimonials:
For example, you might display clips of previous students talking about how your course has helped them achieve their goals.
Plugins like Yotpo and Product Reviews Pro for WooCommerce help you gather customer reviews that also include images and videos.
Asking customers for reviews can be a little intimidating, but you can make things easier by offering small incentives. For instance, you might give them a complimentary product if they take the time to create a one-minute video testimonial.
Then, showcase these testimonials on your product pages or course landing page. It’s also smart to add a few of them on the homepage so visitors can instantly see proof of your product’s value.
Leverage email marketing and push notifications
The moment you launch your store, you’ll want to start building an email list. As seen earlier, you can collect email addresses with popups.
Then, you can send updates like product launches and offers straight to your customers’ inboxes. You might even send abandoned cart reminders to help rekindle interest in your products.
Omnisend helps you automate your email campaigns, saving you a lot of time and work. You could also use it to send SMS notifications about the latest deals and products.
Push notifications are another effective strategy for boosting sales. These are messages that appear on a customer’s browser or mobile phone and help encourage instant engagement:

There are several use cases for push notifications. You might use them to alert customers of special or time-sensitive offers, or promote product launches.
OneSignal helps you automate push notifications on mobile devices and web browsers. You can also use it for in-app messaging.
Offer free trials, previews, or challenges
Whether you sell online courses, software, or digital designs, you might be operating in a competitive market. You’ll need to show visitors why they should choose you over your competitors.
Offering free trials or previews is a powerful way to build trust through a taste of your product — enticing them to proceed with their purchase.
Create opt-in forms that ask visitors for their email addresses so you can send them a preview of your book or course.
Another way to engage visitors is to host competitions or challenges. If you have social media pages for your blog or store, you can ask your followers to comment on a post and tag a friend. The winner will get free access to your course, win an ebook or subscription, or receive a bundle of templates.
Run limited-time promotions and flash sales
If you want visitors to take immediate action and purchase your products, you’ll need to create a sense of urgency. You can achieve this by running limited-time offers and flash sales.
A WooCommerce extension like Sale Flash Pro enables you to schedule your sale period and automate limited-time promotions. This means you can plan them well in advance, fully prepared for seasonal promotions like Black Friday.
You’ll also want to ensure that your customers are aware of these offers. Omnisend offers various email templates for promoting your flash sales:

Remember to also promote these offers with push notifications. If a customer sees your flash sale notification on their mobile phone, they may decide to visit your store before time runs out.
It’s a good idea to schedule multiple emails or notifications. For instance, you’ll want to remind customers that the sale ends in 24 hours, then send another message on the last day to let them know there are only a few hours left.
Conclusion
WooCommerce is the leading ecommerce plugin for WordPress sites, which you can use to sell a variety of products, including downloads, ebooks, software, and more. Once you install the plugin, you can upload your digital products, set up payment methods, and configure secure downloads.
You’ll then need to optimize your WooCommerce digital products pages for conversions. For instance, you might add high-quality images and videos, offer bundles and discounts, and display customer testimonials. You could even offer free trials and gated previews to subscribers — perfect for building your email list while giving people a glimpse of your products.
Even better, you can automate your marketing campaigns. Omnisend comes with pre-built templates for sharing promotions, announcing product launches, sending abandoned cart reminders, and more. You can configure workflows based on user behavior so that emails are sent to the right people at the right time.
Want to draw more eyes to your digital products? Get started with Omnisend today!
Quick sign up | No credit card required
Frequently asked questions
Does WooCommerce allow digital products?
Yes, WooCommerce lets you set up digital products, including downloadable material. When you create a product, navigate to the Product data box and select the boxes for Virtual and Downloadable. You can then upload the file for your product (image, PDF, etc.).
Can I sell digital products with WooCommerce?
Yes, you can sell all sorts of digital products. These include ebooks, software, digital art and photos, courses, templates, and more. You can also sell memberships and subscriptions by installing plugins like WooCommerce Memberships and WooCommerce Subscriptions.
Can I sell ebooks on WooCommerce?
Yes, you can sell them as downloadable products. When you create a digital product in WooCommerce, you’ll be able to upload a file (your ebook). Once a customer completes their purchase, the ebook will download to their device.
TABLE OF CONTENTS
TABLE OF CONTENTS

Subscribe and don’t miss any updates!
No fluff, no spam, no corporate filler. Just a friendly letter, twice a month.