
 OFFER
OFFER


21 best Shopify apps for 2025
With over 130+ pre-built integrations and flexible APIs, you can easily centralize data from across your tech stack
Make the most out of your data and unlock powerful growth marketing possibilities with these other top marketing tools.
Build any custom integration with our open, flexible APIs that are simple to use and implement.
Check out apps that have been stealing all the spotlight.
Email and SMS marketing insights, ecommerce resources, and the latest Omnisend news
Expert-led sessions covering email, SMS, and ecommerce marketing strategies.
Educational video and live training to help you make the most out of Omnisend.
Drive sales on autopilot with ecommerce-focused features
See FeaturesTargeted Shopify popups can significantly boost conversion rates, achieving 3-5% compared to just 1% for generic popups.
You can implement Shopify popups using native tools, third-party apps like Omnisend, or by writing custom code, each offering varying levels of complexity and customization.
Effective popups should be strategically targeted based on visitor behavior and preferences, ensuring relevant experiences that enhance engagement and conversions.
Best practices for Shopify popups include optimizing for mobile, crafting compelling calls to action, and regularly testing different formats and triggers to maximize effectiveness.
Shopify popups play an important role in converting browsers into buyers. Stores using targeted popups see an average conversion rate of 3-5%, compared to 1% for generic implementations.
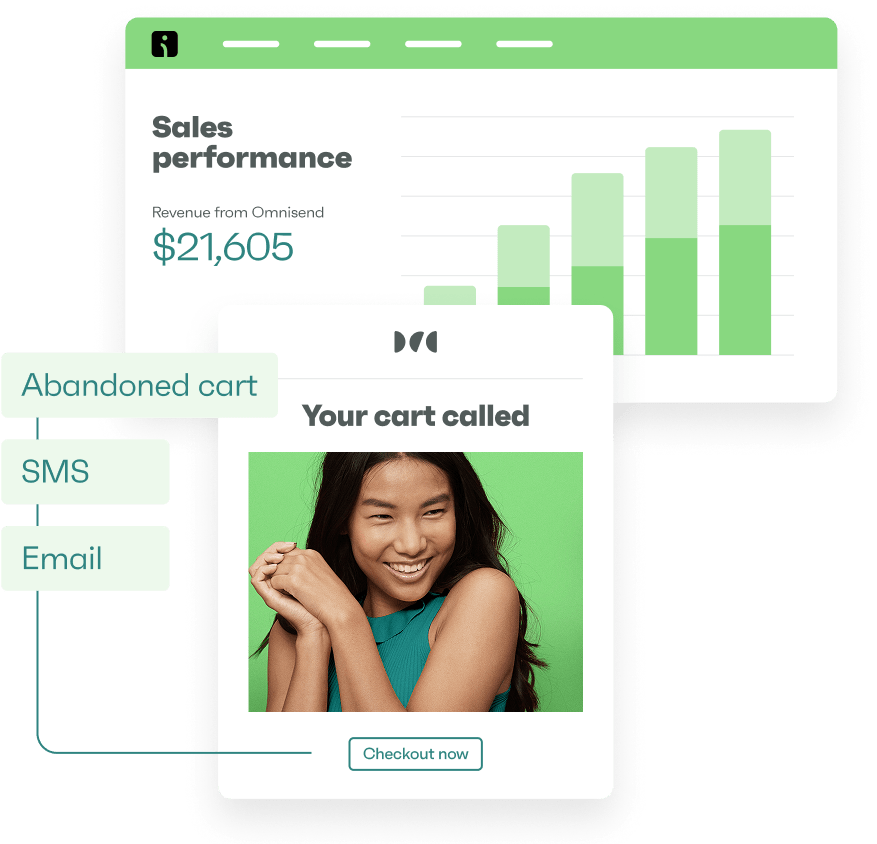
A Shopify popup is a message that appears on your store page to capture attention and drive action. Particularly, a Shopify email popup helps you grow your subscriber list. Ecommerce brands also use popups to collect SMS opt-ins, promote flash sales, and reduce cart abandonment.
You can add a popup on Shopify using native tools, installing a popup app, or leveraging advanced marketing automation platforms like Omnisend. With the right tools, you can even add a Shopify popup to your store for free.
In this guide, we’ll walk you through how to add a popup on Shopify. You’ll also learn targeting strategies, optimization tips, and compliance best practices to ensure your Shopify popup converts in 2026.
Quick sign up | No credit card required
Want popups on your Shopify store? There are three ways to do it: using a Shopify popup app, Shopify’s built-in tool, or writing code yourself.
| Method | Cost | Technical skill required | Best for | Key limitation |
|---|---|---|---|---|
| Third-party popup apps | $0–$100/month | Beginner to intermediate | Stores wanting a free plan with advanced targeting and Shopify certification | Ongoing subscription costs |
| Shopify forms app | Free | Beginner | Simple email capture with a simple setup | No advanced triggers or targeting |
| Custom code implementation | Depends on the developer | Advanced | Stores needing fully custom functionality and total control | High maintenance and theme update risks |
You can add popups to capture emails using a Shopify popup app from the Shopify App Store. You’ll find apps like Omnisend, Privy, OptiMonk, Justuno, Poptin, and Wisepops.
Most work the same way: install, pick a popup template, customize colors to match your brand, and publish. The fundamental differences show in triggers and targeting.
Exit-intent catches abandoning visitors, scroll percentage waits until they’re engaged, and time delays prevent annoying immediate popups. The best apps segment by location, device, or past purchases. They show different offers to first-time visitors versus returning customers.
Apps like Omnisend support both email and SMS capture, helping you grow across multiple channels from a single Shopify popup.
Expect to pay $20–$100/month for decent features. Free versions exist, but they limit impressions or add watermarks.
Pros
Cons
You can find Shopify Forms in your admin under Marketing > Shopify Forms. The templates cover basic popups: email sign-ups, discount codes, and age verification.
Pick one, adjust the text, and change button colors. Your captured emails flow straight into Shopify’s customer list, ready for email campaigns.
Note: There are no exit popups, A/B tests, and “show after scrolling 50%” options. However, with its zero cost and easy setup, it’s perfect for testing whether popups work for your store.
Pros
Cons
Open your theme editor, create a new snippet called popup.liquid, and start coding. JavaScript handles behavior, such as delays and exit intent, while CSS handles layout and animations. Liquid pulls in dynamic content, such as product names or customer tags.
The learning curve is high if you’re not already comfortable with code. You’re responsible for testing across devices and ensuring your Shopify popup works smoothly on both desktop and mobile layouts.
Most importantly, custom code can break during Shopify theme updates, requiring ongoing maintenance. However, you’ll never pay app fees or hit feature walls.
Pros
Cons
Omnisend’s form builder creates popups, embedded forms, flyouts, and landing pages from the same interface. You’ll find templates for email collection, SMS capture, cart abandonment prevention, and product recommendations.
Popular Shopify popup types include:
Step 1
Step 2
Triggering options range from exit-intent (tracking mouse movements toward close buttons) to scroll percentage and time delays. You control when popups appear: after 30 seconds of browsing, halfway down product pages, or when carts hit $50.
Because Omnisend is certified for Shopify, you can install it with a single click and automatically create discount codes. You don’t have to upload codes manually, and your codes won’t be duplicated on coupon websites.
Form submissions flow directly into email workflows, triggering a welcome series based on which popup visitors completed.
Here’s how to add popups on Shopify with Omnisend:
Note: If you’d rather watch a video than read our tutorial, here’s our walkthrough guide:
Navigate to Forms > Create form > Style > Popup on your Omnisend dashboard.
Pick a template from the Forms library. Here’s a screenshot of Omnisend’s template library:
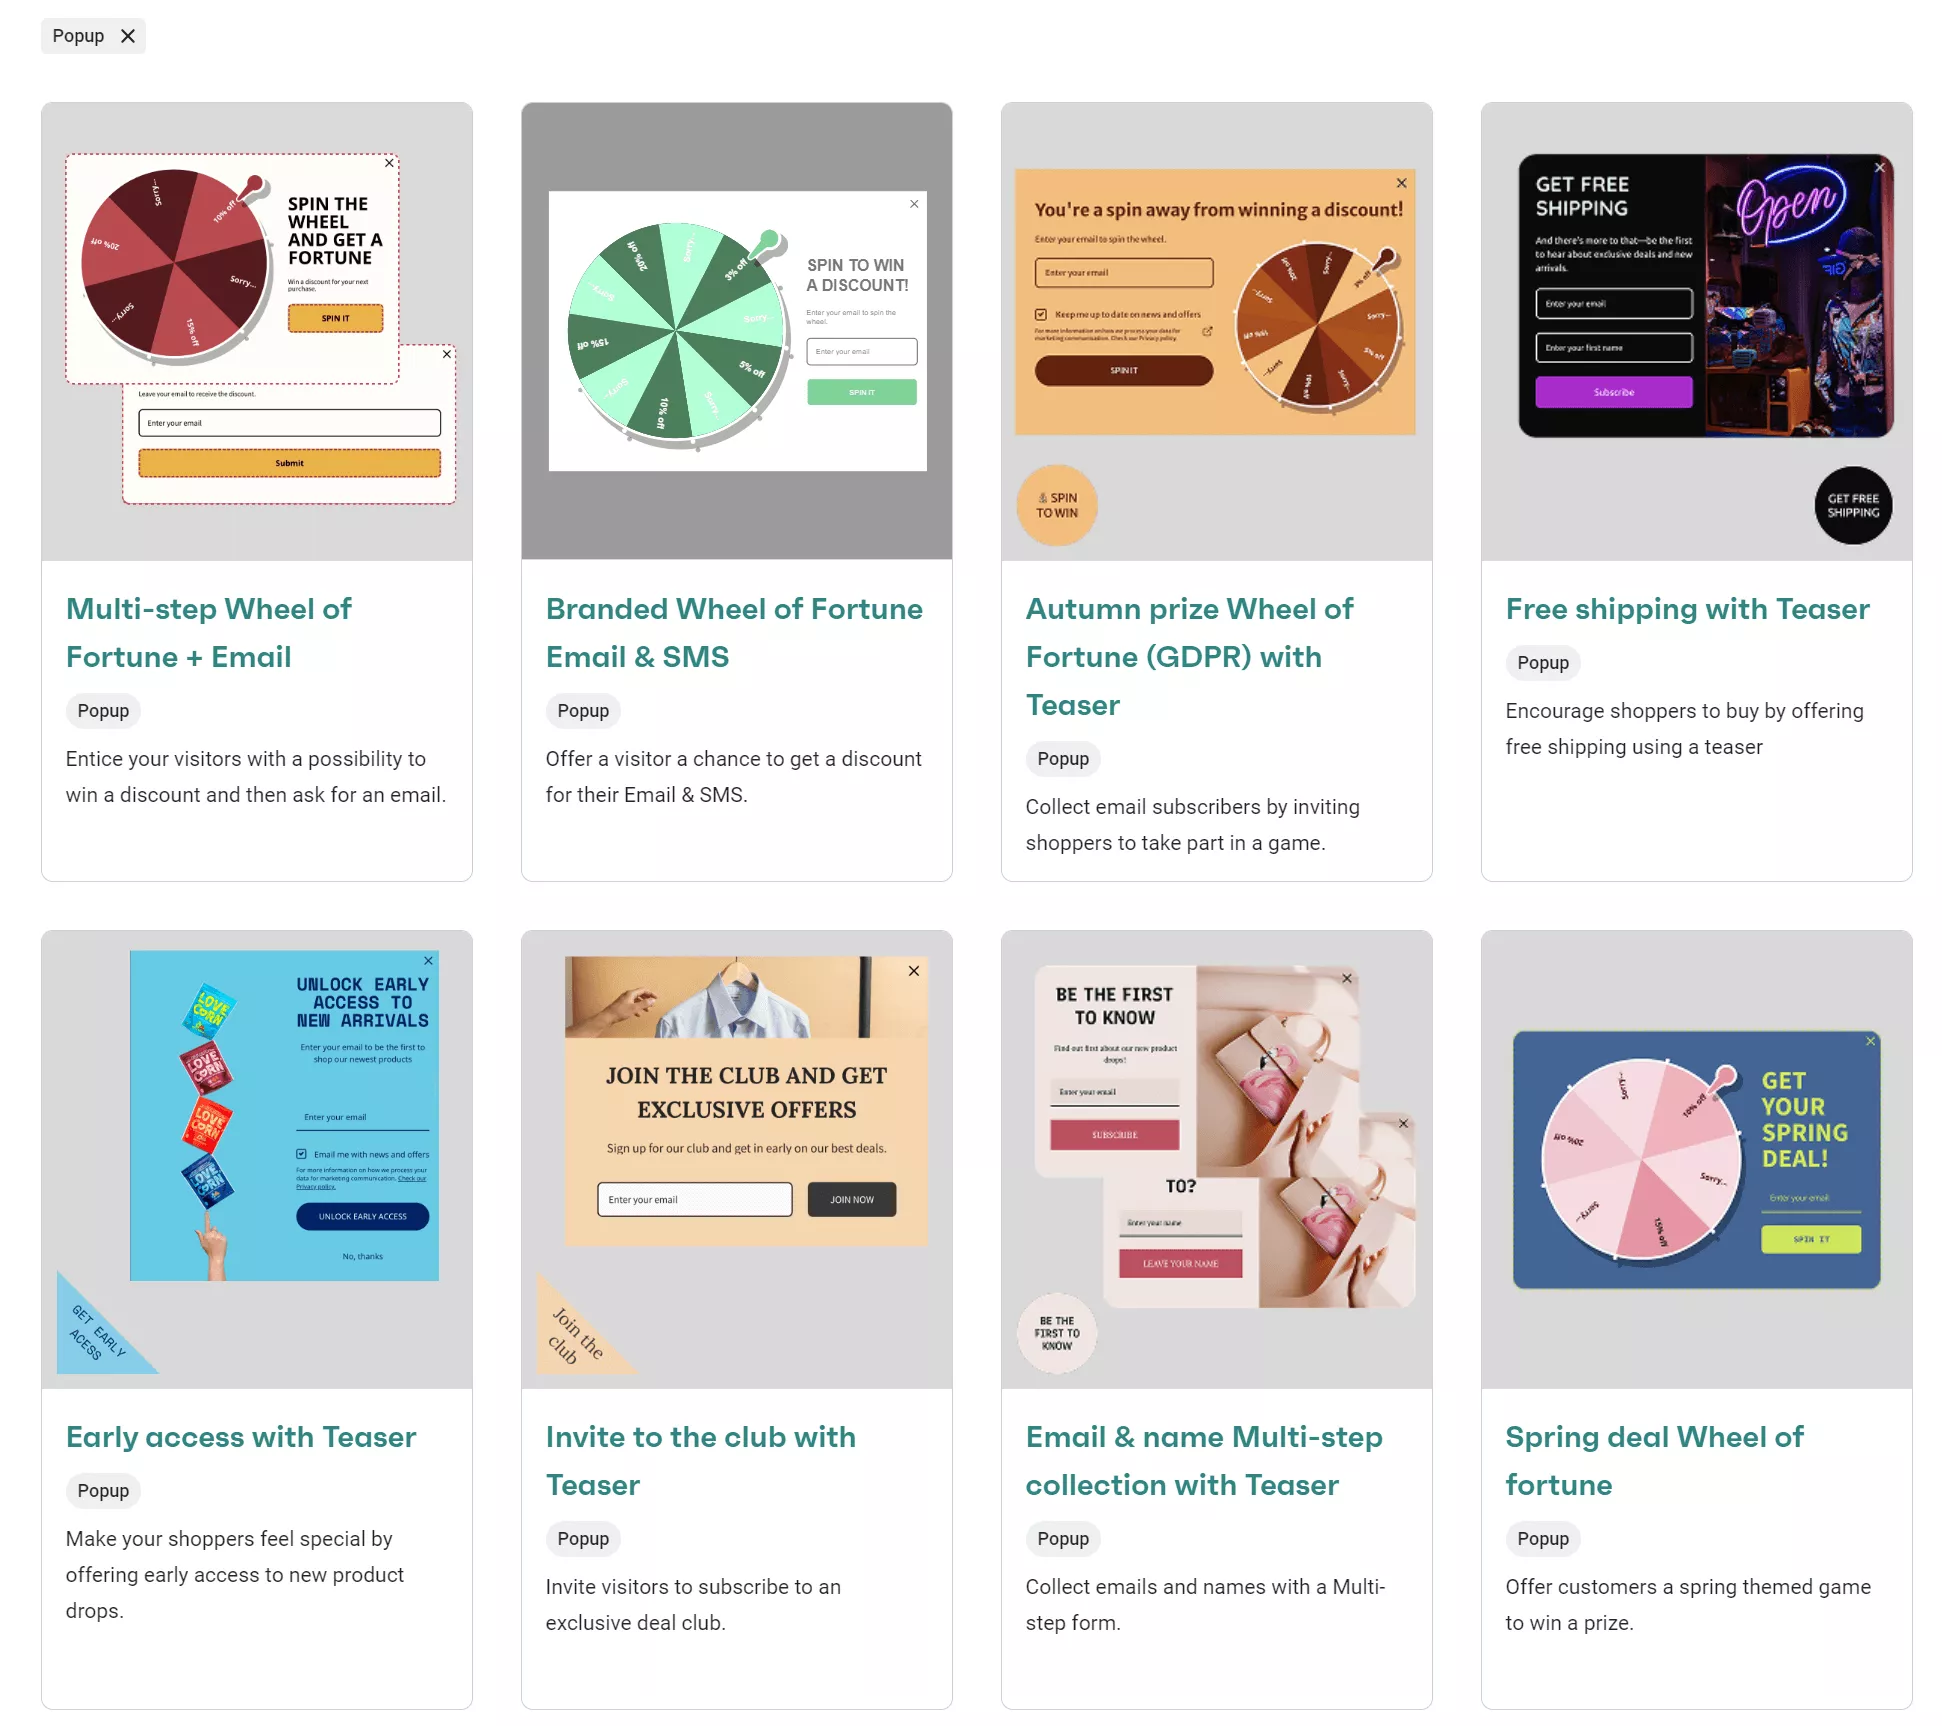
Clicking a template leads to the Form Builder interface.
Click Theme settings to control your popup’s appearance. You can find Theme settings in the top right sidebar below the Enable form button:
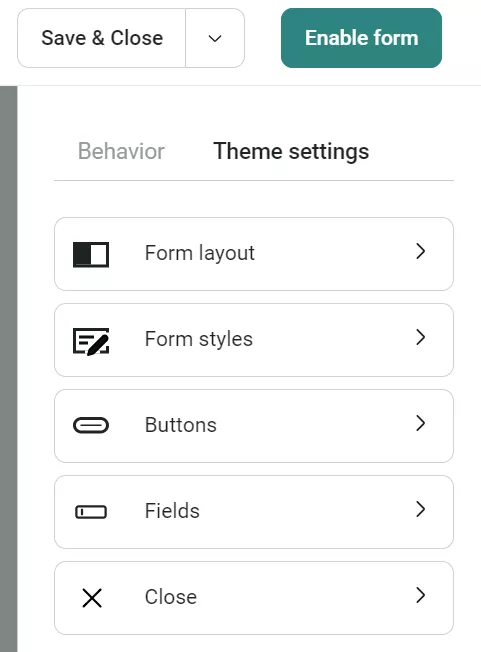
The Fields section lets you customize input shapes, while Buttons controls global button styling.
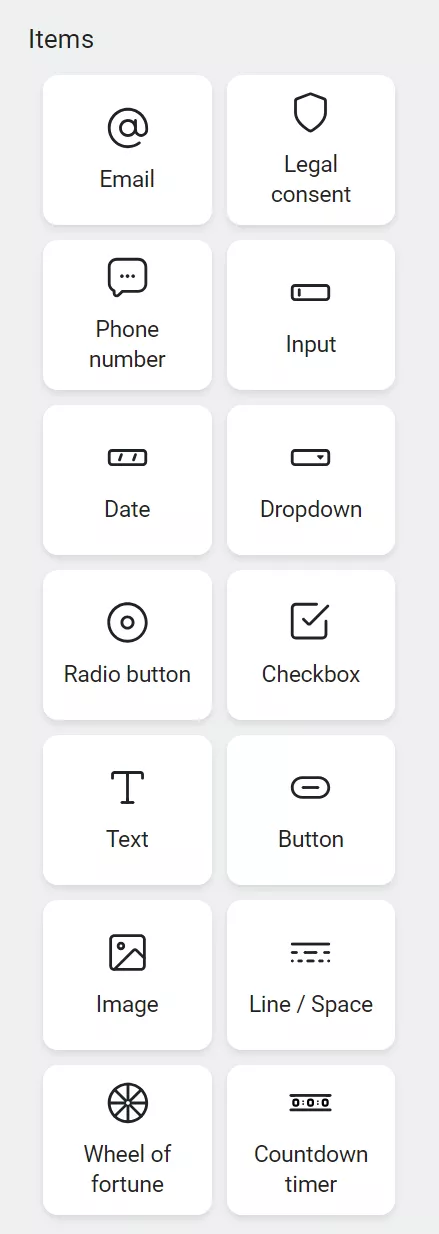
Drag items from the left sidebar onto your form. Available blocks include:
Here’s an image showing all the available items you can add:
Click any block to access its settings. Then, adjust text, styling, and field requirements.
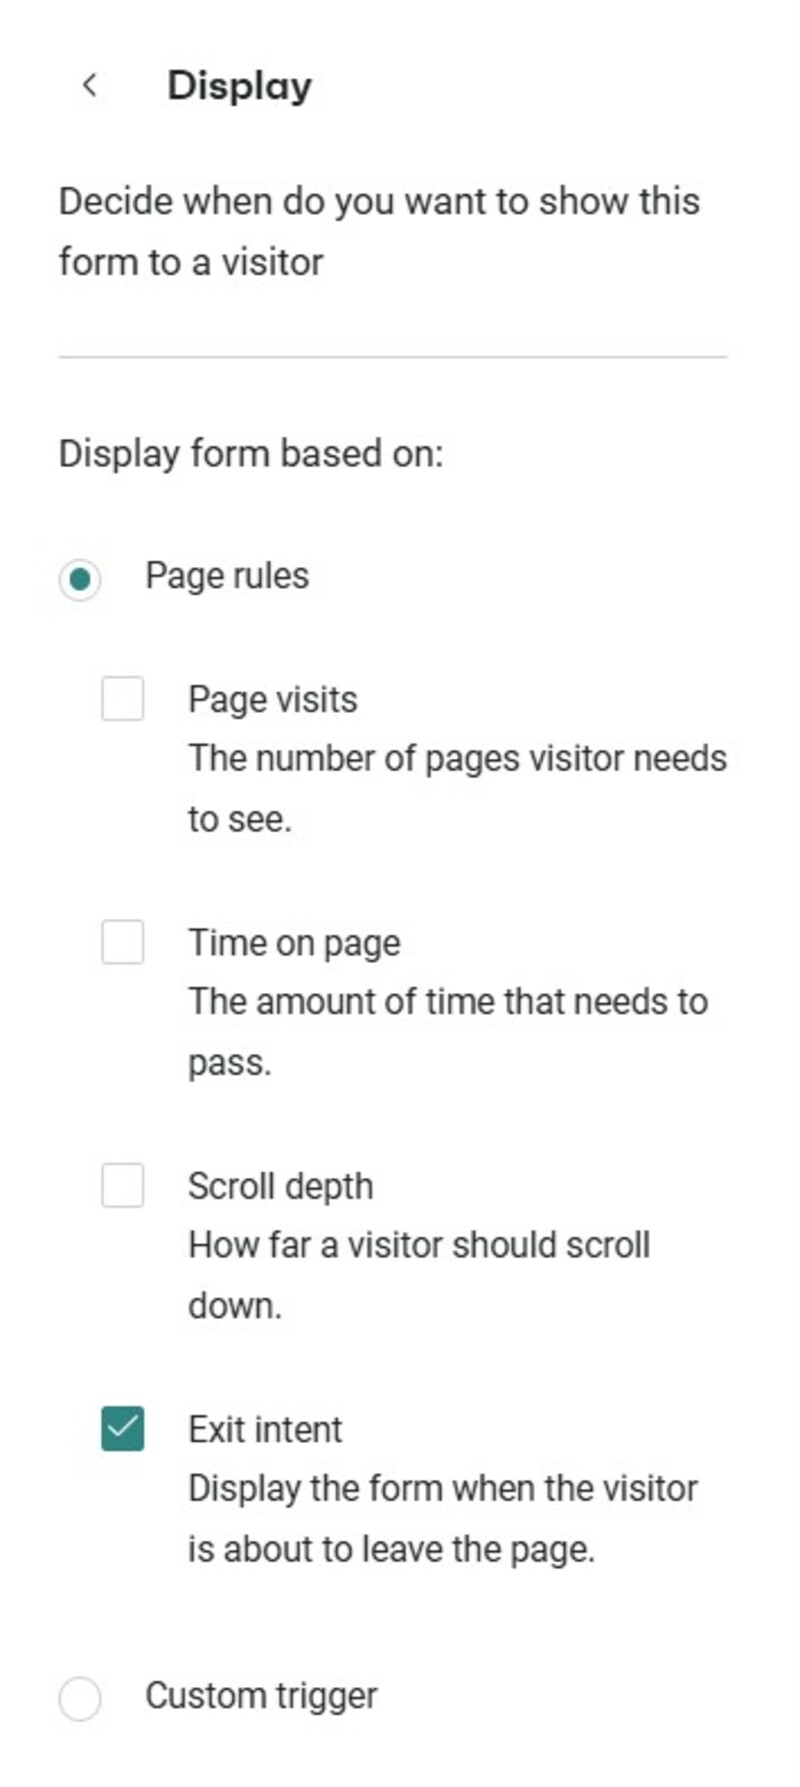
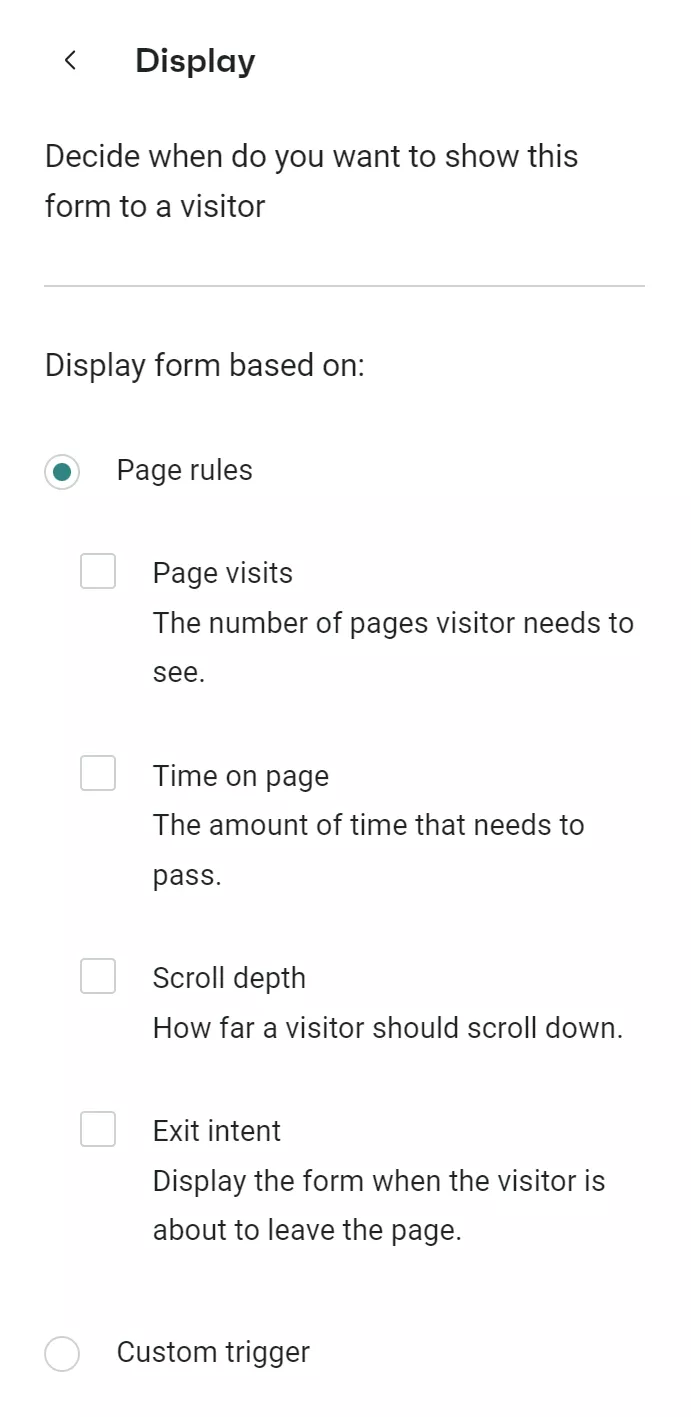
Open the Behavior tab, located next to Theme settings, to set display rules:
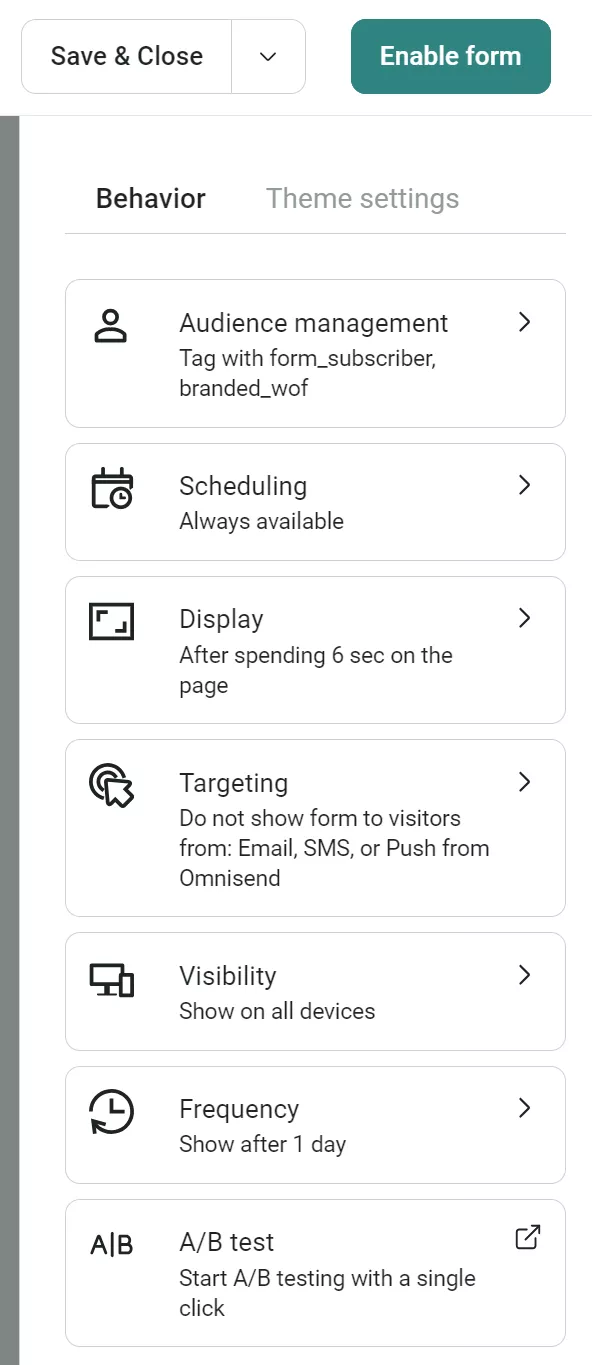
You can set multiple rules using OR logic, so the Shopify popup appears if any one of the conditions is met.
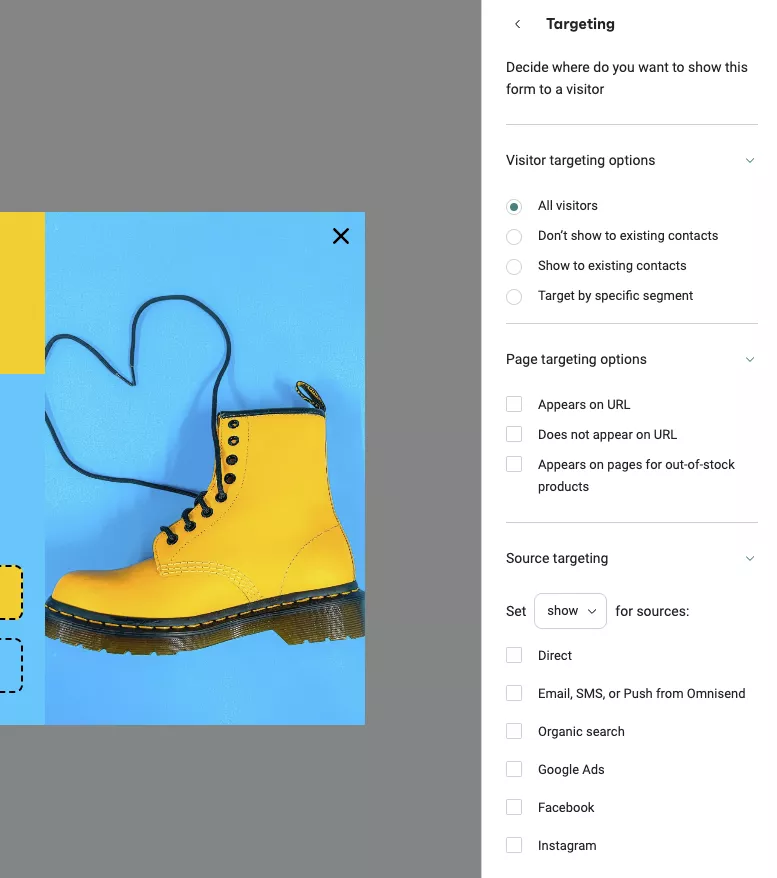
The Targeting section in the Behavior tab controls who sees your popup and where it appears:
Visitor targeting options:
Page targeting options:
Note: Page targeting uses AND logic. This means all URL conditions must match for the Shopify popup to display.
An exit-intent popup on Shopify appears when a visitor shows signs of leaving your store. On a desktop, exit-intent detects rapid mouse movement toward the browser bar.
How exit-intent works on mobile
On mobile, there’s no cursor, so detection works differently. It responds to behaviors, such as:
This timing makes exit-intent one of the highest-converting popup triggers. Our 2025 email popup statistics show that the average email popup conversion rate is 2.1%. However, stores that actively optimize timing, targeting, and format can reach 3.5%+.
Scroll triggers, on the other hand, activate after a visitor engages with your content, say at 40% page depth.
To activate exit intent on Omnisend, click Display from the Behavior tab, then check the Exit intent box.
In Frequency settings, choose intervals:
If disabled, the form always appears to visitors. Enable frequency limits to avoid overwhelming store visitors and reducing user experience quality.
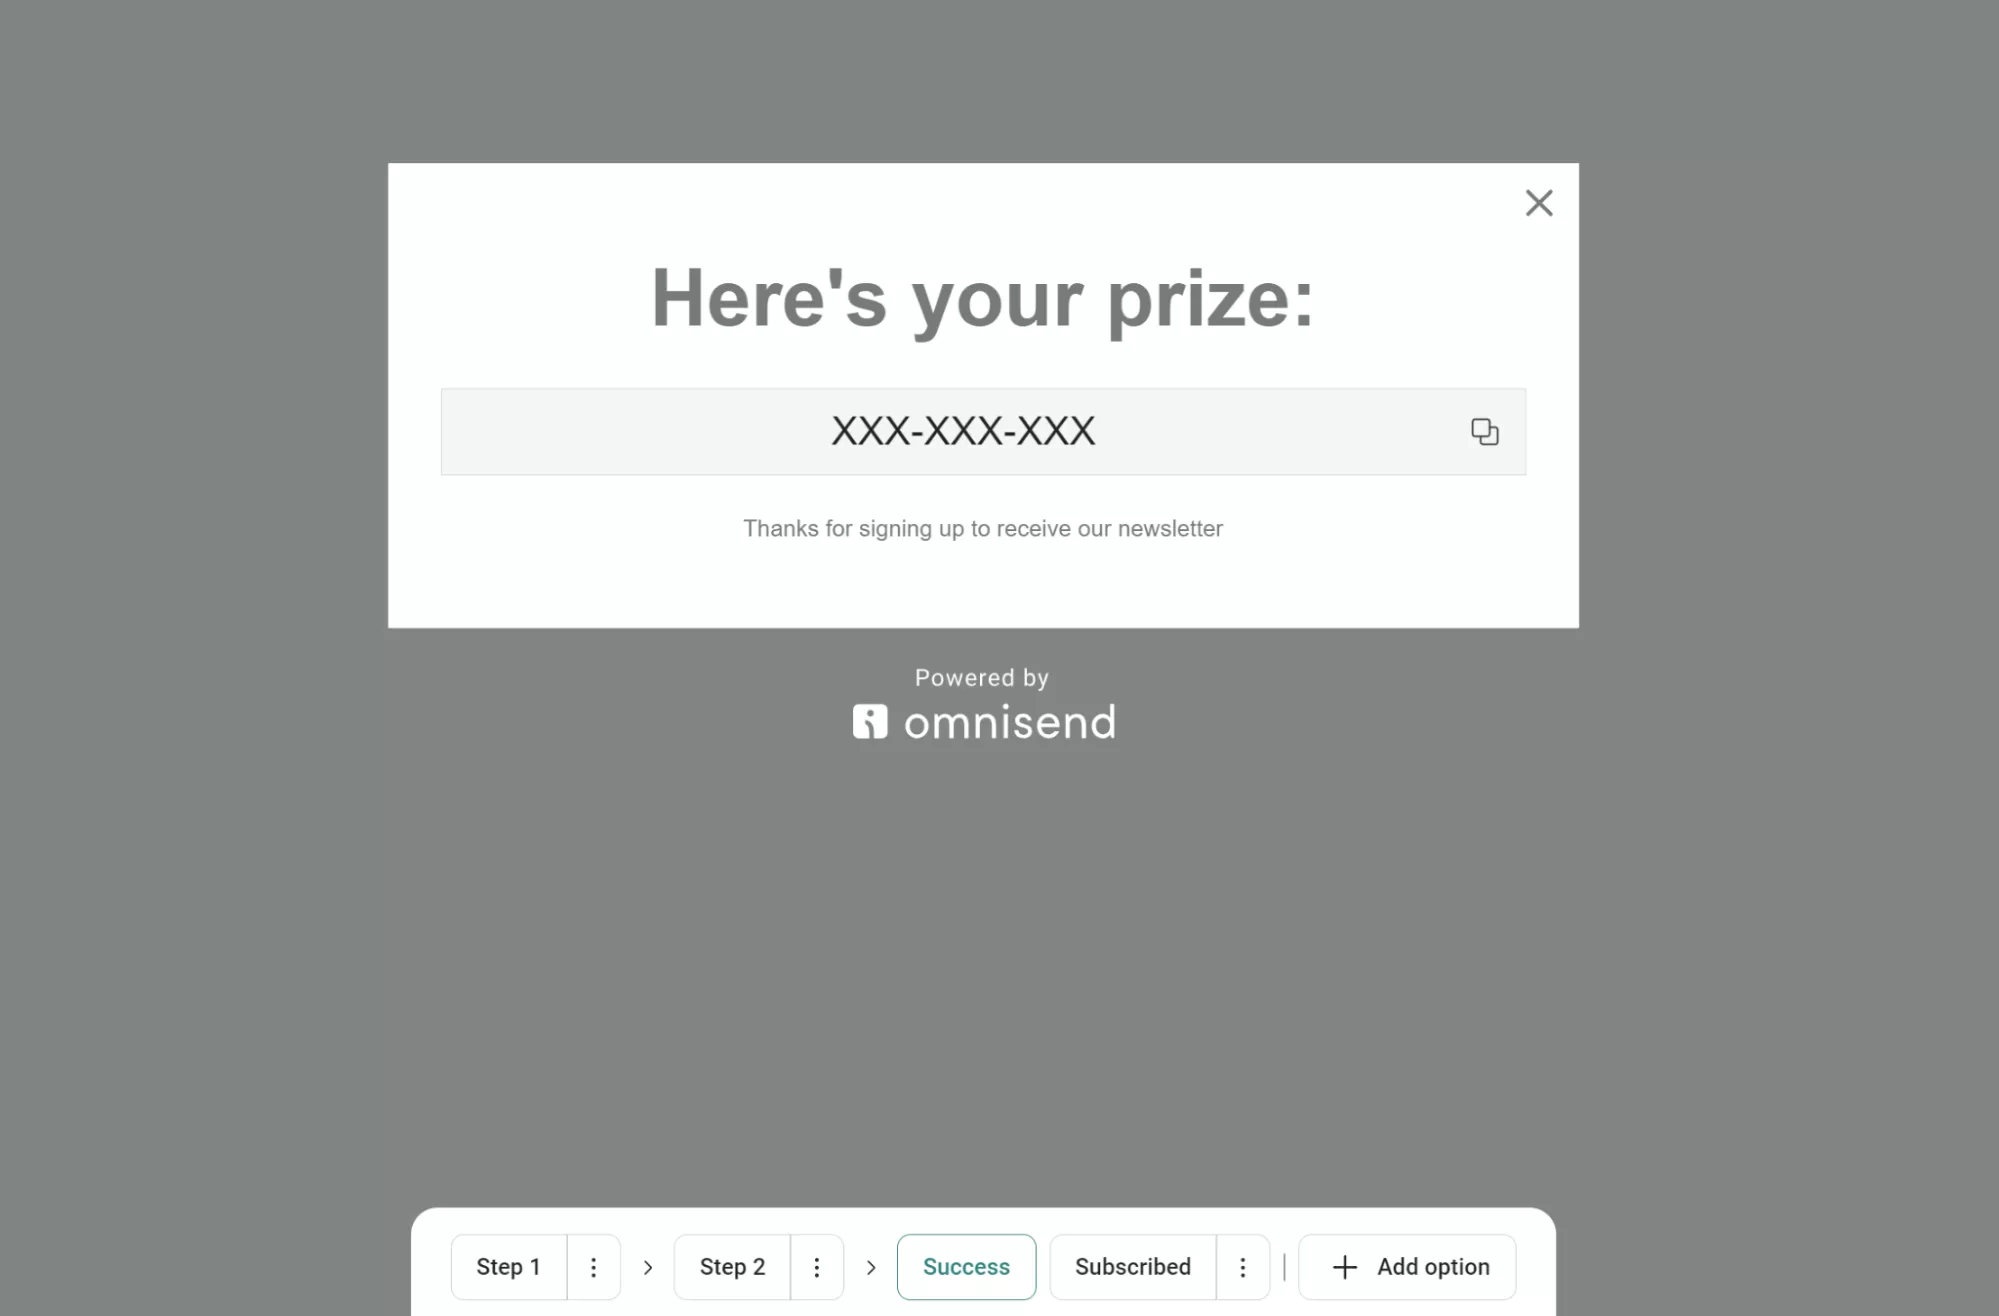
Click Success in the bottom menu. Edit the success message like the main form. Add text, images, buttons, or promotional content. Here’s an example:
Use the Subscribed section to create a separate message for returning subscribers who are already on your list. For instance:

Toggle A/B test in Behavior settings to experiment with different Shopify popup versions. Clicking the A/B test will load this page:
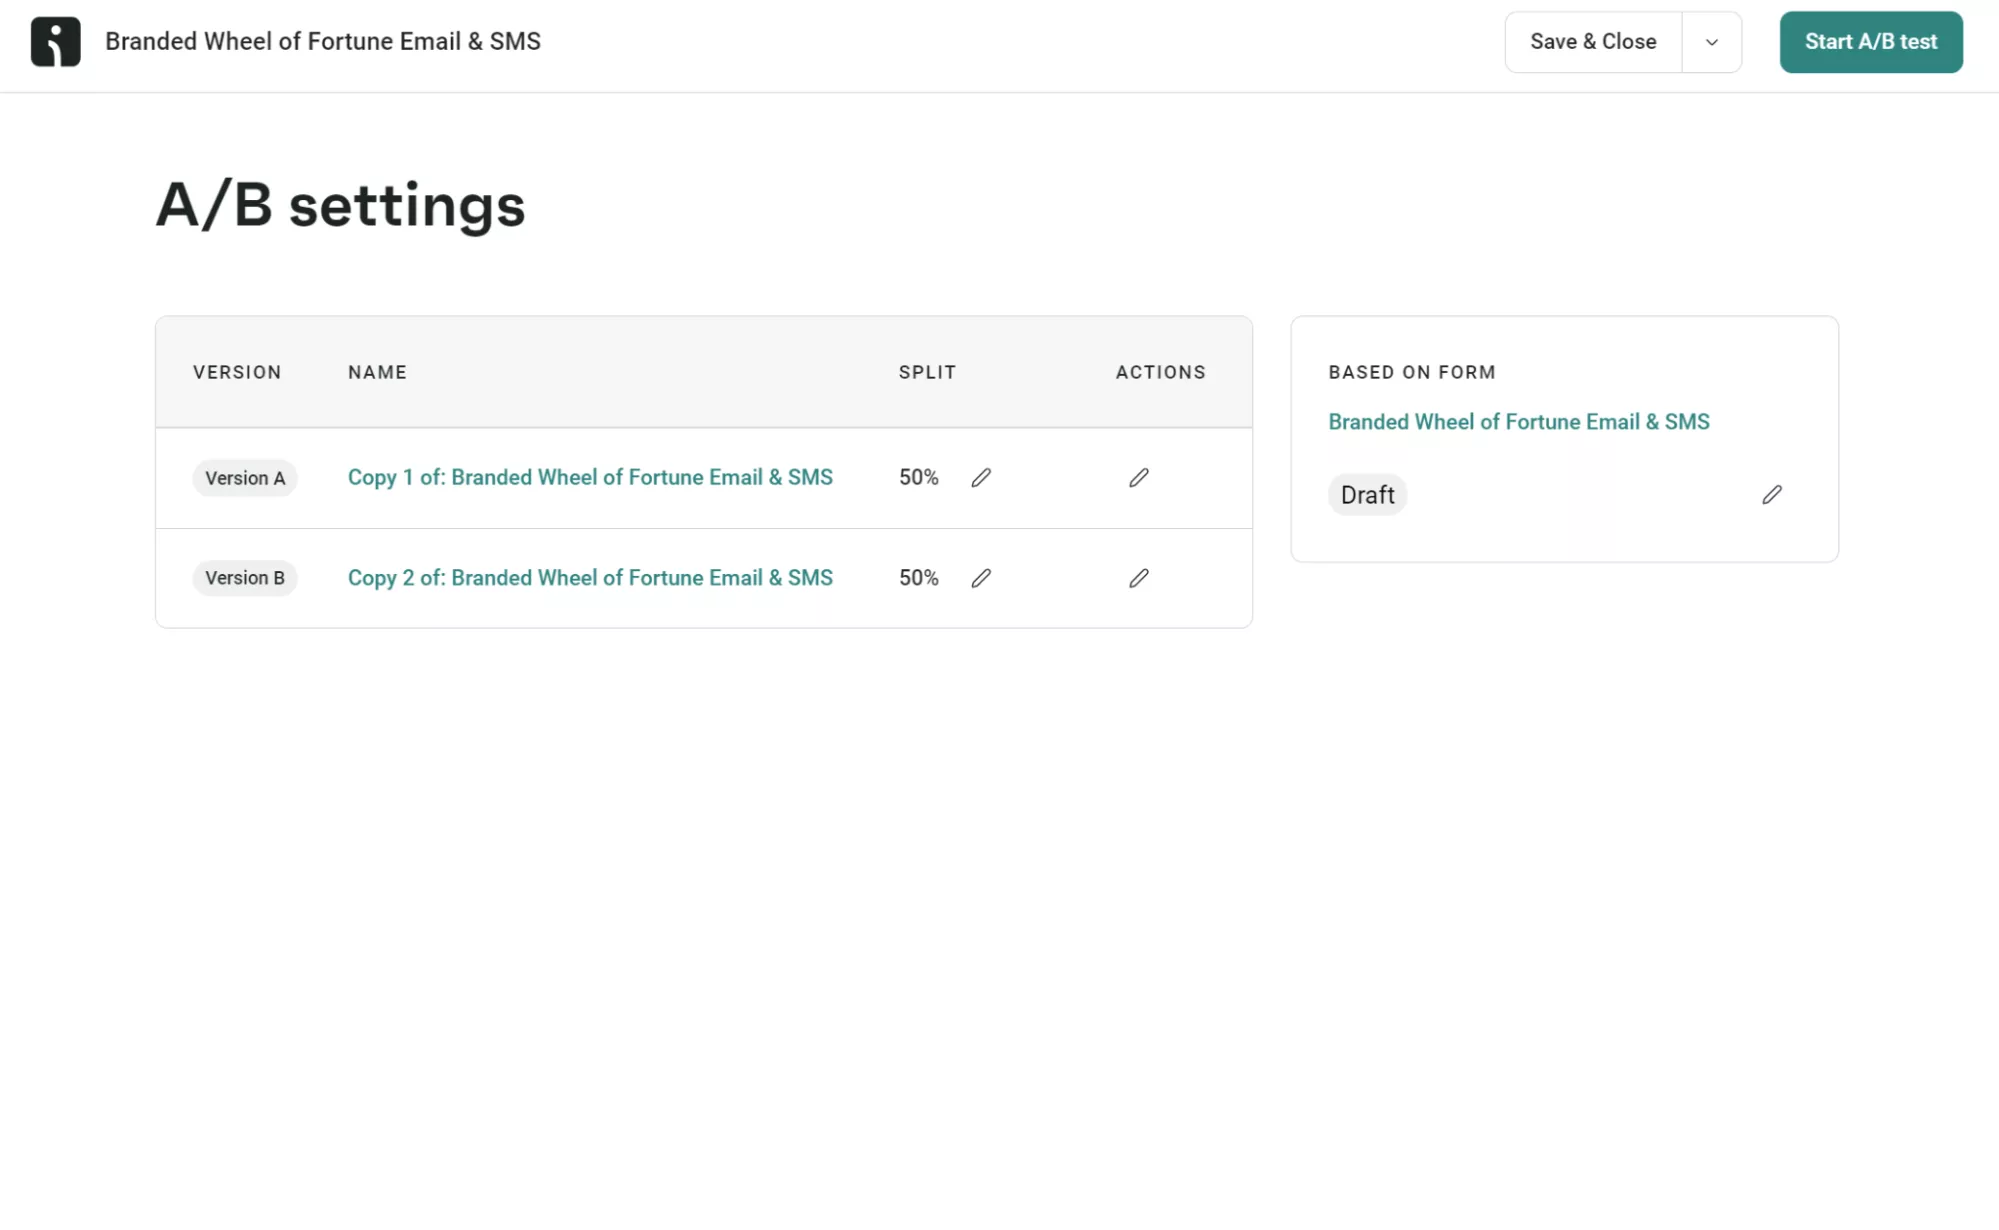
It’s a popup best practice to test variations of content, timing, or design to optimize performance.
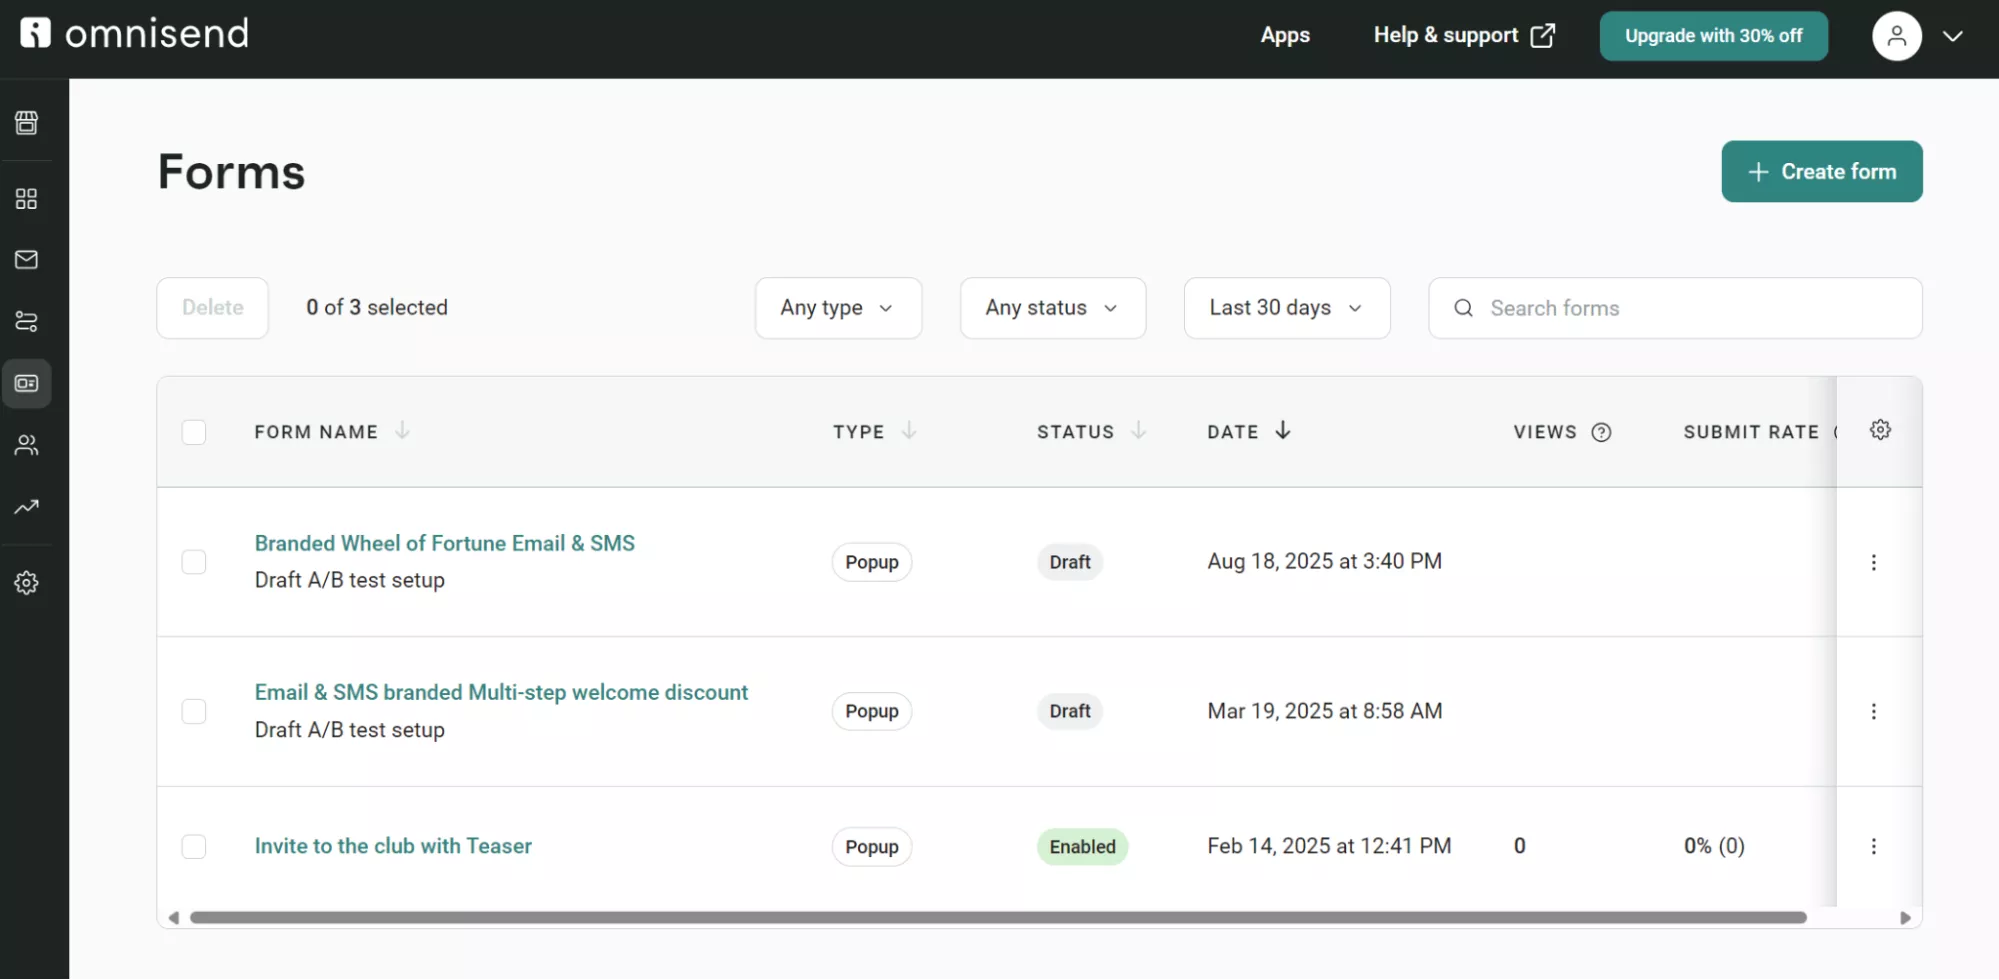
Use Undo/Redo buttons to refine your design. Click Enable to make the Shopify popup go live immediately or Save & Close to save as a draft. You can access saved forms through the Forms dashboard to monitor performance metrics:
Pro tip
While these instructions show Omnisend’s interface, most Shopify popup apps follow the same workflow: install the app, browse templates, customize design in a visual editor, configure display rules, and publish.
The buttons and menu names change between apps like Privy or OptiMonk. However, you’ll find similar template libraries, drag-and-drop builders, and behavior settings in each tool.
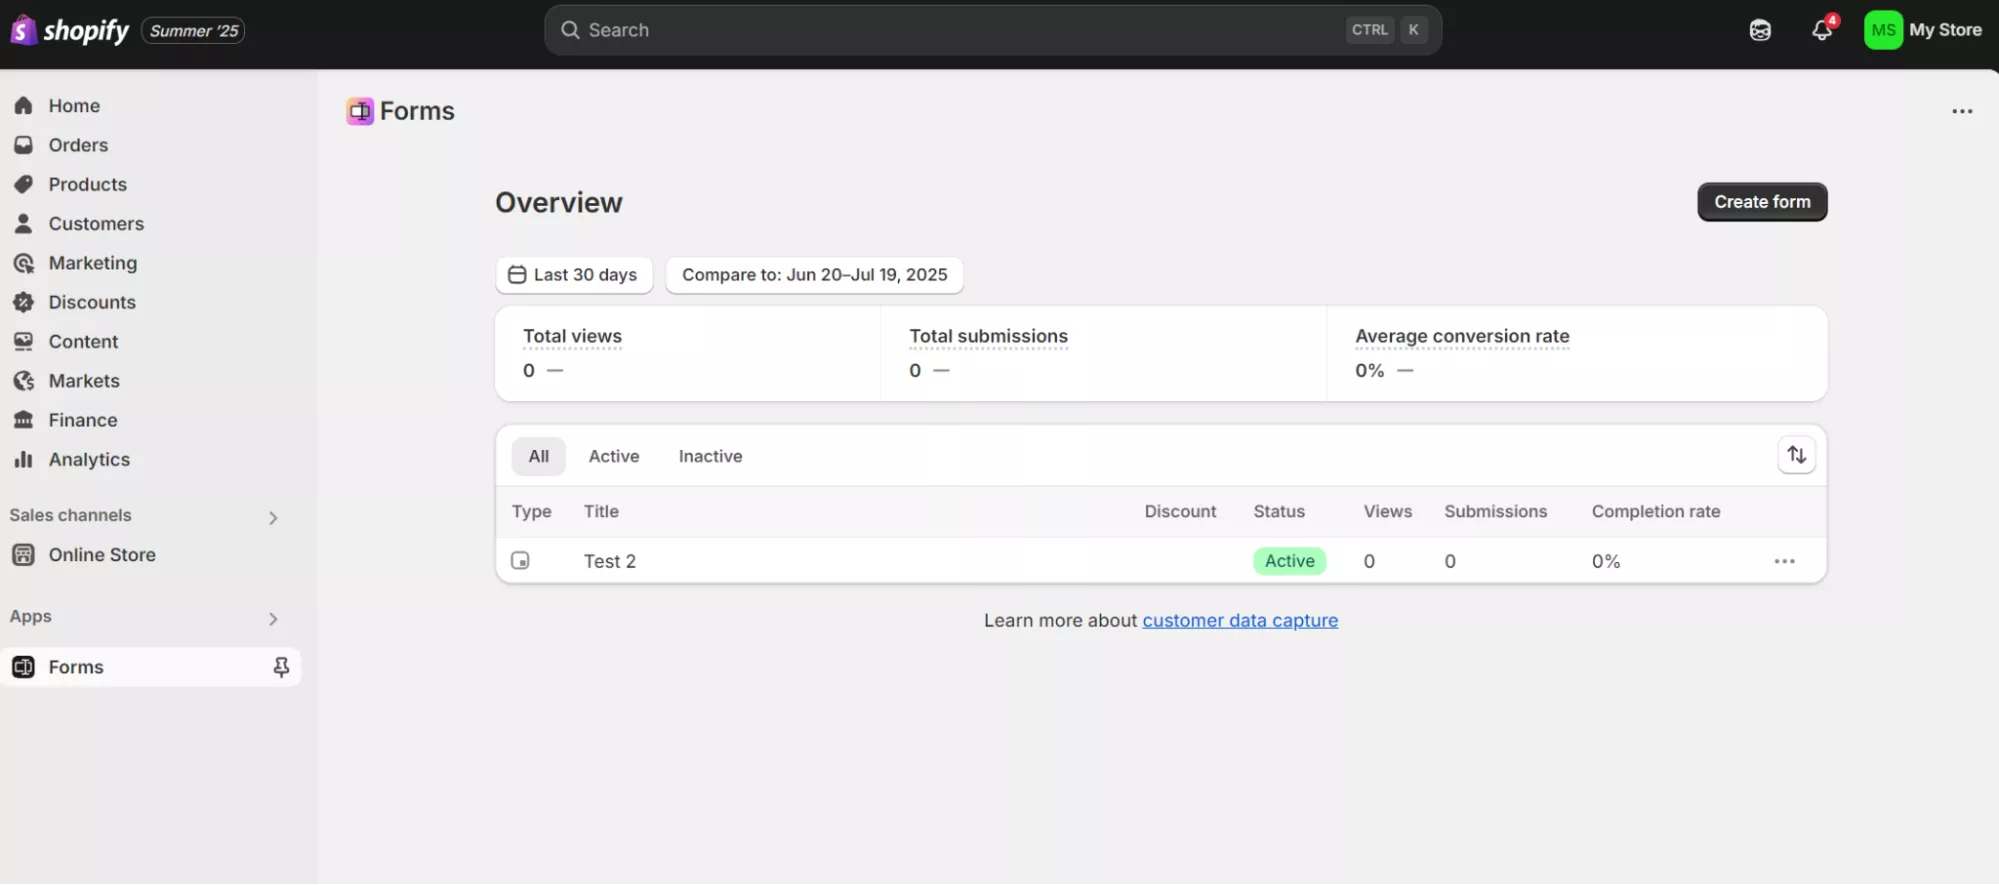
Shopify offers built-in popup features via the Forms app and the Forms theme app embed. After adding these to your theme, you can create and enable popups.
What’s great about Shopify Forms is that it’s completely free. You also don’t need to leave your Shopify admin panel to create popups.
Follow these step-by-step instructions to use Shopify’s native popups:
First, let’s access Shopify Forms:
Next, enable popup display on your store:
Without activating the Forms theme app embed, your popups won’t display even after you’ve created them.
Next, create your Shopify popup form:
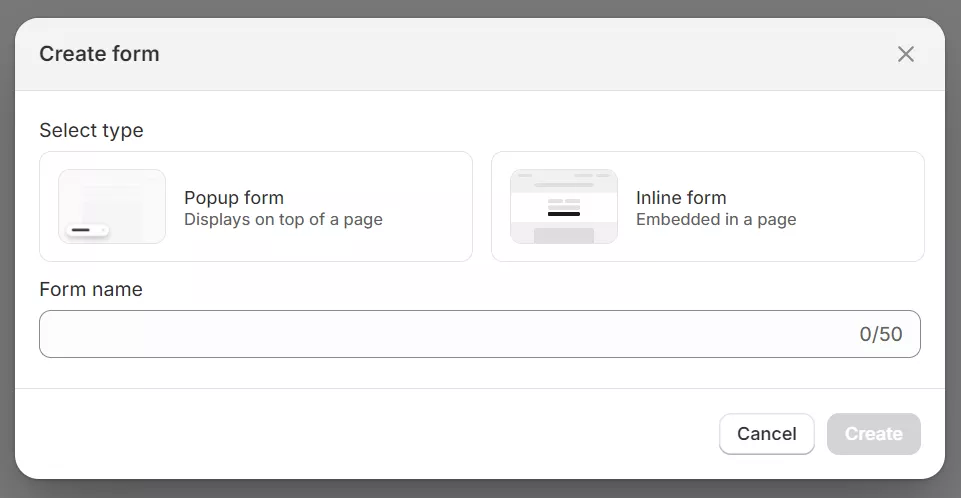
Your form opens in the editor with the status set to active by default. It will display immediately based on your settings.
Choose between two display options:
For floating forms, select the position (bottom-left, bottom-right). Overlay forms always appear centered.
The Styling box provides multiple settings for form customization. You can also edit your popup image and teaser.
Shopify Forms lets you pick which devices and pages show your popup and set triggers based on different page views:
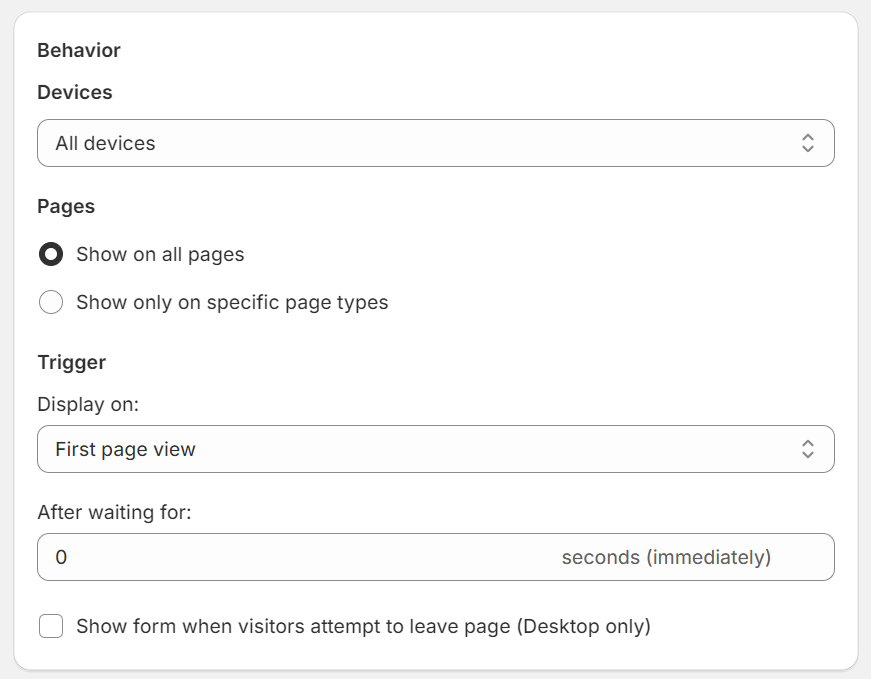
Trigger options:
Visibility settings:
Note: Shopify Forms can’t target specific URLs or exclude certain pages, such as checkout.
Use the editor to customize fields:
To create announcement popups without email collection, remove all form fields and add only text/images with a button.
Click Save to activate your Shopify popup:

New forms are automatically set to Active status and begin displaying based on your configured rules. You can monitor performance in the Forms app dashboard. It lets you view submission counts and manage multiple forms from a single location.
Pro tip
While Shopify Forms handles basic popup needs, you’ll hit limitations quickly. No A/B testing means guessing what converts best. No behavioral targeting means showing the same offer to everyone.
Shopify Forms can’t display exit-intent popups to mobile users. It works on desktop only.
If you need features such as cart value triggers, customer segment targeting, or SMS marketing integration, consider upgrading to a specialized app.
Shopify Forms are ideal for testing, but forms that come with expert-approved apps like Omnisend is ready when you need results.
While Omnisend and Shopify Forms are the best ways to add popups to your store easily, you can do it manually with code.
This option is more advanced and best suited for people with coding knowledge or who can hire a developer. However, remember to back up your theme files before making any edits.
Use manual code when you need unique popup behaviors for desktop or mobile layouts that apps can’t provide. With custom code, you can add custom animations, specific JavaScript triggers, integration with proprietary systems, or complete control over popup timing and styling.
HTML is the simplest way to add a custom popup to your Shopify store. Here’s a free code you can grab and test:
}
.form-control {
width: 100%;
padding: 10px;
border: 1px solid #ddd;
border-radius: 4px;
box-sizing: border-box;
}
.form-control::placeholder {
color: #666;
}
.checkbox-group {
margin: 15px 0;
}
.submit-btn {
background-color: black;
color: white;
padding: 10px 20px;
border: none;
border-radius: 4px;
cursor: pointer;
width: 100%;
}
</style>
<div class=”popup-container” id=”popupForm”>
<div class=”popup”>
<span class=”close-btn” onclick=”closePopup()”>×</span>
<h2>Sign up for 20% off your first order</h2>
<div class=”popup-form”>
<form id=”discountForm”>
<div class=”form-group”>
<input type=”text” class=”form-control” id=”name” name=”name” placeholder=”Name” required>
</div>
<div class=”form-group”>
<input type=”email” class=”form-control” id=”email” name=”email” placeholder=”Email” required>
</div>
<div class=”checkbox-group”>
<label>
<input type=”checkbox” name=”marketing” checked>
I agree to receive marketing messages
</label>
</div>
<button type=”submit” class=”submit-btn”>Submit</button>
</form>
</div>
</div>
</div>
<script>
Note: Adding a popup to your Shopify store with manual code works with any Shopify theme by editing the theme files. You should always test the code in a preview before publishing it to ensure it functions as intended.
Once you have your form, you can add it to Shopify with these steps:
After adding this code:
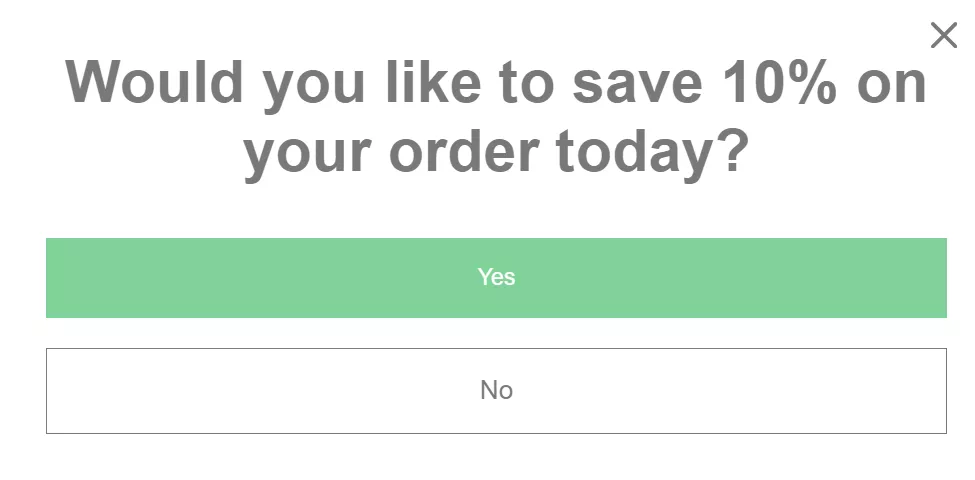
You can then preview your store. Here’s how our form looks:
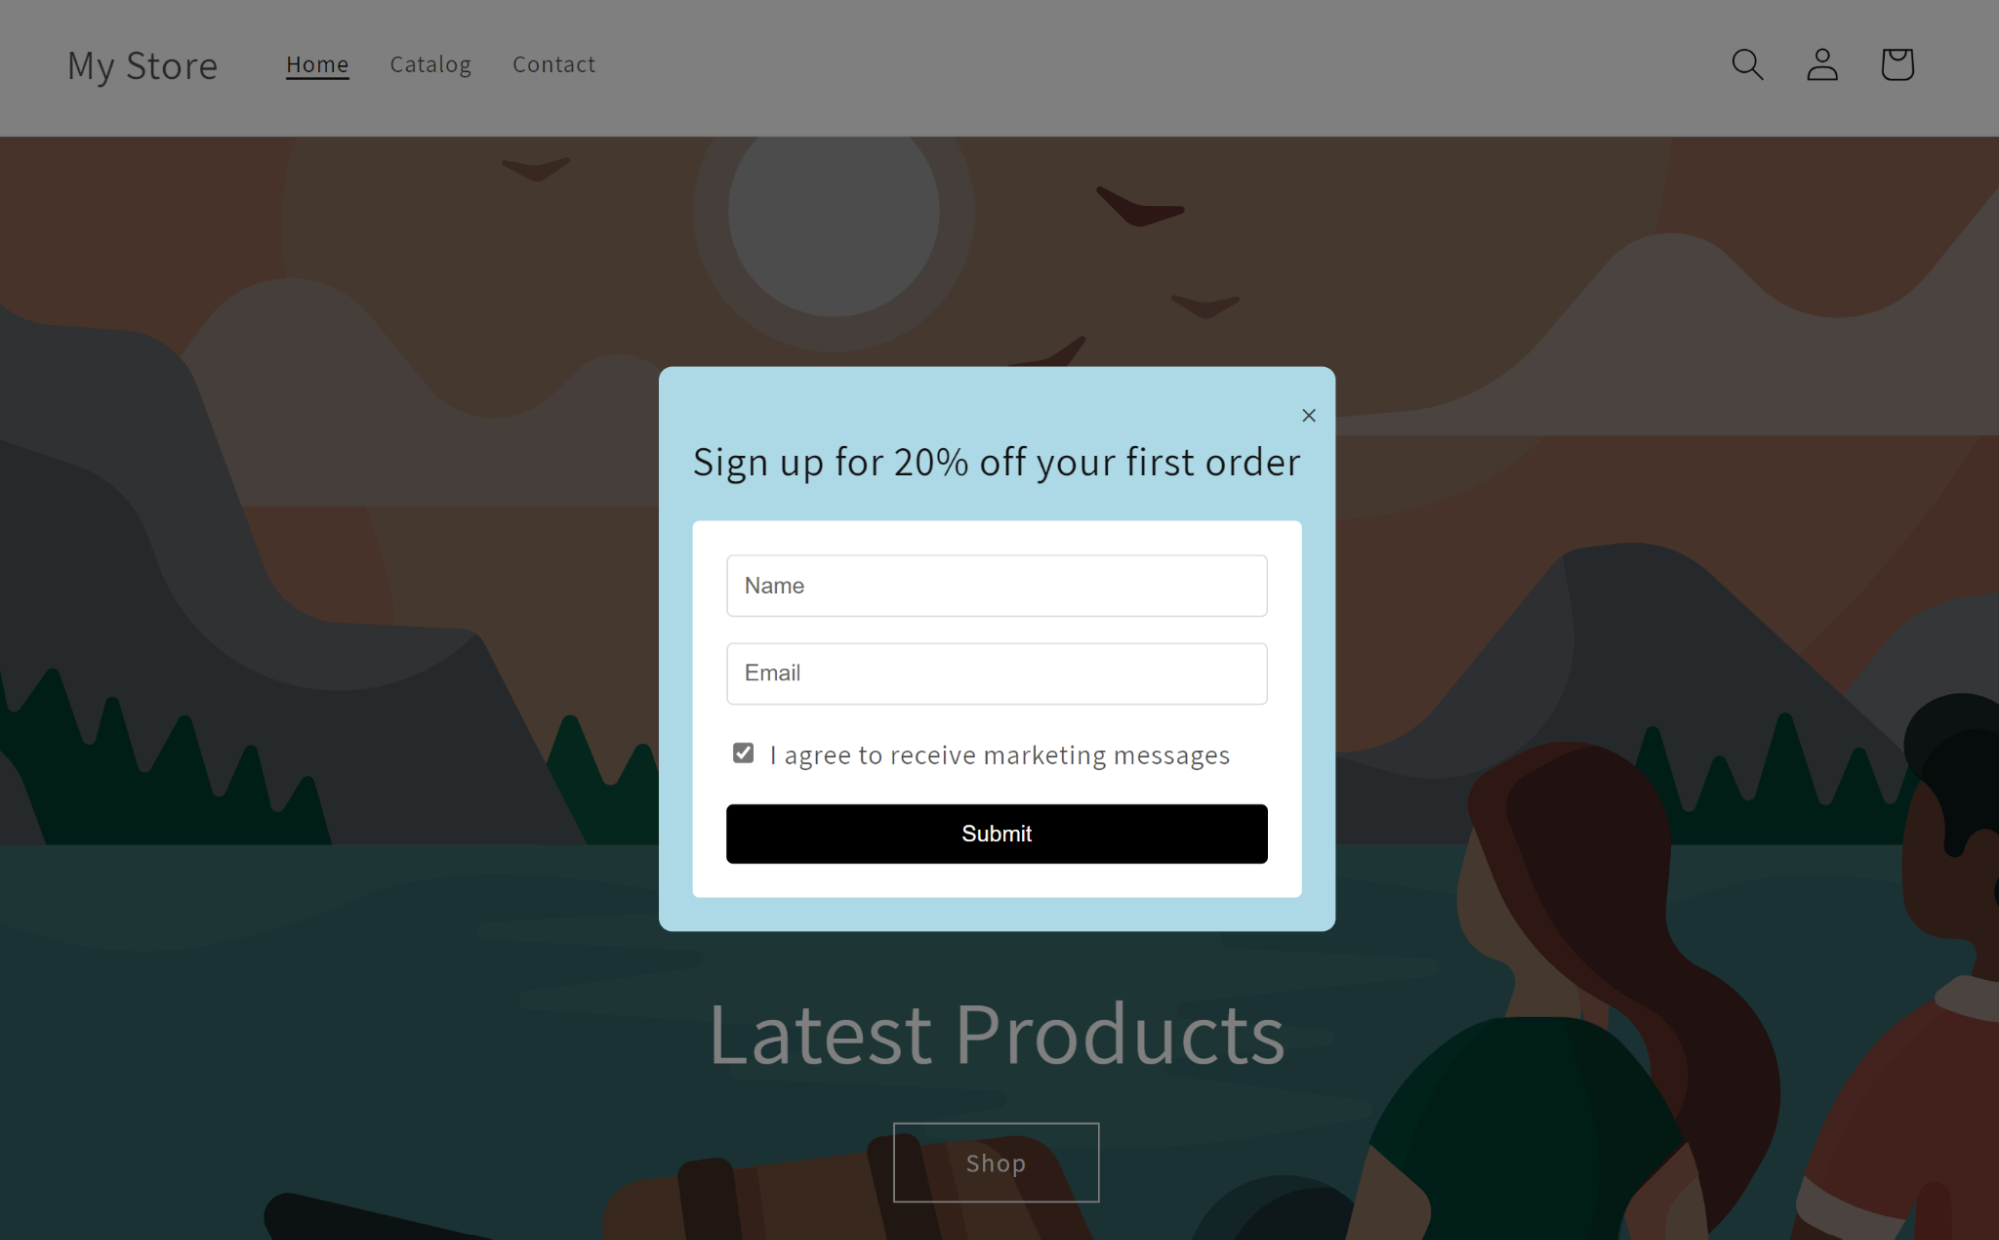
You can customize colors, form fields, buttons, content, opt-in boxes, and other elements by editing the code above.
For a functioning opt-in box in Shopify, you’ll need to connect it to the Shopify Customer Privacy API and, if applicable, to your email marketing platform.
Pro tip
Once you master manual code, creating custom popups becomes straightforward. You can replicate designs quickly, reuse JavaScript functions, and build exactly what you envision without app constraints.
However, popup apps remain more efficient for most stores. Features that take hours to code manually, such as mobile responsiveness, A/B testing, and automated analytics, are built in with tools like Omnisend.
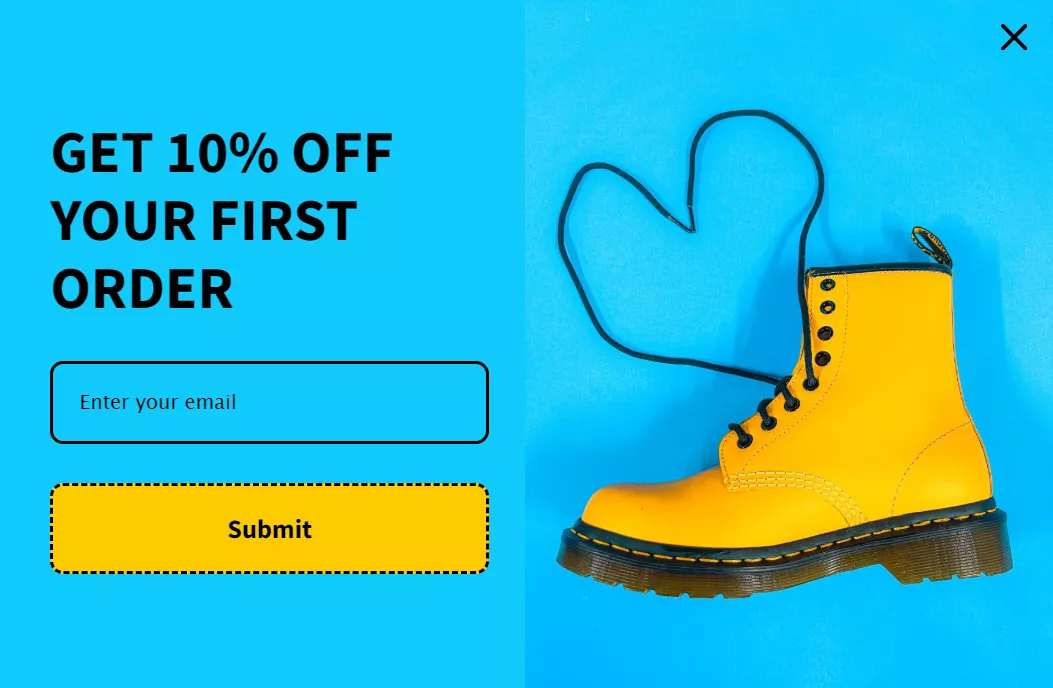
A Shopify discount code popup remains the most popular way for top Shopify stores to grow email lists.
Recent popup statistics show that an email capture popup with a discount offer converted at 2.4%, compared to 1.7% for popups without discounts. That’s because visitors are willing to exchange their information if there’s a clear benefit.
Here’s how to set up a discount code popup:
Before building Shopify discount popups, create the actual discount:
1. Navigate to Discounts in your Shopify admin
2. Click Create discount > Select discount type
3. Enter a unique code, such as “FIRSTORDER” or “20OFF”:
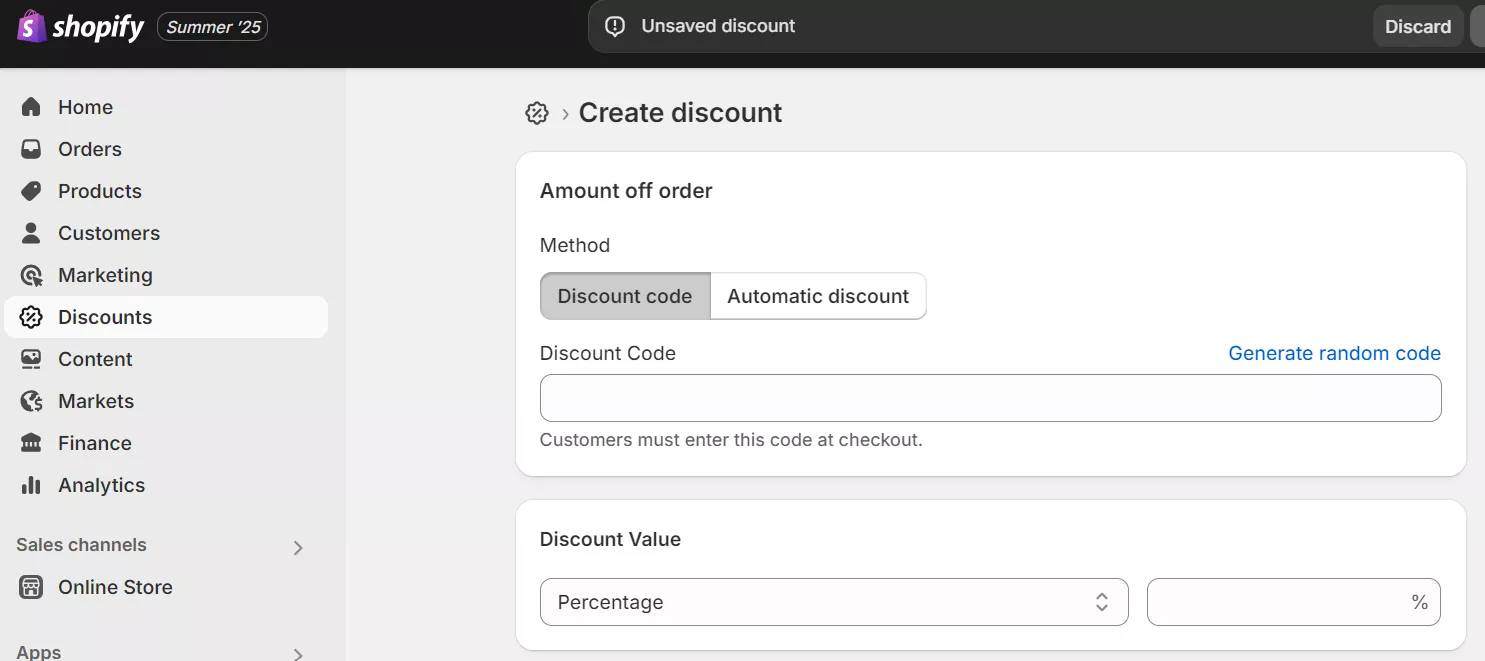
4. Set the discount type (percentage or fixed amount)
5. Choose Specific customers and select Customer gets a discount for signing up
6. Save the discount code
Keep this code handy, as you’ll need to add it to your popup’s success message.
It’s best practice to create discount popups that request an email address, as this allows you to target customers with additional messages. However, you could also create a Shopify popup without any data-capture fields if your only goal is sales.
The steps are similar:
Using Omnisend:
Using Shopify Forms:
There are two ways to show the discount code popups:
Immediate display (recommended):
Email delivery:
Optimize the timing when your Shopify discount popup appears:
Run through the whole experience:
Pro tip:
Static codes (Shopify Forms) vs. Unique codes (Omnisend)
Shopify Forms requires manual code creation, which means everyone gets the same code. However, Omnisend allows you to generate unique, single-use discount codes automatically, preventing code sharing on coupon sites.
If you want to stop seeing your codes on coupon sites, Omnisend is a better option than Shopify Forms.
Quick sign up | No credit card required
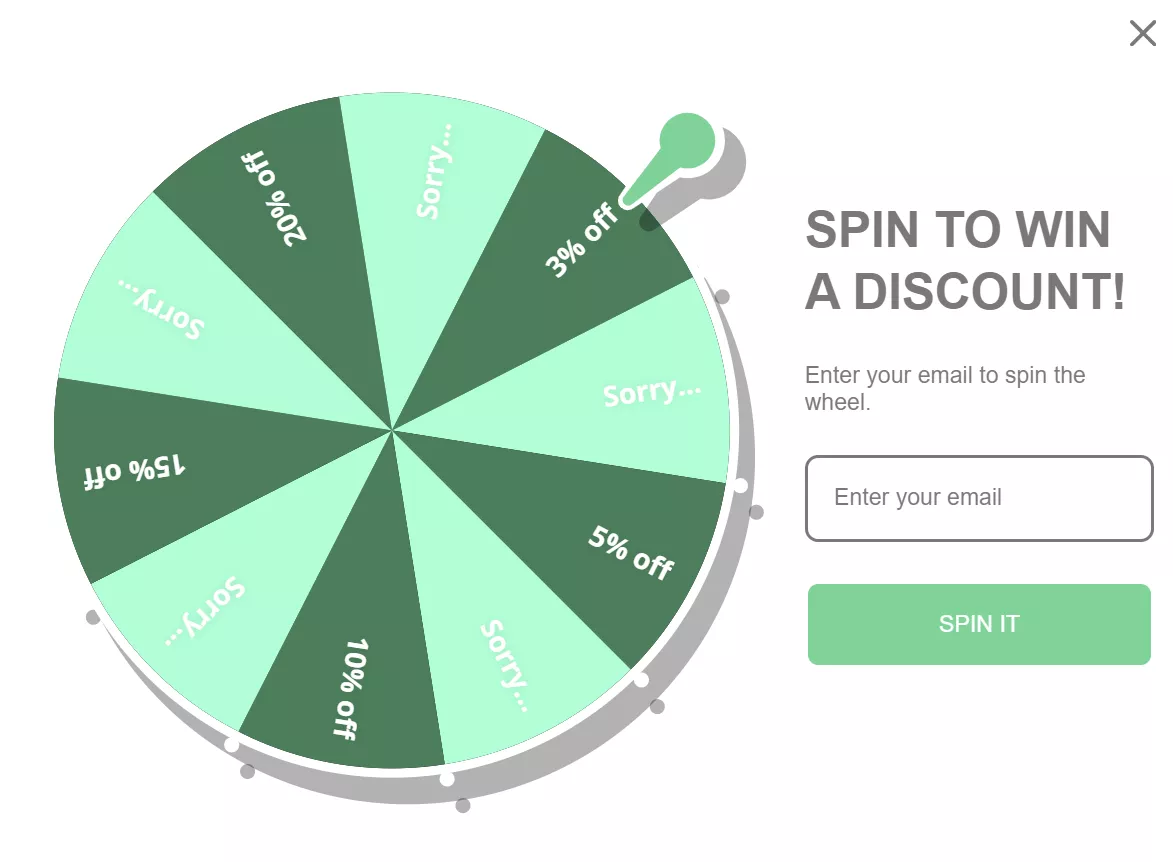
Popups can serve different goals in your customer journey, such as increasing signups, promoting new products, and testing different offers.
Here are the most effective Shopify popup types for your store:
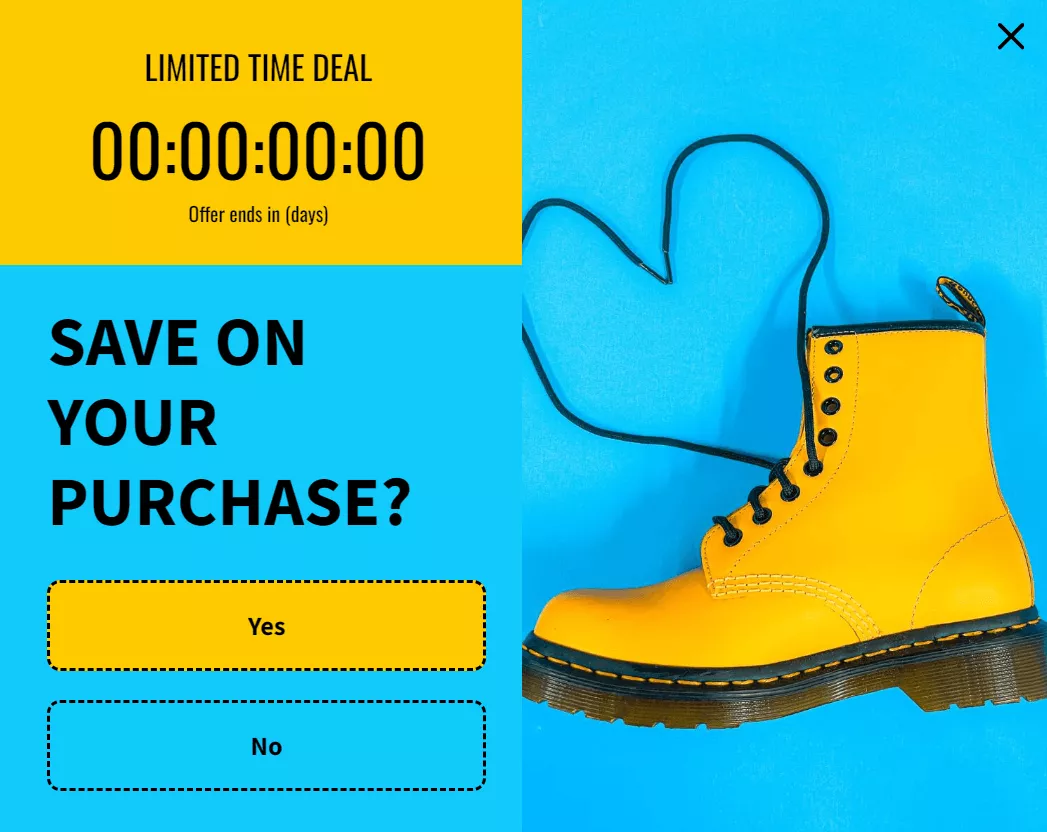
Because it appears at the last possible moment, an exit-intent popup on Shopify is used for free shipping offers at checkout, limited-time discounts, or email capture before visitors leave.
Pro tip:
Test Shopify popup formats and timing to see what gets the most engagement. For instance, a welcome popup for new visitors, exit intent for browsers, and cart savers for almost-customers.
Without targeting, you’ll show the same Shopify popup to everyone. Returning customers see “new visitor” discounts, casual visitors get bombarded immediately, and conversion rates struggle to tick over a few percent.
Proper targeting creates relevant experiences that feel natural and pleasant for your customers. Additionally, you can test different segments (new vs. returning), timing (immediate vs. delayed), and contexts (homepage vs. product pages) to find what converts best.
In Omnisend, building a Shopify popup is just the first step. You’ll achieve your highest conversion rates when you align popup content with visitor intent.
Here’s how to approach Shopify popup segmentation via Omnisend:
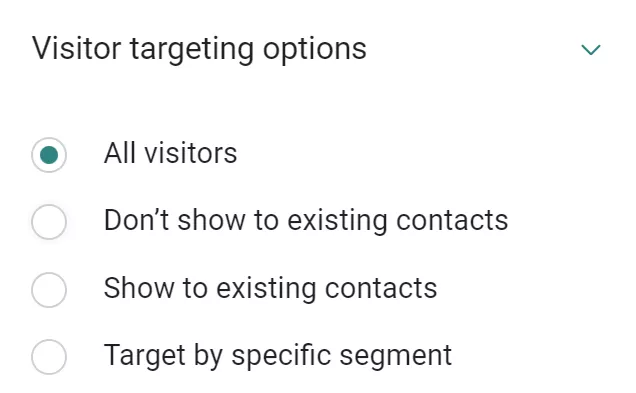
You can choose exactly who sees your Shopify popup using Omnisend’s visitor targeting options. For example, you can choose to show the popup only to:
Here’s an image showing the “all visitors” targeting option:
This is also where geo-targeting happens. If you’ve created segments based on customer location, you can show region-specific offers. Here’s how:
Omnisend lets you target popups to appear on specific URLs on your Shopify domain or similar URLs, such as Shopify collection pages. To do this, you must:
This ensures that your Shopify popup content is relevant to the page visitors are on, effectively increasing engagement.
You can also direct popups based on visitor behavior by navigating to Behavior > Display. Here are some of the available options:
Most people shop from their mobile phones. That’s why it’s so important for Shopify popup targeting to be optimized for smaller screens and shorter attention spans. Consider:
Layer these targeting methods for surgical precision.
Real examples:
You can edit your targeting settings any time. If you still don’t feel confident about doing this on your own, you’re welcome to browse Omnisend’s Knowledge Base whenever you need.
Pro tip:
The Shopify Forms app also provides multiple targeting options. However, Omnisend’s targeting goes beyond Shopify Forms’ basic page-type filters. You can combine visitor history, cart values, browsing patterns, and UTM parameters. These features help you create laser-focused campaigns that Shopify’s native tool can’t match.
A Shopify email popup helps you build an owned marketing channel. Unlike paid ads or social media, your email list is an asset you control. Follow these tips to ensure your Shopify email popups actually convert:
You can add a popup on Shopify using one of the following methods:
1. A Shopify popup app like Omnisend
2. Built-in Shopify Forms
3. Custom code
Shopify Forms works well for basic popup needs. However, Omnisend offers more advanced features, including mobile device exit-intent display, targeting options, and a richer drag-and-drop template editor.
For popups built with Shopify Forms, go to Online Store > Forms, select your form, and toggle the Turn form off button. You’ll then receive a notification that the form has been deactivated.
The Shopify popup controls are inside your Shopify admin under Apps > Forms. To customize them, go to Online Store > Themes > Customize. If you’re using Omnisend, you can access these settings through the Forms dashboard.
You can create popups on Shopify Plus stores using all standard popup methods: native Forms app, third-party apps, or custom code.
Navigate to Apps > Forms in your admin, click on your existing Shopify popup, and select Edit. For third-party apps like Omnisend, access the app dashboard and open your saved popup to modify any element.
An exit-intent popup on Shopify is a message that appears when a visitor shows signs of leaving your store. It’s commonly used to incentivise visitors or capture emails.
Yes, Shopify popups can be free depending on the method. Shopify Forms is free, and many third-party apps like Omnisend offer free plans with A/B testing and automation.
To add a Shopify email popup, you can use Shopify Forms, install a popup app, or add custom code to your theme. For higher conversions, connect your Shopify popup to an automated welcome email flow.
TABLE OF CONTENTS
TABLE OF CONTENTS
What’s next


No fluff, no spam, no corporate filler. Just a friendly letter, twice a month.